
Platform Overview
n8n is an advanced solution in the field of digital ecosystem automation. It is open source software based on an innovative node-based approach to building logical schemes. Unlike linear scripts, working in n8n resembles assembling an engineering constructor: you visually connect functional blocks, each responsible for a specific operation or interaction with an external service.
The system’s capabilities allow seamless integration of hundreds of popular platforms. Within minutes, you can connect tools such as:
- Messengers: Telegram, Slack, Discord, WhatsApp.
- Office tools: Google Sheets, Airtable, Microsoft Excel.
- Intelligent systems: OpenAI (ChatGPT), Anthropic, LangChain for creating advanced AI agents.
- Infrastructure solutions: Databases (PostgreSQL, MySQL, MongoDB), CRM systems, and marketing platforms.
The key advantage of n8n is the Self-hosting model. Unlike cloud giants such as Zapier or Make (formerly Integromat), running n8n on your own server gives you undeniable benefits:
- Absolute confidentiality: Your data and API keys never leave your server, which is critically important for complying with security requirements and GDPR/FZ-152 standards.
- No financial barriers: You are not limited by the number of steps in a scenario or the frequency of execution. Your expenses are fixed only by the VPS rental cost.
- Unlimited customization: Advanced users can deeply customize workflows through “Code” nodes, where arbitrary JavaScript scripts can be written for complex data transformation.
Whether you are a small startup looking to automate lead processing or a large corporation building complex multi-level business logic using artificial intelligence, n8n will become the foundation of your digital transformation.
Quick Start Guide
1. Deploying the Server and Accessing It via Console
The first step toward automation is activating the ready-made n8n image from our Marketplace. This process is fully automated and takes only a few minutes. Once the virtual machine status changes to “Active,” you will need to establish a secure connection to the server via the SSH protocol.
If you have not previously worked with remote server management, use our detailed reference materials:
- For Linux or MacOS systems: Use the built-in terminal. Details are available in the guide Connecting to a VPS via SSH.
- For Windows OS: It is recommended to use the built-in PowerShell client or third-party utilities such as PuTTY or Termius. Details are available in the Windows guide.
For authorization, use the root user password specified during server creation or your personal SSH key (recommended for maximum security). If you do not yet have a key, refer to the material “Generating SSH Keys.”
After successfully logging into the server console, you need to retrieve the unique access credentials automatically generated by the system for security purposes. All data (database and web interface usernames and passwords) are consolidated in a special hidden file. To display them on the screen, enter one of the following commands:
cat ~/.password_credentialsor, if you are in the root directory:
cat /root/.password_credentialsCarefully review the file contents. You need to find and save the values of the variables BASIC_AUTH_USER (your login) and BASIC_AUTH_PASS (your temporary password). They will be required in the next step.
2. Initial Authorization in the Web Interface
Open any modern web browser and enter your server IP address in the following format:
https://<YOUR_SERVER_IP>
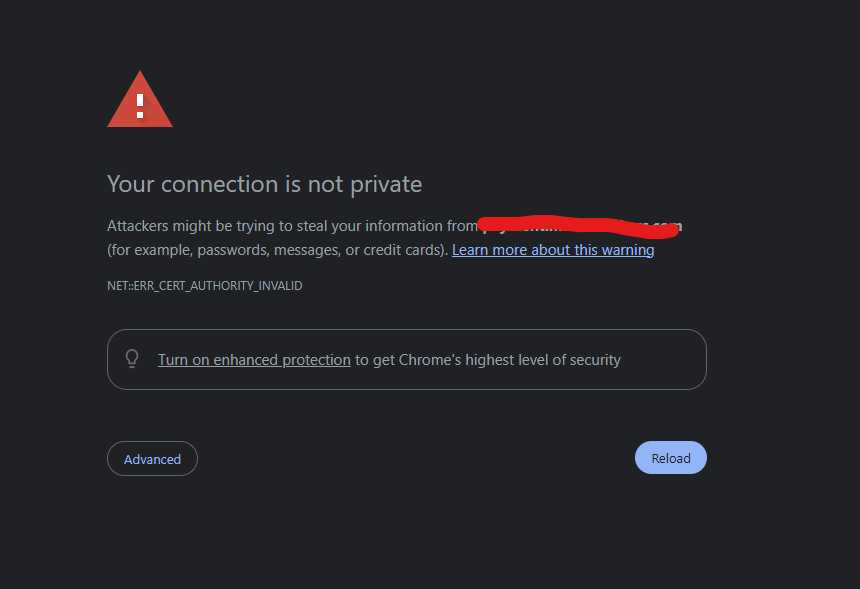
Important Security Notice
When visiting for the first time, you will encounter a browser security warning (SSL certificate error). This is a normal situation because the freshly installed server uses a self-signed certificate.
You need to click the “Advanced” button and then select “Proceed to... (unsafe)”. Later, you can connect your own domain and install a free Let’s Encrypt certificate.
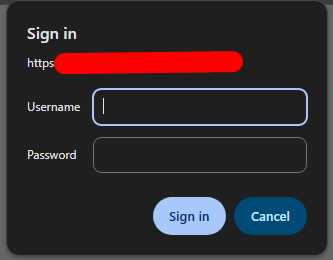
Immediately after this, the browser will display the standard Basic Auth authorization window. Enter the credentials obtained from the .password_credentials file:
- Username: the value of BASIC_AUTH_USER (often admin by default).
- Password: the value of BASIC_AUTH_PASS.
3. Registering the n8n Administrator Account
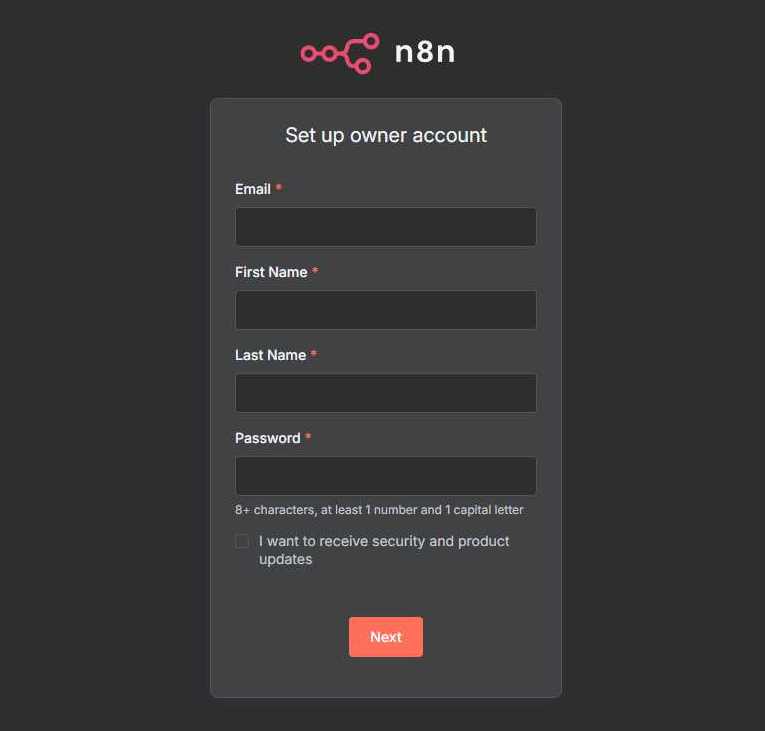
Successfully completing system authorization will take you to the welcome page of the n8n application itself. Here, the platform will prompt you to create the main owner account. This internal profile will allow you to manage projects, permissions, and system settings.
You must fill in the following fields:
- Email: your work email address.
- First Name and Last Name: your name and surname for identification within the system.
- Password: create a strong and secure password, as this account has full access to all your automations.
After filling in all the data, click “Next” to complete the initialization process.
4. Developing Your First Automation
You will enter the “holy of holies” of n8n — the visual editor (Editor Canvas). This is an infinite workspace where the magic of workflow creation happens.
The algorithm for creating your first scenario looks as follows:
- Adding triggers and nodes: Click the “+” icon or the “Add first step” button. A library containing hundreds of integrations will open before you. Select a starting node (for example, “Webhook” for receiving data or “Schedule” for running on a schedule) and subsequent actions (for example, “Telegram” for sending messages).
- Building logical connections: Connect nodes to each other using lines. Data in n8n flows from left nodes to right nodes, transforming at every stage. You can visually track how information moves from one service to another.
- Debugging and execution: Use the “Execute Workflow” button in the bottom panel. The system will execute the scenario in test mode, and you will be able to see the contents of the transmitted data in each node. This allows you to quickly find and fix errors before the automation goes into production.
- Monitoring: Configure internal notifications or create a separate workflow that informs you through a messenger if any critical chain fails.
Technical Note
Please note that outbound port 25, used for direct mail sending (SMTP), is closed by default to prevent spam activity. If your automation requires direct Email sending through this port, create a ticket with technical support to have it opened.
Your personal n8n server is fully configured and ready to solve the most ambitious tasks. Now you have in your hands a powerful tool for business optimization, artificial intelligence integration, and freeing up time from routine operations.
Happy automating!