
Platform Overview
OpenClaw is a universal high-level AI Gateway designed to become the connecting link between advanced Large Language Models (LLMs) and everyday communication tools. The platform provides seamless integration of neural network intelligence into messengers, social networks, and automation systems such as n8n.
Unlike simple API wrappers, OpenClaw provides developers and system architects with a comprehensive toolkit “out of the box”. Key capabilities include:
- Context and memory management: Session support allows AI agents to remember conversation history, creating the feeling of meaningful communication.
- Document analysis: Built-in file processing mechanisms allow you to “feed” documentation to the agent for data extraction or summarization.
- Dynamic Skills: Execution of complex logical chains and commands in real time.
- Security and routing: The gateway handles all technical complexities, including provider authorization (OpenAI, Anthropic, etc.), secure connection management, and efficient message forwarding.
OpenClaw is the ideal foundation for building scalable chatbots, enterprise assistants, and business communication automation systems designed for long-term operation and high workloads.
Getting Started Guide
1. Preparation Stage: Server Deployment and Access
The process begins with selecting and installing the OpenClaw image from our Marketplace. The system will automatically prepare the environment, install the required dependencies, and configure the server for operation.
After the installation is completed, you need to connect to the server via the SSH protocol. This is your primary administration tool. Depending on your operating system, use the following recommendations:
- For Linux and MacOS users: Open the system terminal and use the standard command ssh root@SERVER_IP. A detailed guide is available here: SSH Connection.
- For Windows users: We recommend using the built-in client (PowerShell/CMD) or professional utilities such as PuTTY. Instructions: Connection from Windows.
For login, use the password specified in the control panel when creating the server or a preconfigured SSH key (this method is preferred from a cybersecurity perspective).
2. System Initialization and Basic Configuration
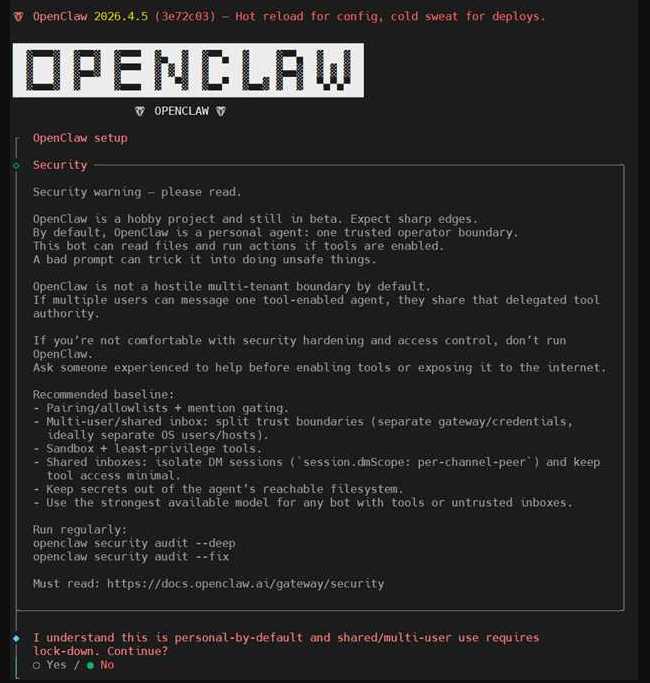
Once you are in the server console, you need to launch the interactive setup wizard. It will perform the final daemon installation and help configure the core gateway settings. Enter the following command:
openclaw onboard --install-daemon
During the setup wizard process (QuickStart mode), the system will ask you to select several key parameters. For stable operation, we recommend the following values:
- Onboarding mode: Select QuickStart for automated setup.
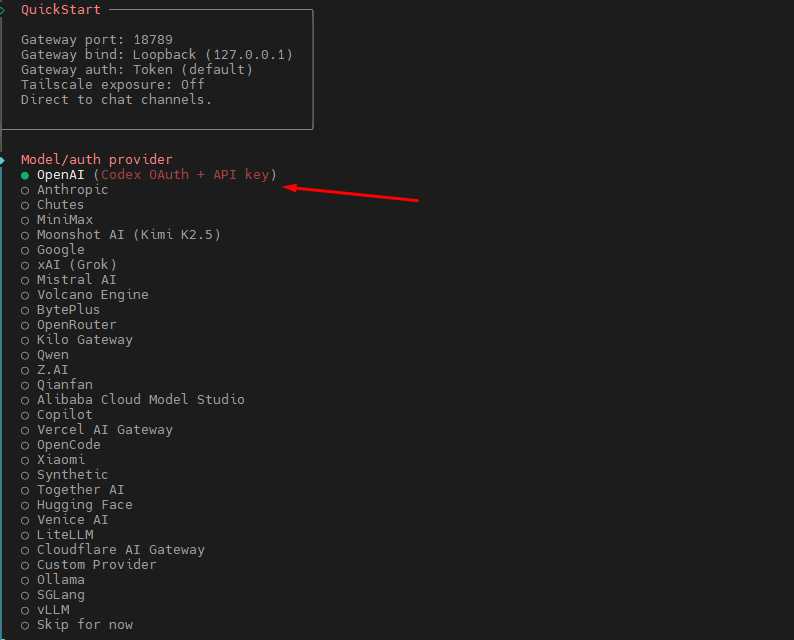
- Gateway port: Leave the default port 18789. This is the internal communication channel for the web interface and API.
- Gateway bind: Set the address to 127.0.0.1. This is a critically important security setting that restricts access to the gateway from external networks, protecting your control panel from unauthorized login attempts.
3. Choosing an AI Provider and Model (Model/auth provider)
OpenClaw is a multi-provider platform and supports more than 30 different services. You can flexibly switch between them depending on your tasks and budget. The list of supported systems includes:
- Global leaders: OpenAI (GPT-4), Anthropic (Claude), Google Gemini, xAI (Grok).
- Specialized and open platforms: Mistral AI, Hugging Face, Together AI, Ollama (for local models), DeepSeek, Qwen, and many others.
- Aggregator gateways: OpenRouter, Vercel AI Gateway, Cloudflare AI Gateway.
Testing Tip
If you want to test the bot functionality immediately without having an API key available, select the Skip for now option or set the model to echo mode. In this mode, the bot will simply repeat your messages, confirming that the messenger connection has been successfully established.
4. Connecting Communication Channels (Messengers)
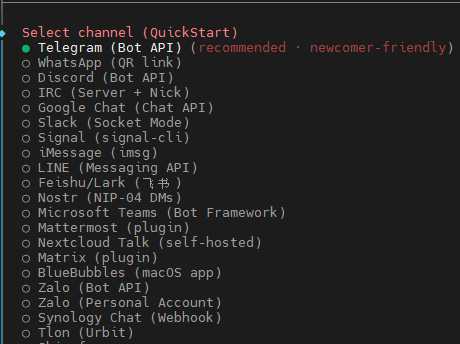
OpenClaw allows you to combine multiple communication channels within a single interface. Supported platforms include: Telegram, WhatsApp (via QR link), Discord, Slack, Microsoft Teams, Signal, as well as more exotic protocols such as Matrix or Nostr.
The fastest way to launch a project is to connect a Telegram bot:
- In the channel selection menu (Select channel), choose Telegram (Bot API).
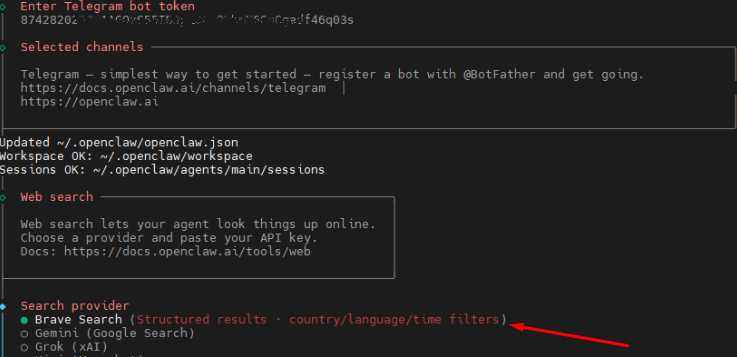
- Enter your bot token (Bot Token). If you do not have one, create it in Telegram through the official bot @BotFather.
- After entering the token, the system will automatically create a working directory at ~/.openclaw/workspace, where logs and temporary session data will be stored.
- During the Web-search setup stage, select Skip for now if you do not need instant access to up-to-date internet information for the bot.
5. Model Authorization and Pairing Confirmation
To make your bot “come alive” and start using AI intelligence (using Google Gemini 2.5 Flash as an example), you need to activate the model and complete the pairing procedure.
Run the following commands in the terminal:
- Set your API key:
openclaw config set providers.google.apiKey "YOUR_API_KEY"
- Assign the default model for sessions:
openclaw config set session.defaultModel "google/gemini-2.5-flash"
Pairing Procedure (Secure Pairing)
This is a protection mechanism that guarantees that only you can manage the bot. Send any text message to your created Telegram bot. In response, the bot will send a unique security code. Return to the server terminal and enter the confirmation command:
openclaw pairing approve telegram <CODE_FROM_CHAT>
6. Accessing the Web UI via a Secure SSH Tunnel
Since in step #2 we restricted access to the control panel to the address 127.0.0.1, you will not be able to open it simply by using the server IP address. SSH tunneling is used for secure access. It creates a “virtual bridge” between your computer and the server.
On your local computer (not on the server!), open a new terminal window and run:
ssh -L 18789:127.0.0.1:18789 root@YOUR_SERVER_IP
- Keep this terminal window open while working in the browser.
Open the browser and navigate to the link generated by the system during installation. It will look approximately like this:
http://127.0.0.1:18789/#token=YOUR_UNIQUE_TOKEN
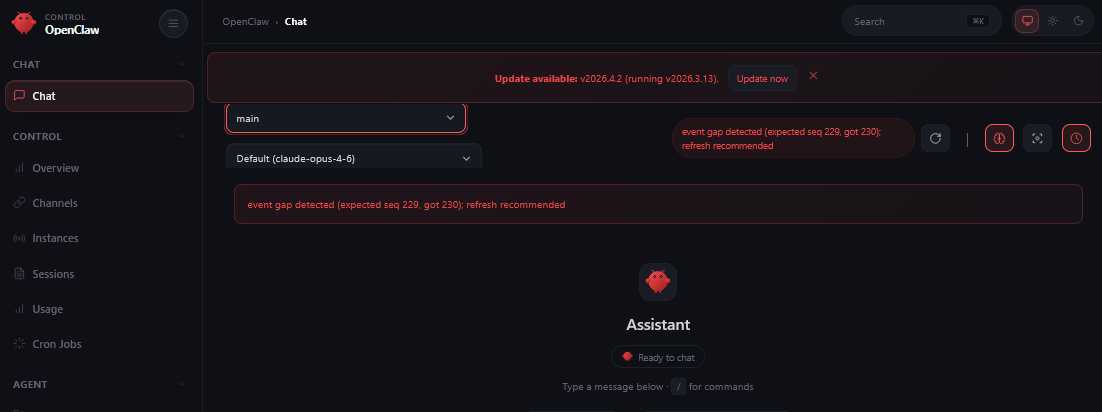
What the Web UI Provides
- Chat Test: Live testing of bot logic.
- Visual Logs: Detailed debugging of every request — you can see which data was sent to the neural network and what response was returned.
- Skills Management: Management of agent skills and tools through a graphical interface without editing console configs.
Important Note on Network Settings
To ensure infrastructure security, outbound port 25 (used for direct SMTP email sending) is closed by default. If your automation logic requires sending notifications through this port, please contact our technical support team to request its unblocking after verification of the intended use.
Conclusion
OpenClaw is a powerful, flexible, and professional tool that removes the boundaries between advanced neural network technologies and practical business tasks. Thanks to its clear architecture and support for multiple providers, you can build a project that is easy to scale and adapt to the changing AI market.
More detailed information, examples of complex workflows, and API documentation can always be found on the official portal: