Paperclip is an open-source platform for managing teams of AI agents on your own server. With its help, you can organize the work of multiple agents within a single system: set goals, assign tasks, control budgets, track execution statuses, and manage processes through a unified dashboard.
It is important to understand that Paperclip is different from a regular AI chatbot. It is not designed for chatting with a single AI model, but for managing agents that can perform different roles: from manager and developer to marketer or researcher.
For example, you can create a team of several agents: one will work with code, the second with marketing, the third with documentation. Manually tracking such work is difficult, especially when there are many tasks. Paperclip solves this problem through centralized management. In one tool you get:
- agents working within a single structure;
- linking tasks to specific goals;
- the ability to see who is working on what;
- an approval process for important actions;
- control over statuses, tasks, and budget.
Paperclip can be useful for developers who use multiple AI agents for writing and reviewing code, startup teams automating internal processes, and businesses testing AI automation on their own infrastructure.
That’s why we have prepared a Paperclip image for quick installation on a Cloud VPS server. After deployment, you will only need to perform basic additional configuration — and you can start building your own AI team.
What you need to set up Paperclip
If you don’t have a server with Paperclip pre-installed yet, when purchasing a cloud server, go to the Server image block and select the Paperclip image in the Marketplace section. After creating the server, you will be able to connect to it via SSH using an SSH key or password — depending on the authorization method chosen when creating the service.
After logging into the server via SSH, switch to the special paperclip user:
sudo su - paperclip

Then run the automatic Paperclip setup command:
npx paperclipai onboard --yesDuring the installation, the system may ask for confirmation to install packages. Type y:

After that, the installation of the required components will begin. The process usually takes a few minutes.
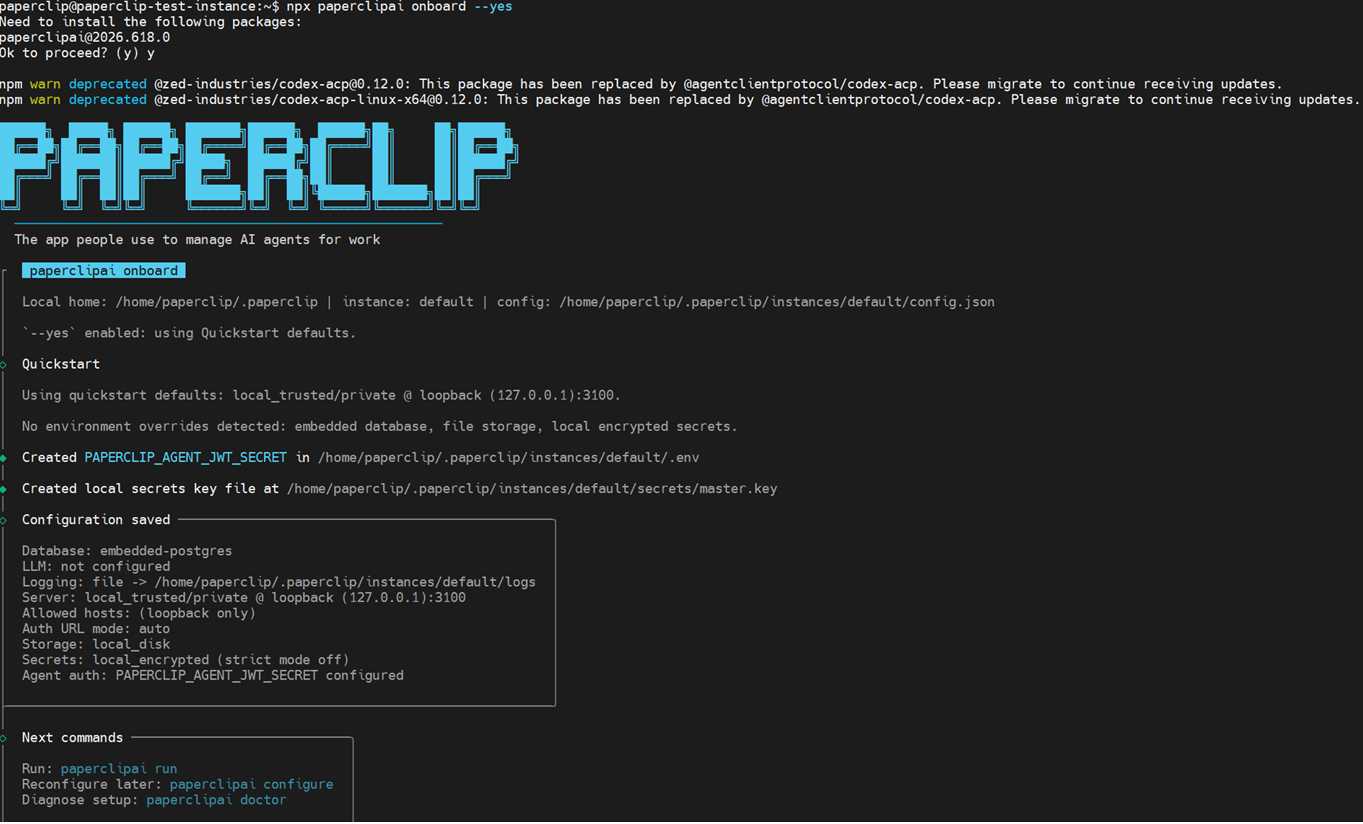
When the installation is complete, Paperclip will be ready for use. To run the service as a separate process on the server, launch it with the command:
sudo systemctl status paperclipYou can check the service status using the command:
sudo systemctl status paperclipIf everything is set up correctly, the service status should display active (running):
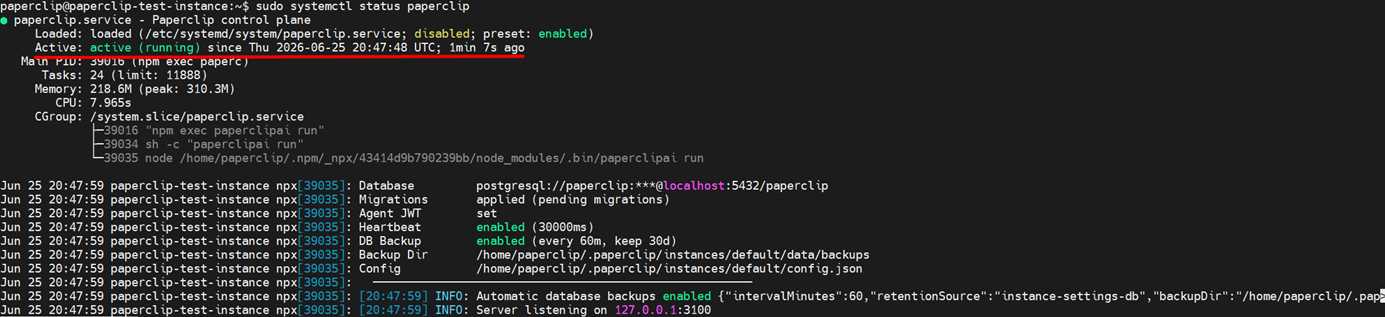
Now Paperclip is running on the server. For secure access to the web interface, you need to create an SSH tunnel from your local device. Execute this command on the computer from which you will be accessing the control panel:
ssh -N -L 3100:127.0.0.1:3100 root@IP_SERVERReplace IP_SERVER with the IP address of your server.
After that, open your browser and navigate to:
http://127.0.0.1:3100You should see the Paperclip web panel and will be able to start setting up your AI team: