Introduction
Every one of us has probably heard of viruses at least once. Moreover, many have personally encountered them: on a computer, phone, or even a server. This article will not be about influenza or ARVI, but about computer viruses and other malicious software. Malicious programs vary. Some use device resources for cryptocurrency mining, others collect and transmit confidential data to an attacker, and still others can connect the server to a botnet, send spam, or be used for attacks on other systems.
In more technical terms, a virus is a type of malicious software (malware). The more general term is malware. This term typically refers to programs, scripts, or processes that have entered a device without the owner's permission and perform undesirable actions: stealing data, creating hidden access, modifying files, overloading the system, or using the server in the attacker's interest. In this article, we will focus on the server case, specifically the Linux server. We will analyze how malicious files can get onto the server, by what signs infection can be suspected, and how to perform a check using Maldet—an antivirus scanner for Linux systems.
How Viruses Get onto the Server
There are quite a few server infection scenarios. A malicious file can get in through a website vulnerability, an insecure file upload form, an outdated CMS plugin, a weak SSH/FTP password, or incorrectly configured access rights. In some cases, it is enough for an attacker to upload a single PHP file to the website directory to gain the ability to execute commands on the server.
Key recommendations from Zomro:
- If your site runs on WordPress, Joomla, Drupal, or another CMS, monitor the relevance of the version and regularly install updates.
- The same applies to frameworks, libraries, and language environments. If the site is written in PHP, Node.js, or another stack, remember to update dependencies and the environment version.
- Check directory access rights. Do not set 777 permissions unnecessarily, especially for directories where users can upload files.
- For a website, bot, or separate service, it is better to use a dedicated user with minimal necessary rights. It is not recommended to run such processes as root.
- Use strong passwords: a minimum of 12 characters, upper and lower case letters, numbers, and special characters. Even better is to use SSH keys and disable password login where possible.
How to Suspect an Infection
You can also check the server manually. For example, by looking for suspicious processes, unknown cron jobs, files with strange names, a sharp increase in CPU load, or the appearance of new files in site directories. The following commands can be used for initial diagnostics.
If you notice that your server has started running slower than before, try running the following command on it:
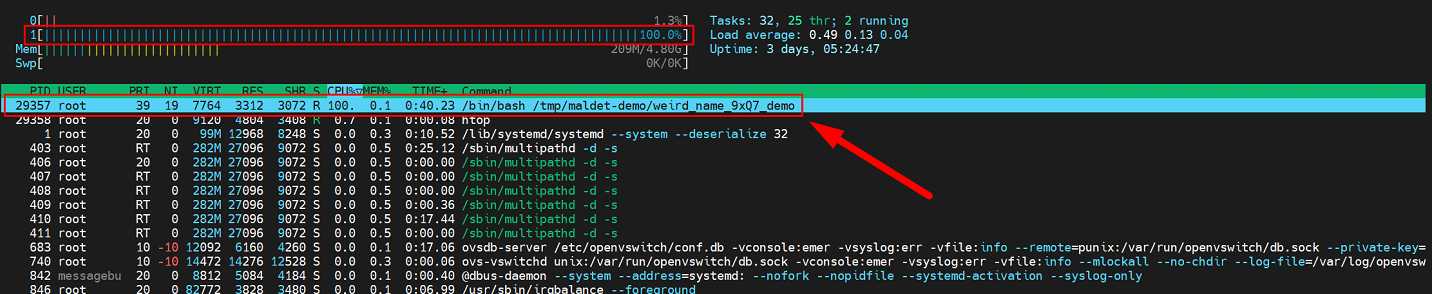
htopThis command will show a detailed output of all processes currently running on the server. Pay attention to the process with PID 29357— it is marked in the image below. The "CPU%" column for this process has a value of 100. This means that the process is actively consuming processor resources, and its "strange" name might suggest that it is a malicious file.
crontab -lThis command displays scheduled tasks. Attackers also use it quite often for so-called persistence, i.e., to gain a foothold in the system. For example, they can create a task that will download or run the desired file on the server after a server reboot.

This kind of check does not replace a full scan but helps quickly notice strange activity. For example, if an unknown process constantly using the CPU appears in htop, or an incomprehensible command running every minute is found in crontab, it is a reason to conduct a deeper investigation.
Что такое Maldet
After the initial manual check, you can proceed to a full file system scan. For this, we will use Maldet, also known as Linux Malware Detect or LMD. Maldet is an antivirus scanner for Linux systems, often used on web servers and shared-hosting environments. It helps find malicious PHP files, web shells, backdoors, suspicious scripts, and other files that might appear after a website hack or server compromise. It is important to understand that Maldet does not replace basic server protection. It does not negate the need to update CMS, monitor access rights, use strong passwords, limit SSH access, and perform backups. However, as a tool for checking files and initially searching for malicious objects, Maldet is very convenient.
Подготовка к сканированию
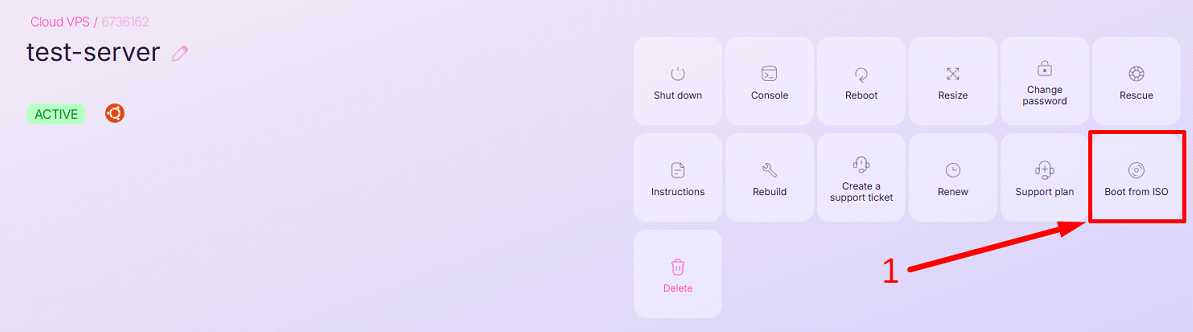
We will perform the scanning outside the OS level; for this, we will use the functionality of cloud servers, specifically by switching the service to system-rescue mode—this way, we will boot from a mounted image that is used separately from the OS. First, log in to the services panel https://cp.zomro.com/services/cloud_vps. Then select the desired service — click it, and when you get to the server control panel, look for the "Boot from ISO" button:
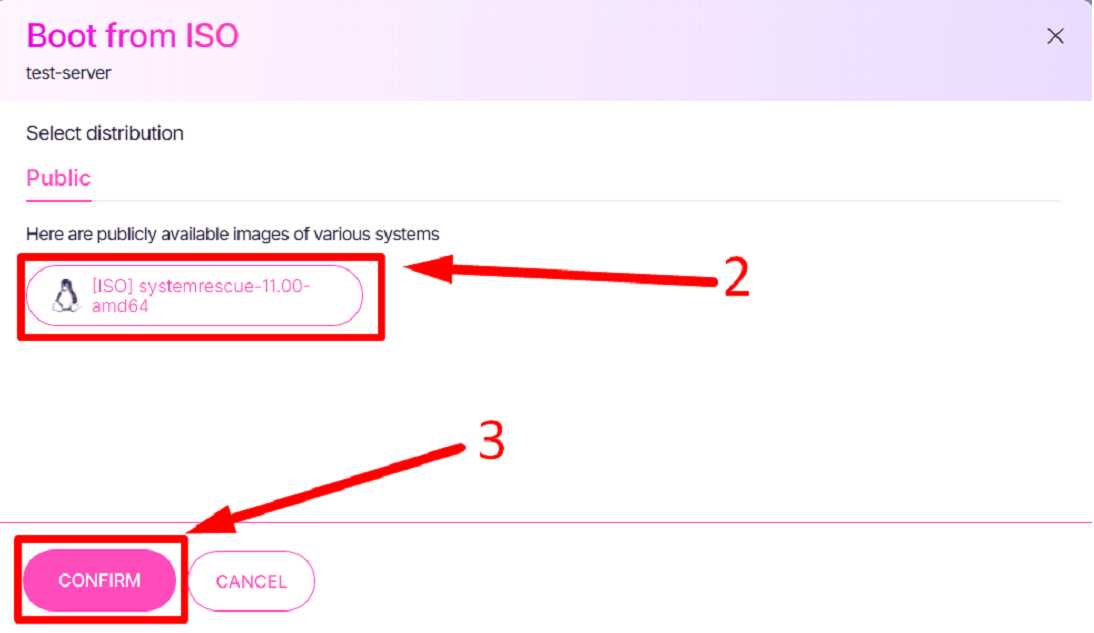
Click this button. You will see the systemrescue image from which you can boot. Select it and click "Confirm".
You need to wait a few minutes until the service changes its status to "booted from iso".
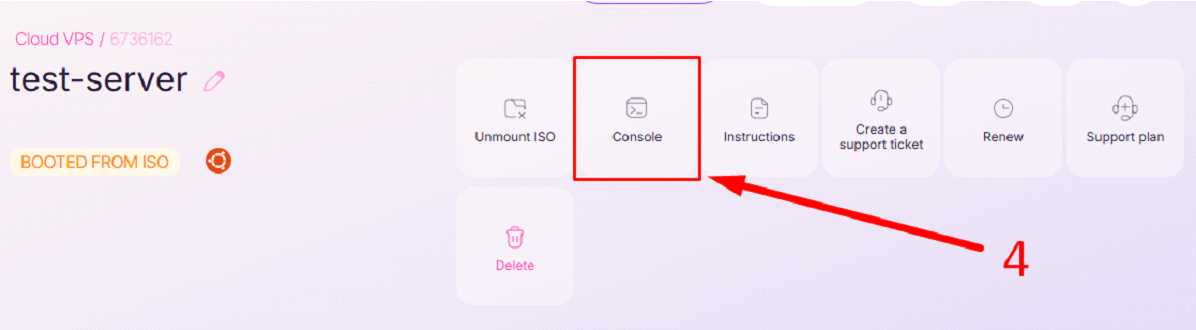
Next, to access the server, you need to go through the console or what is also called — VNC. After visiting the console in the browser, you will see approximately this view:
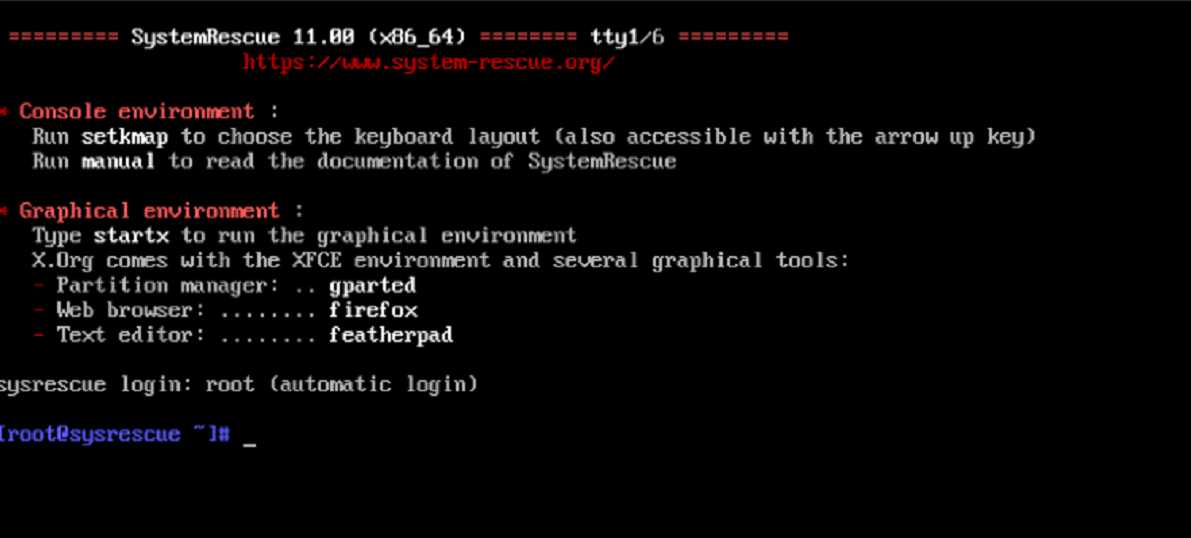
After booting into SystemRescue, we enter a separate live environment. This means that the main OS of the server is not running right now. This approach is convenient for checking: suspicious processes from the main OS will not be active and will not interfere with scanning. Now we need to determine which disk belongs to the installed system, mount it, and perform a file check. First, let's look at the list of disks and partitions:
lsblk -f
In the command output, you need to find the partition where the server's root file system is located. It can be named differently, for example, in my case, it is /dev/vda1. Usually, it can be identified by two signs: the partition has a file system type, such as ext4; the partition has the largest size among the disk partitions.
Create a directory where the server disk will be mounted:
mkdir -p /mnt/serverNext, mount the desired partition. In our example, /dev/vda1 is used:
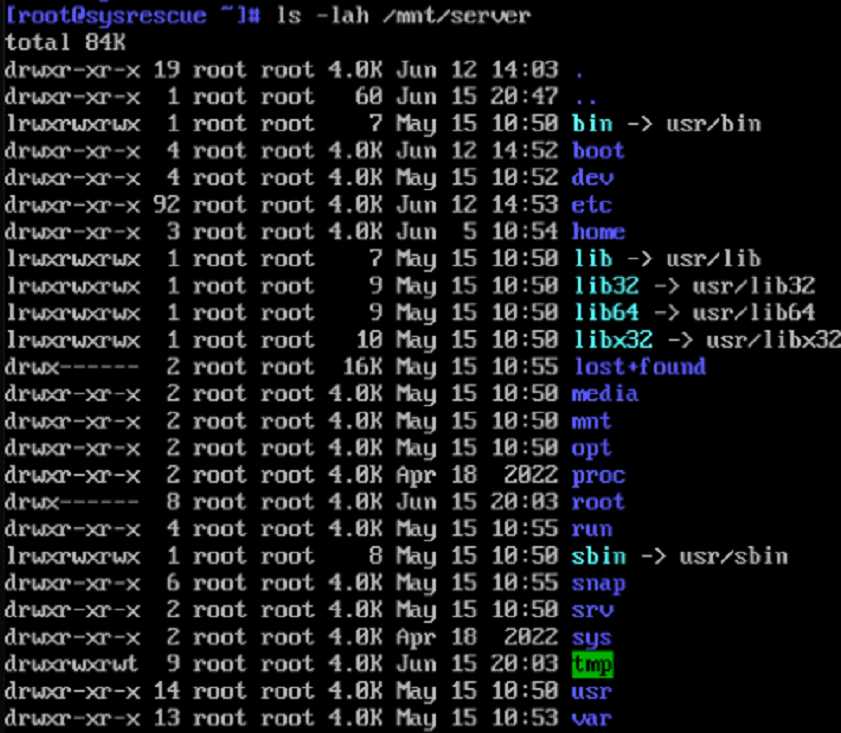
mount /dev/vda1 /mnt/server Check that the disk is successfully mounted. If standard Linux directories, such as etc, var, home, root, are visible in the output, the disk is mounted correctly.
ls -lah /mnt/server
SystemRescue typically uses pacman to install packages: we need to install git, wget, perl, and clamav. We install ClamAV additionally so that Maldet can use it as an auxiliary scanning engine. SystemRescue uses pacman for installing additional packages, and the official Maldet documentation indicates support for integration with ClamAV.
pacman -Sy --noconfirm git wget perl clamavAfter installing ClamAV, update its antivirus databases:
freshclamNow let's install Maldet. Go to the /root directory, download the project from GitHub, and run the installation script. This installation method is specified on the official Linux Malware Detect page.
cd /root
git clone https://github.com/rfxn/linux-malware-detect.git
cd linux-malware-detect
bash install.shCheck that the maldet command is available:
which maldet

Before the first scan, it is recommended to update Maldet signatures:
maldet -uYou can also run a Maldet version update:
maldet -dCheck that maldet will use ClamAV:
sed -i 's/^scan_clamscan=.*/scan_clamscan=1/' /usr/local/maldetect/conf.maldet
grep 'scan_clamscan' /usr/local/maldetect/conf.maldetIt is best not to enable automatic quarantine during the first run. It is safer to first get the report, look at the found files, and only then make a decision:
sed -i 's/^quarantine_hits=.*/quarantine_hits=0/' /usr/local/maldetect/conf.maldet
sed -i 's/^quarantine_clean=.*/quarantine_clean=0/' /usr/local/maldetect/conf.maldet

It is also important to enable permission for maldet to search for viruses among the root user's files. To do this, run the following command:
sed -i 's/^scan_ignore_root=.*/scan_ignore_root=0/' /usr/local/maldetect/conf.maldetNow let's start checking the test directory:
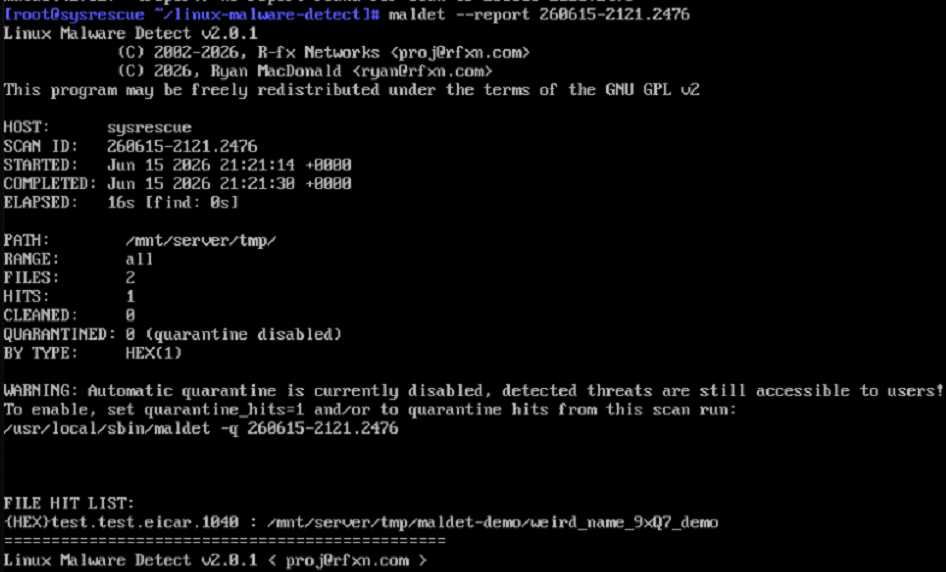
maldet -a /mnt/server/tmpThe “-a” key means scanning all files along the specified path. After completion, maldet will output a brief result of the check. Now maldet returns a formed list of files and shows a normal result. After scanning, open the report visible in the output — Maldet will show the report identifier SCAN ID:
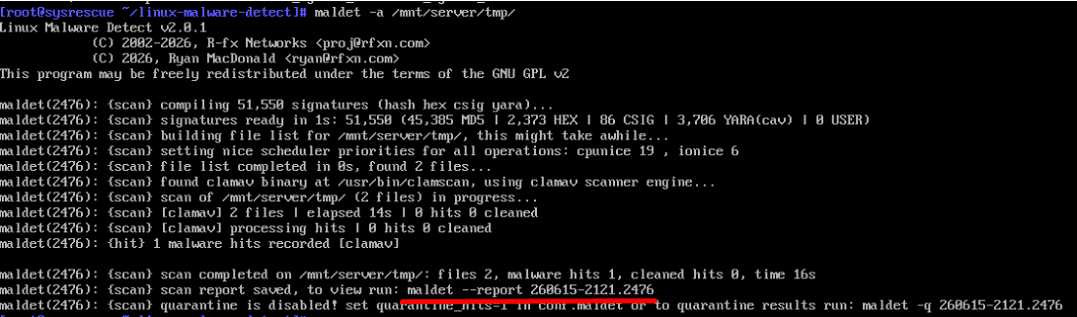
In the report, we see the malicious file at the path /mnt/server/tmp/maldet-demo/weird_name_9xQ7_demo:
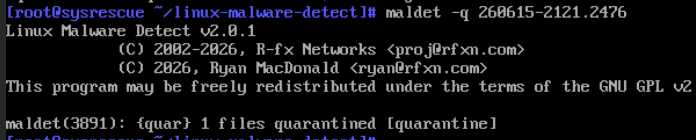
To deal with the found files, we can quarantine them using the command:
maldet -q SCANID
Finishing Work and Correctly Exiting SystemRescue
Before exiting the rescue environment, you need to unmount the server disk. First, go to a directory that is not inside /mnt/server:
cd /rootThen perform the unmount:
umount /mnt/serverCheck that the disk is no longer mounted:
findmnt /mnt/serverIf this command outputs nothing, the partition has been successfully unmounted. If an error "target is busy" appears during unmounting, it is likely that some process is still using files inside the mounted directory. In this case, make sure you are not inside the mounted directory:
pwd
cd /rootAfter that, repeat:
umount /mnt/serverNext, you can return the server to normal booting from the system disk. To do this, disable booting from ISO in the server control panel:

Your service will transition to "unrescuing" status for a few minutes. Wait until its status changes to "active". After this, the virus scanning work can be considered complete.