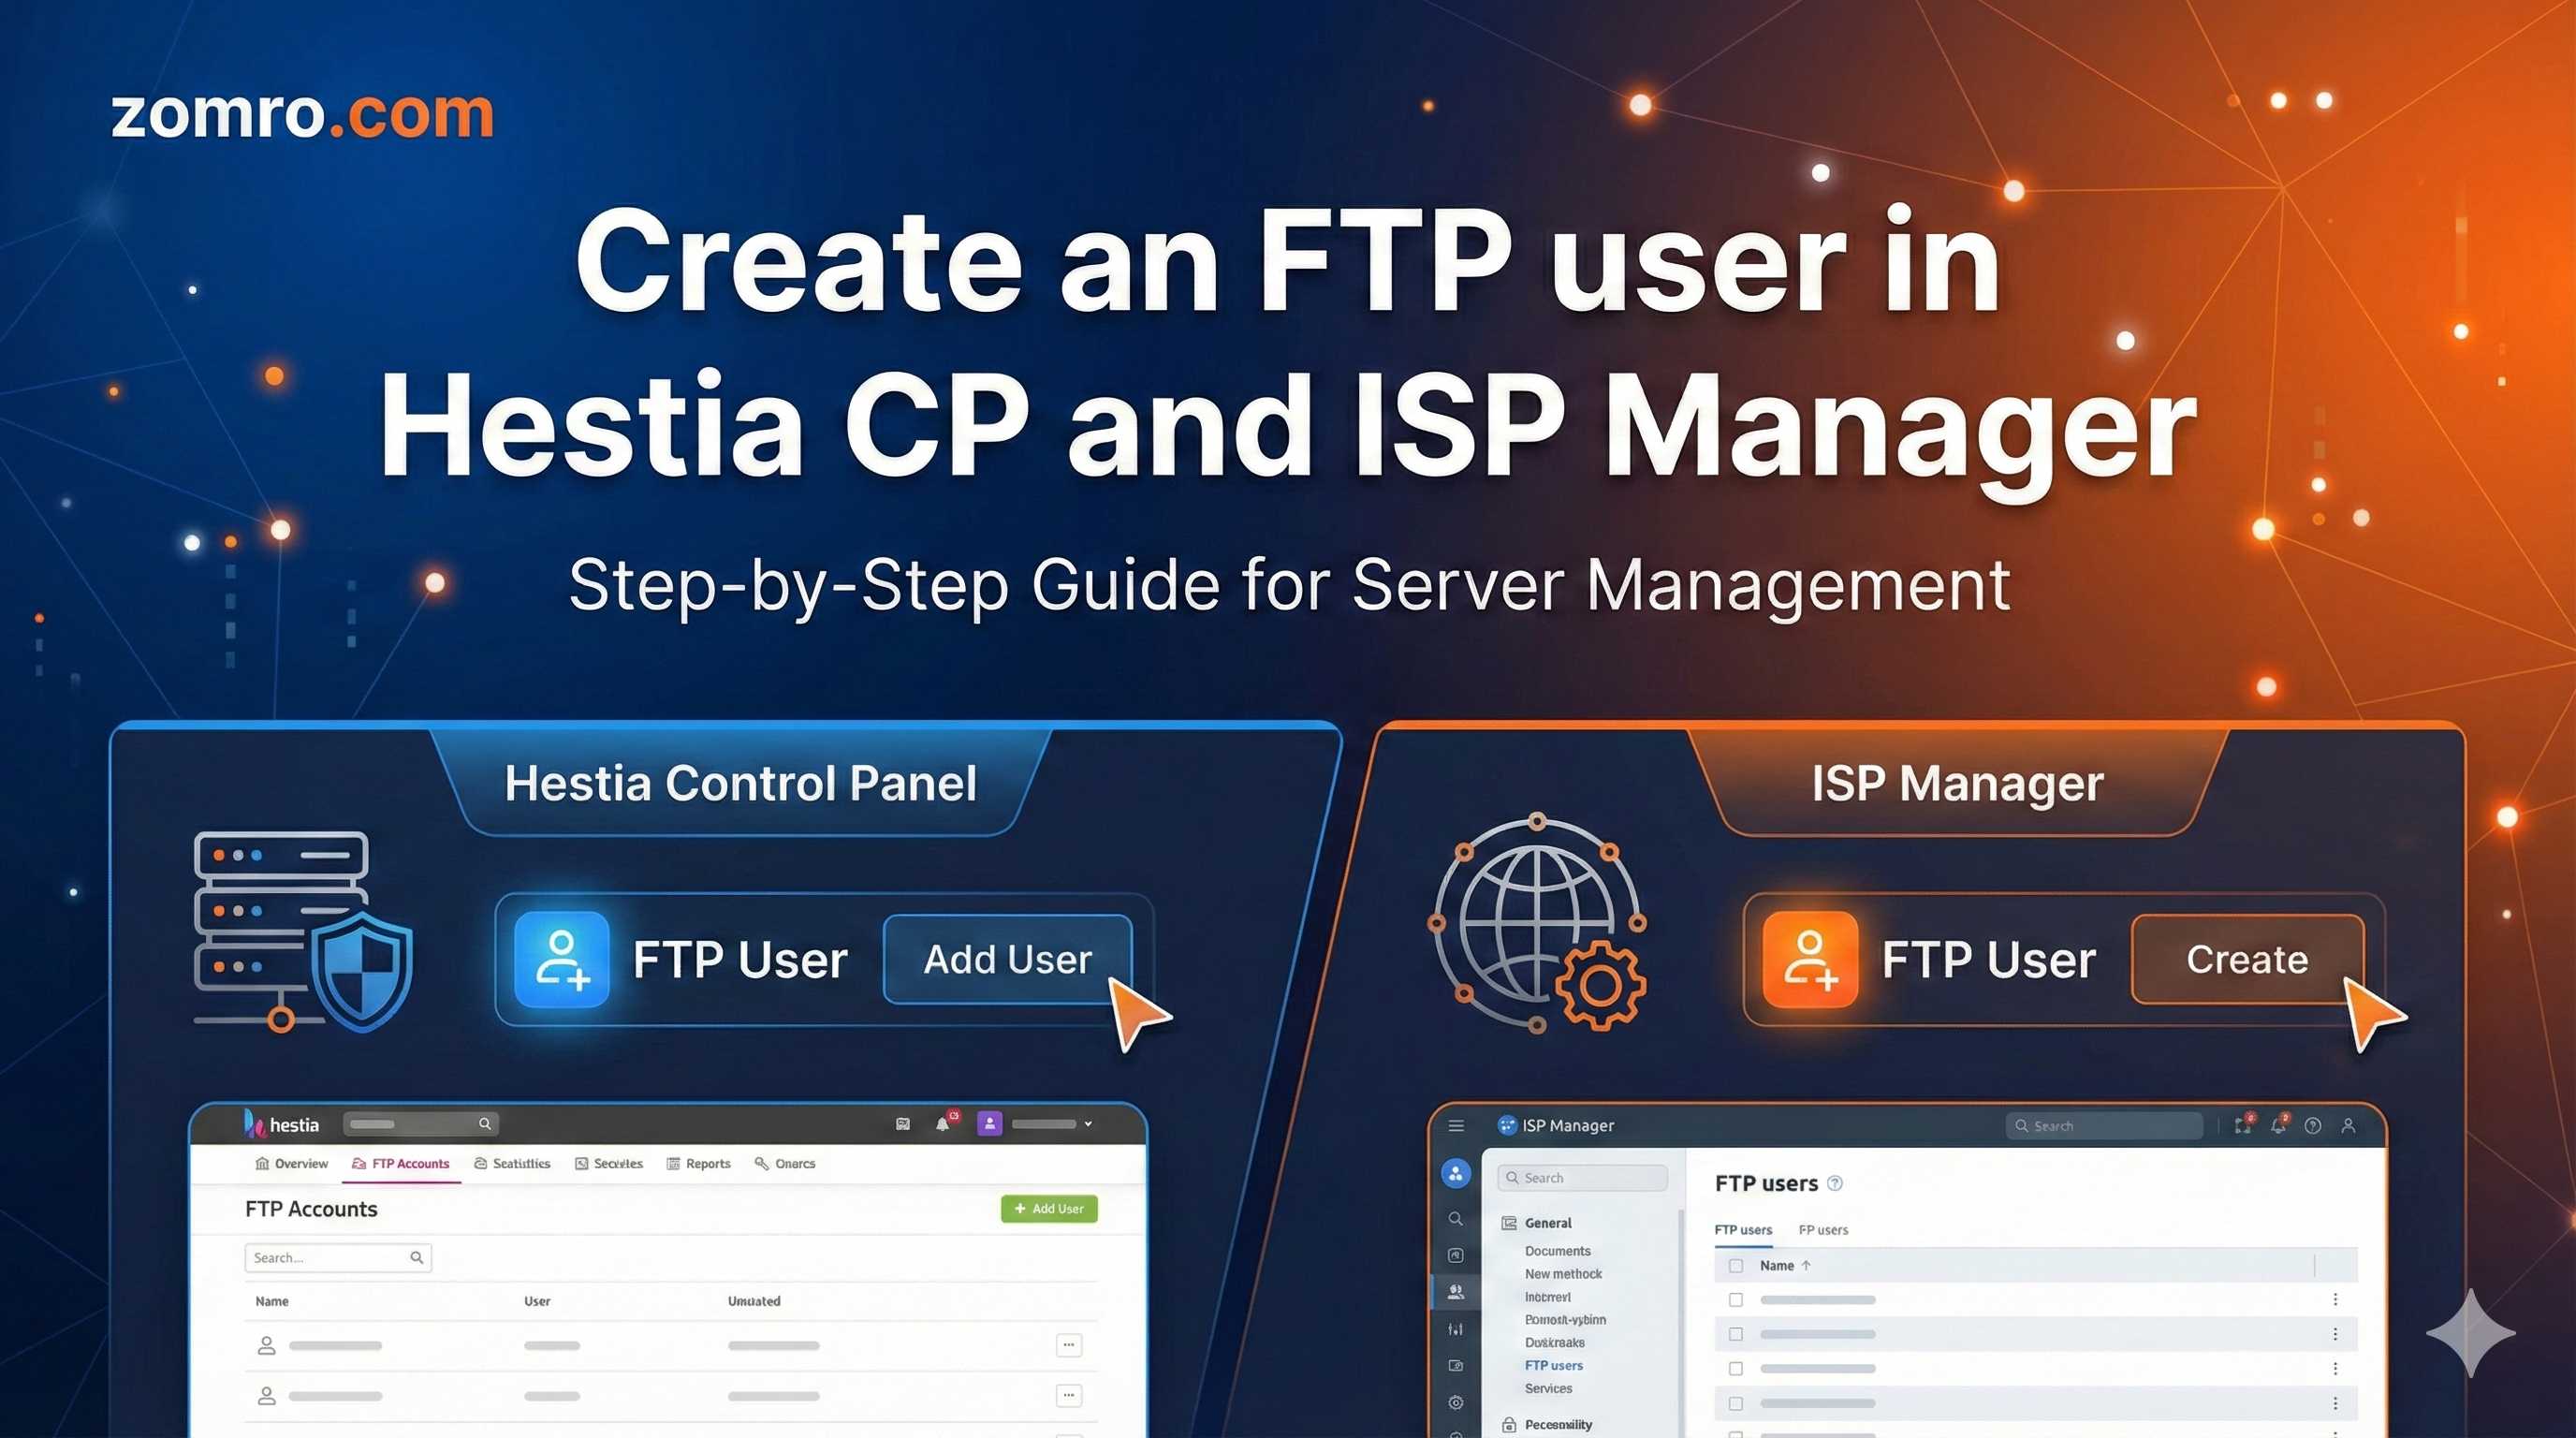
In this guide, we’ll go through how to add a separate FTP user for a specific website/folder. This is useful when you need to give access to a developer or content manager not to the entire account, but only to a specific directory.
Creating an additional FTP account in HestiaCP
Logging in to the panel
Open the HestiaCP panel in your browser:
https://SERVER_IP:8083
Port 8083 is used by default (if you have changed it, use your custom port).
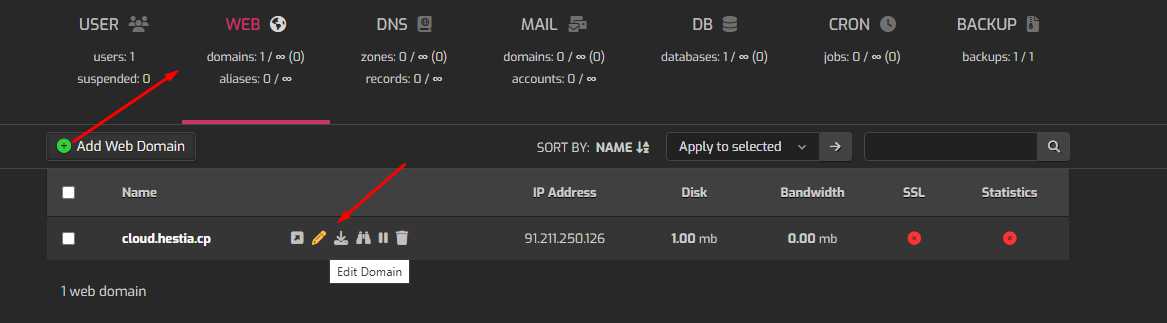
Navigating to the domain
In the left menu, open WEB.
Find the required domain.
Click Edit (the domain edit icon).
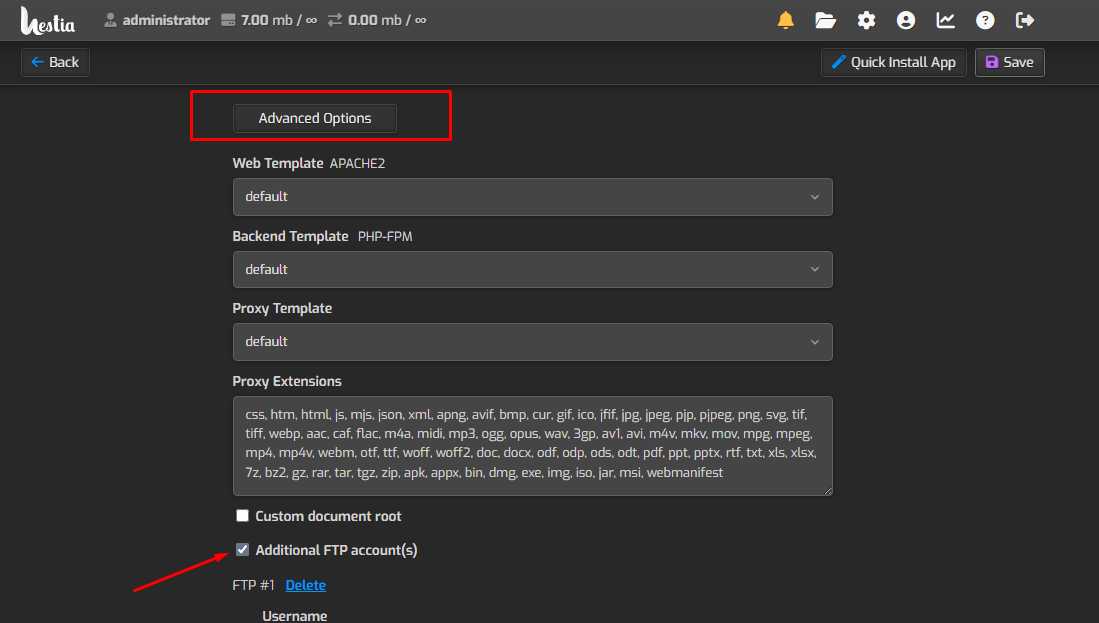
Enabling “Additional FTP accounts”
In the domain card:
Check the Additional FTP accounts checkbox.
Fill in the fields for the new FTP user:
Username - login without a prefix. Hestia will automatically add a prefix like
user_.Example: you enter
dev→ the actual login will beadmin_devoruser_dev(depending on the domain’s system user).
Password - set a password (or generate one).
Path - the path that will be accessible to this FTP user.
(Optional) Email - where to send the access details.
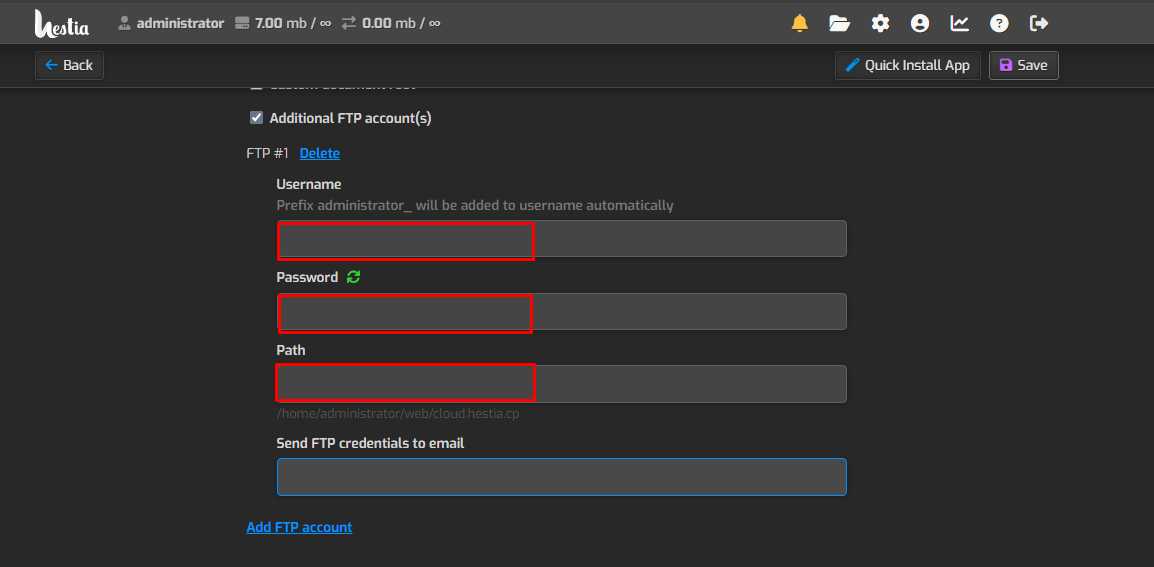
To add another FTP user, click Add FTP account, then be sure to click Save in the upper right corner.
How to correctly specify the Path
HestiaCP allows you to restrict an FTP user’s access to a specific directory. In the Path field, you usually specify the path relative to the site/domain root (in the interface this looks like a simple folder).
Practical examples:
Give access to the entire site:
public_html
Give access only to WordPress uploads:
public_html/wp-content/uploads
Give access only to a specific project folder:
public_html/assets
If you leave Path empty, the FTP user may see more directories within the account owner’s environment (this depends on the FTP implementation and current settings). Therefore, for secure access delegation, it is better to always specify Path explicitly.
A normal behavior: after logging in, some FTP clients may show a “home” folder like
/home/user_xxx. Consider this the “root” (jail) - in practice, the user is still restricted to the specified Path.
FTP connection: what to enter in FileZilla / WinSCP
Minimum required:
Host:
server_IPor domainUsername: final login (with the prefix generated by the panel)
Password: your password
Port:
FTP - usually 21
SFTP - 22 (if you use SSH/SFTP)

Administrator’s security recommendation
If you have a choice, use SFTP (port 22) or FTPS, because standard FTP transmits data without encryption. For external access via “plain” FTP, it is very often also necessary to configure passive ports and firewall rules - this is a typical reason for cases like “connects, but does not show the file list / does not upload”.
Creating an FTP user in ISPmanager
If your service/server is managed via ISPmanager, the logic is as follows:
Log in to the panel (often
https://IP:1500is used - depends on the configuration).Accounts → FTP users → Create.
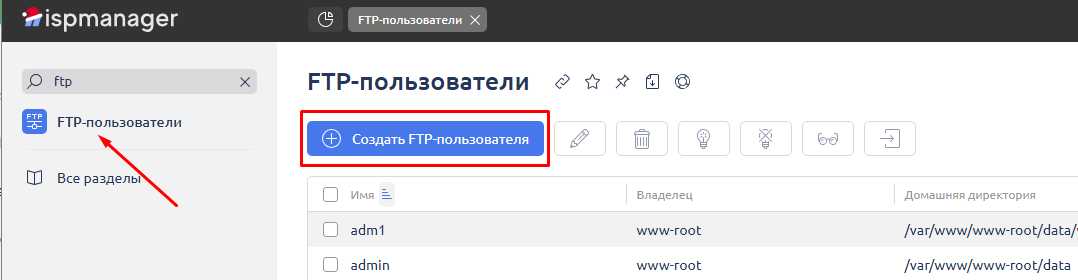
Specify:
username
password
access directory (specify the path to the site folder)
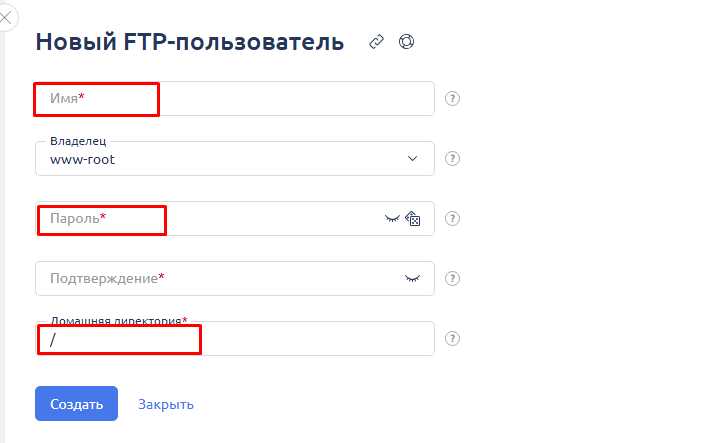
The idea is the same: grant access only to the required directory, not “anywhere”.
Quick checklist if “it doesn’t work”
✅ The login is entered with the prefix generated by Hestia (
user_…).✅ A correct Path is specified (preferably
public_htmlor deeper).✅ Required ports (FTP/FTPS/SFTP) are open and there are no firewall blocks.
✅ The correct protocol is selected in the client (do not confuse FTP and SFTP).
Conclusion
In HestiaCP, an FTP user is created via WEB → Edit domain → Additional FTP accounts, where you can immediately restrict access to a specific folder and, if necessary, add multiple accounts for different tasks.