 SIGN IN / UP
 Control Panel






RDP (Remote Desktop Protocol) is the standard way to remotely access a Windows server with a graphical interface. With its help, you connect to the remote VPS desktop and perform tasks just like on a regular PC: use the internet, install software, adjust settings, and work with files and Windows services.
This guide contains simple steps for connecting via remote desktop RDP using Windows and macOS, as well as quick tips for troubleshooting errors and basic security.
What you need
Server IP address
Login (usually Administrator)
Password
Sometimes RDP port: default is 3389
Where to get access details
Open your Zomro personal account.
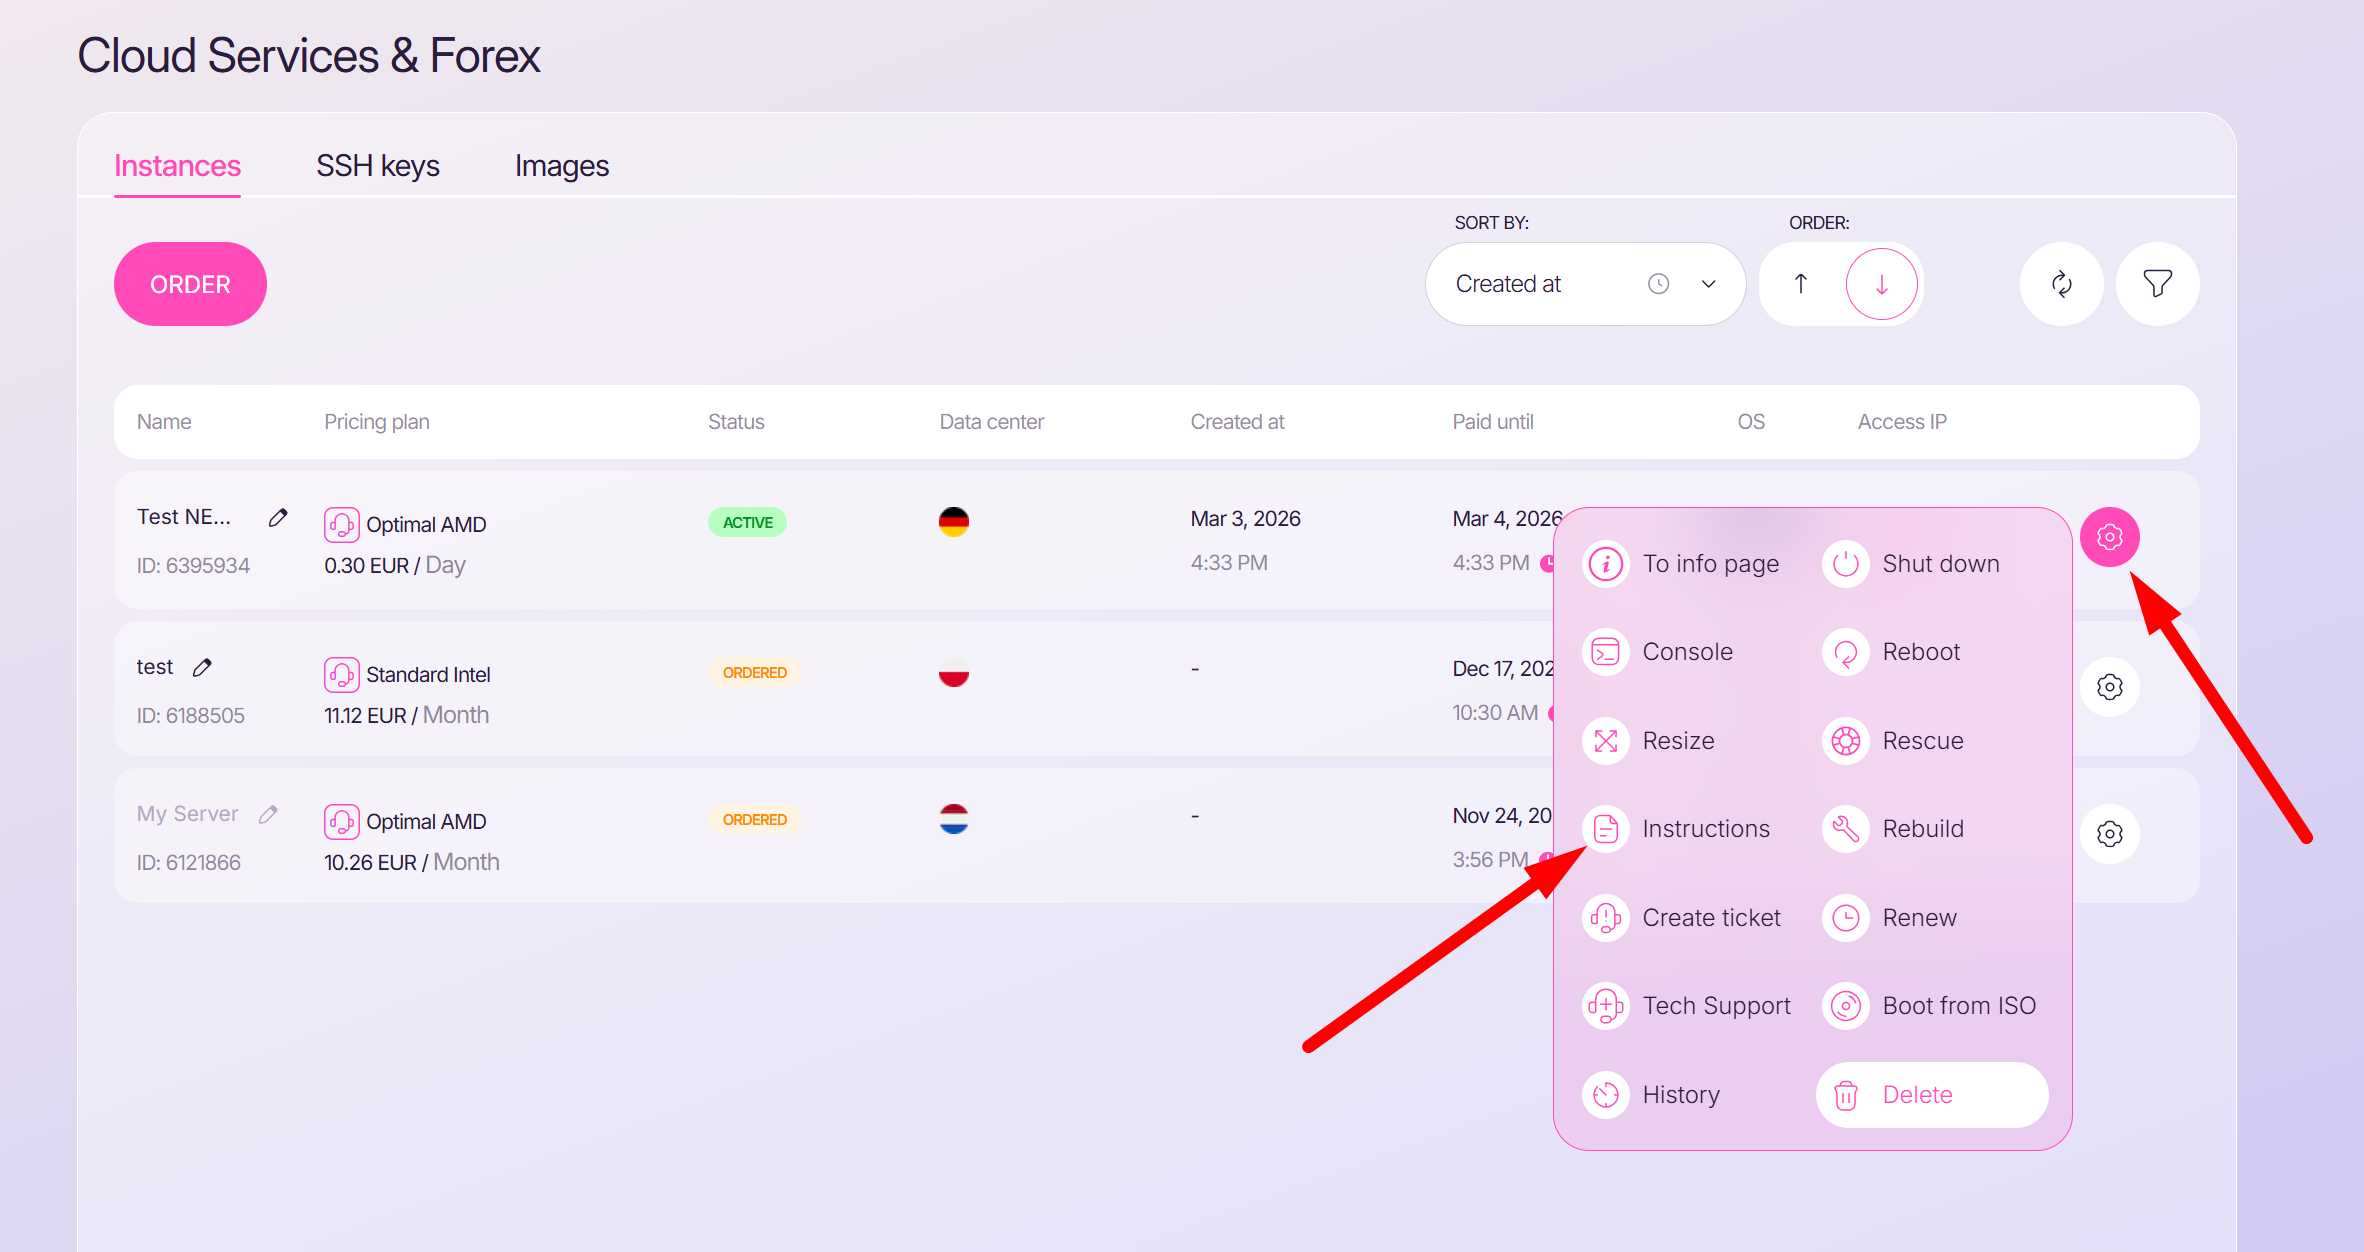
Go to your service section: Services > Cloud Services & Forex
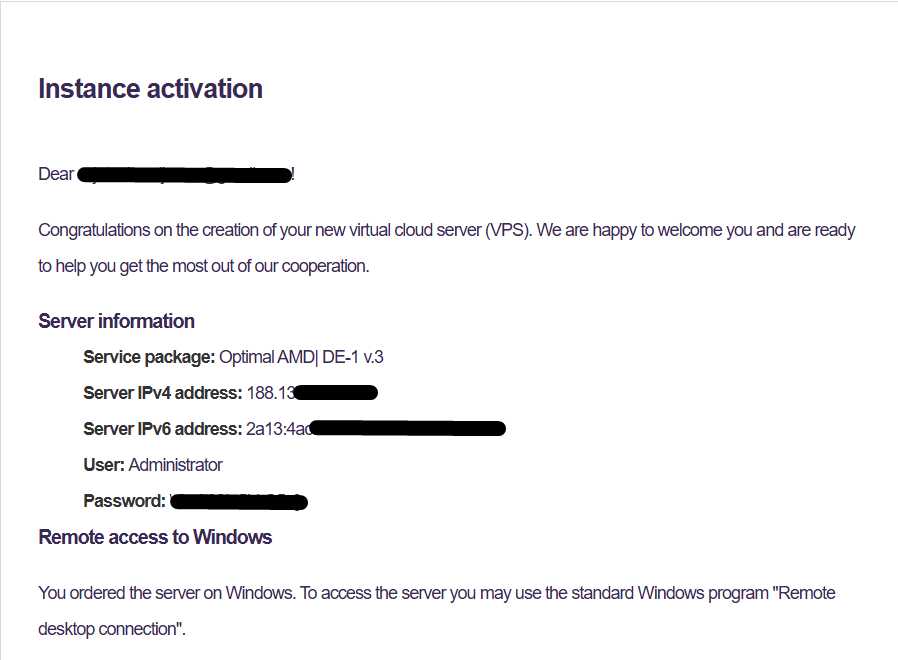
Click on the gear icon for the specific server → choose Instructions.
Connecting with Windows 10/11
Launch and basic settings
Launch the RDP client
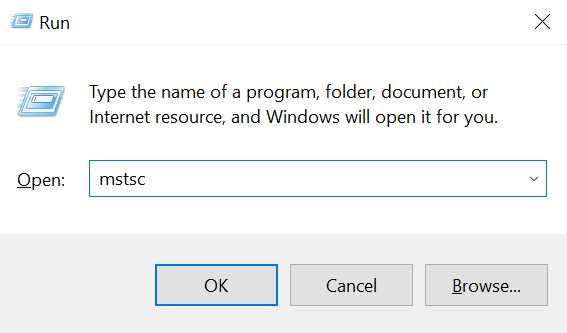
On your computer keyboard, press the combination Win + R → enter mstsc in the opened window → press Enter on the keyboard (Or the “OK” button in the window)
Specify the server address
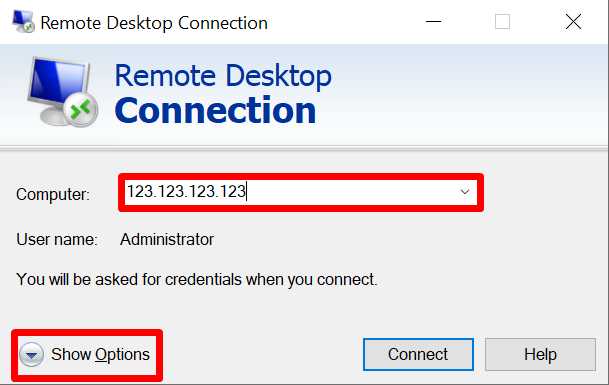
In the Computer field enter the IP (Copy the IP from the “Server IPv4 address” item in your instructions)
If the port is non-standard - specify it as: IP:port (example: 203.0.113.10:52244).
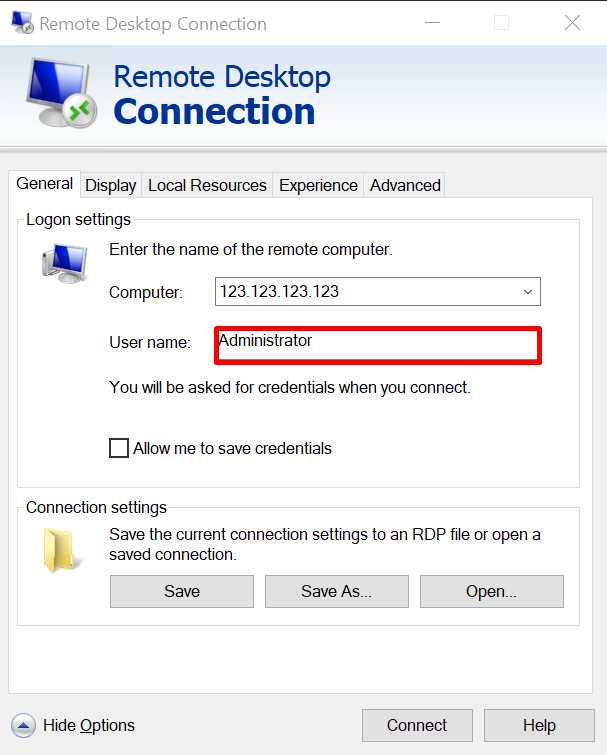
Click Show Options and in the User name field, enter the login (usually Administrator).
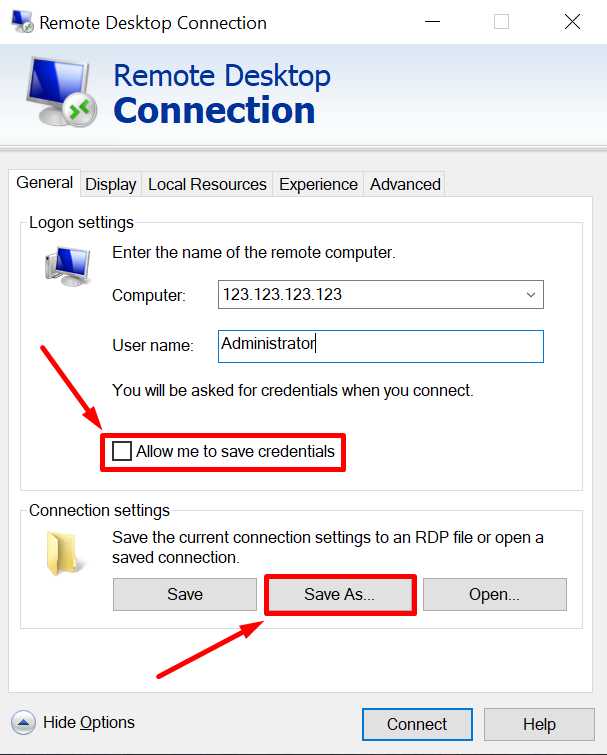
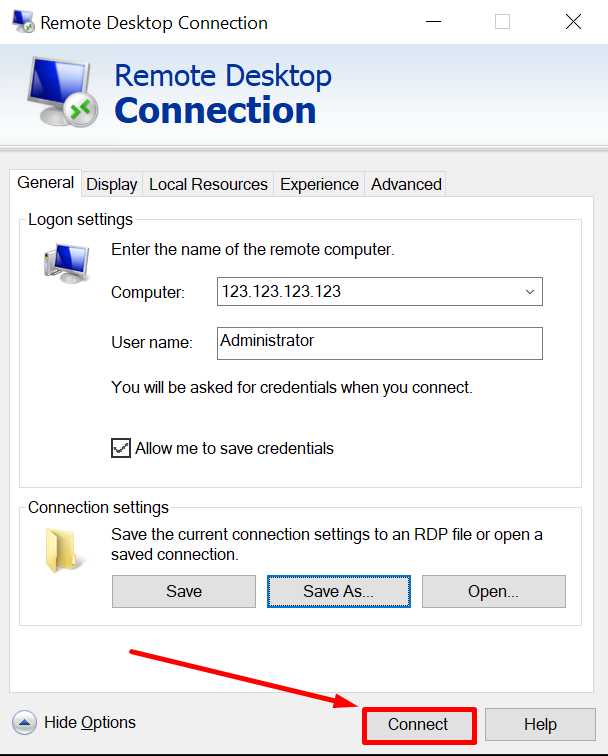
To save time, if you plan to use the same server repeatedly, you can create a shortcut for quickly connecting to the remote desktop. To do this, check the box next to “Allow me to save credentials” and click the “Save As…” button.
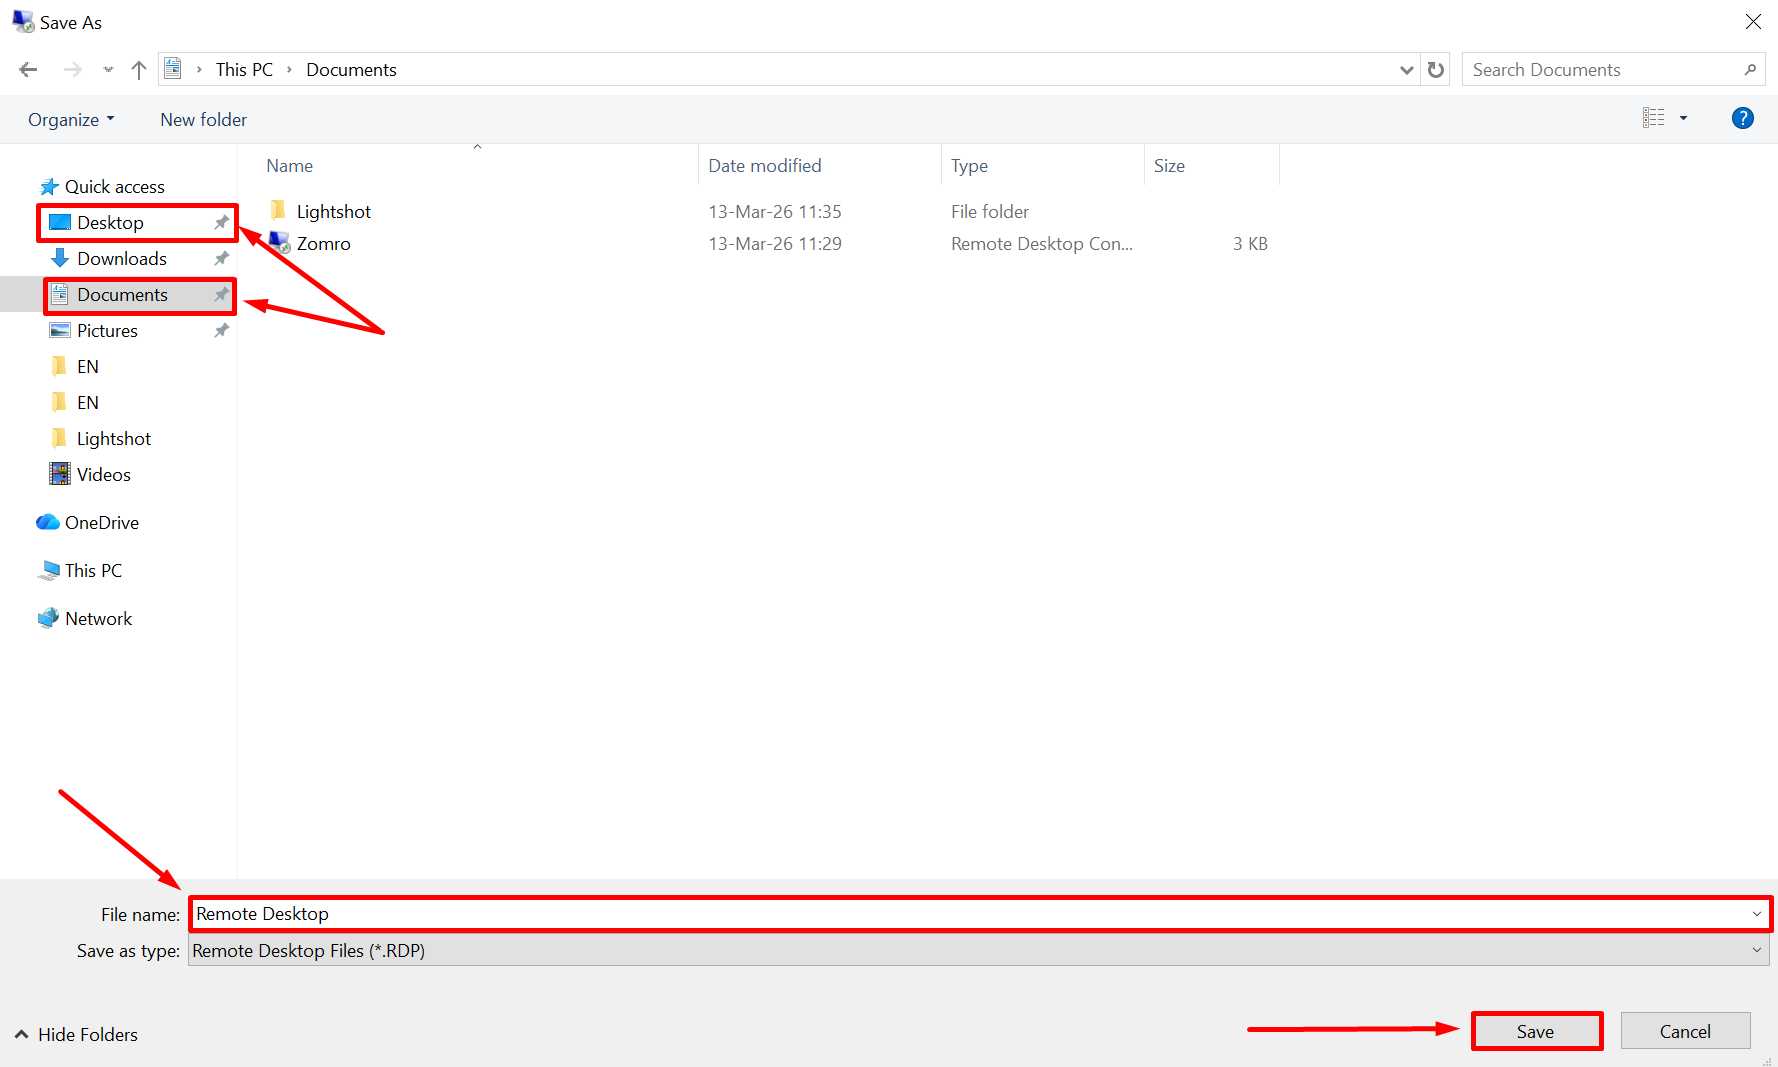
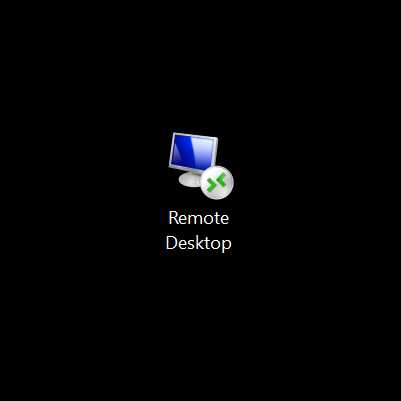
In the opened window, choose where you want to save the shortcut, for example, the Desktop. Then name the shortcut, for example “Remote Desktop”, and click the “Save” button.
Overview of additional settings (Optional)
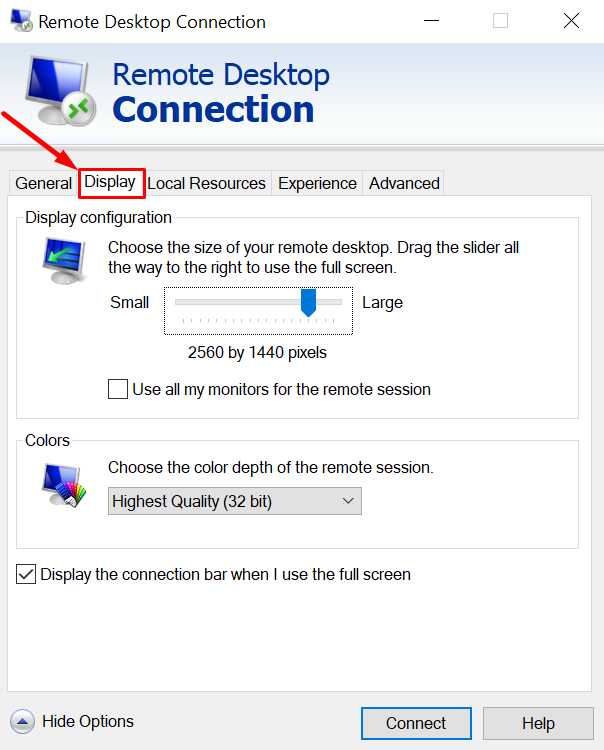
In the Display section, there are the following settings:
Display configuration:
The slider allows you to adjust the size of the remote desktop — from small to full screen.
Use all my monitors for the remote session:
This option allows you to use all connected monitors for the remote session.
Colors:
Select the color depth for the session, for example, "Highest Quality (32 bit)" for the best image quality.
Display the connection bar when I use the full screen:
Enabling this option will display the connection bar when full screen mode is used.
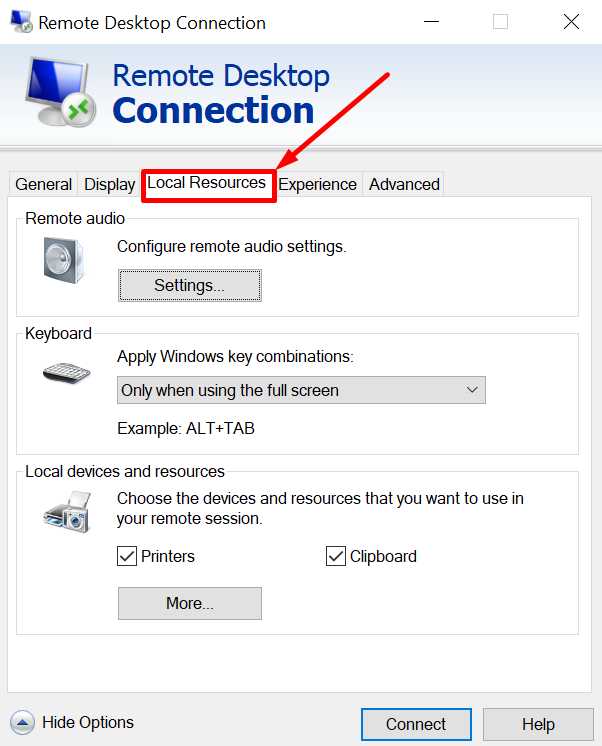
In the Local Resources section, you can configure the following parameters:
Remote audio:
Configure settings for audio playback in the remote session. To do this, click the "Settings..." button.
Keyboard:
Set when Windows key combinations (e.g., ALT+TAB) will apply in the remote session. You can choose: "Only when using the full screen" (только при использовании полного экрана).
Local devices and resources:
Select devices to be used in the remote session, for example:
Printers - to use printers on the local device.
Clipboard - access to the clipboard between local and remote sessions..
If necessary, you can click More... for additional settings.
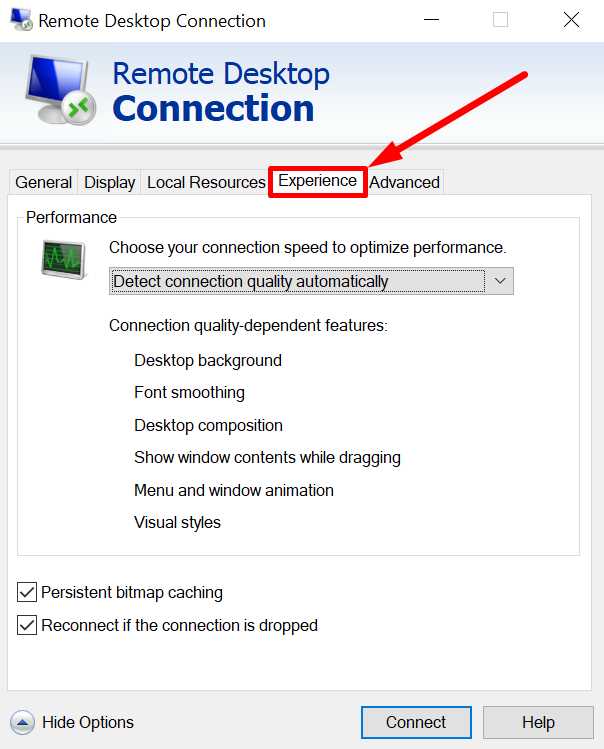
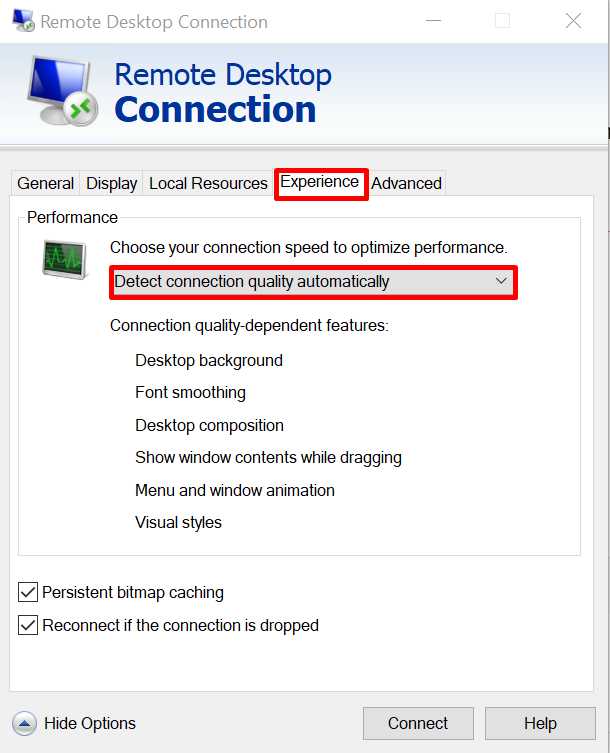
In the Experience section, you can configure performance and connection quality settings:
Choose your connection speed:
Determines how to optimize performance, depending on the connection quality. You can choose "Detect connection quality automatically"
Connection quality-dependent features:
Disable/enable the following features to improve performance on a low-speed connection:
Desktop background
Font smoothing
Desktop composition
Show window contents while dragging
Menu and window animation
Visual styles
Additional parameters:
Persistent bitmap caching - enabling persistent bitmap caching for faster operation.
Reconnect if the connection is dropped- automatic connection restoration if it is lost.
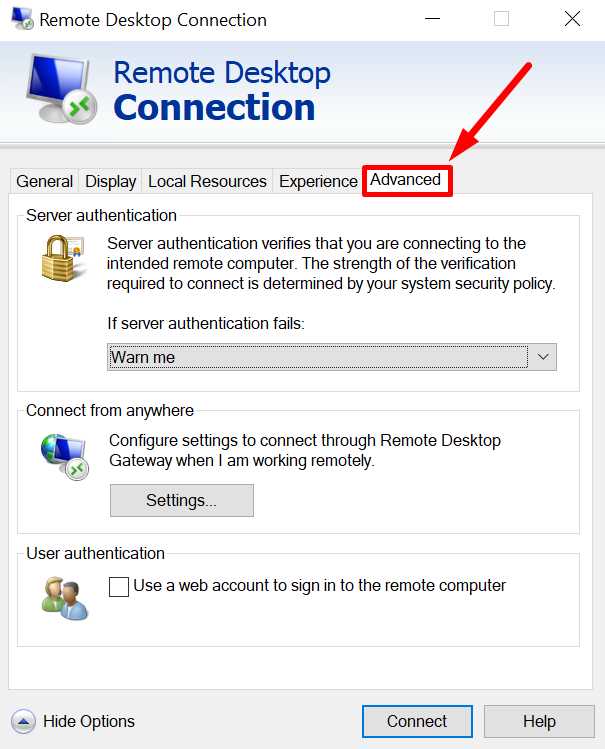
In the Advanced section of the Remote Desktop Connection application, you can configure the following parameters:
Server authentication:
This parameter checks that you are connecting to the correct remote computer. The verification level depends on the system's security policy.
If server authentication fails, you can choose an action, for example, "Warn me".
Connect from anywhere:
Configuring parameters for connecting via Remote Desktop Gateway for remote work.
To do this, click the Settings... button for additional configuration.
User authentication):
Includes the option Use a web account to sign in to the remote computer
Connect to the server
After all settings, click “Connect”
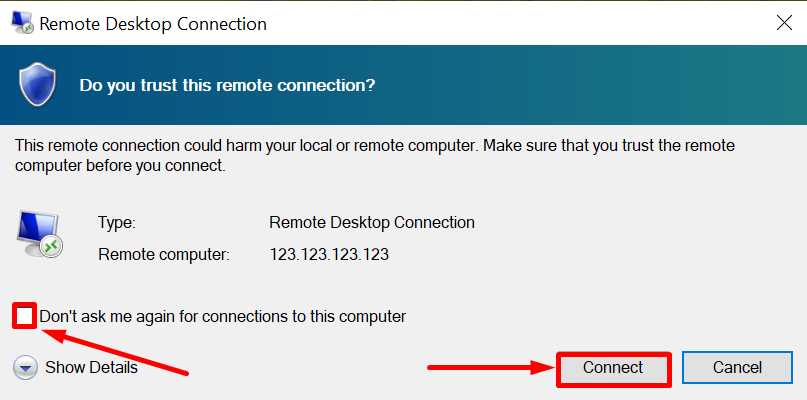
Next, a pop-up window will appear asking you to confirm trust in this connection. To continue connecting, click the “Connect” button. To prevent this window from appearing on subsequent connections, check the box next to “Don’t ask me again for connections to this computer.
After this, the remote desktop icon will appear in the selected save location. By clicking on it, you can quickly launch the connection to the remote desktop.
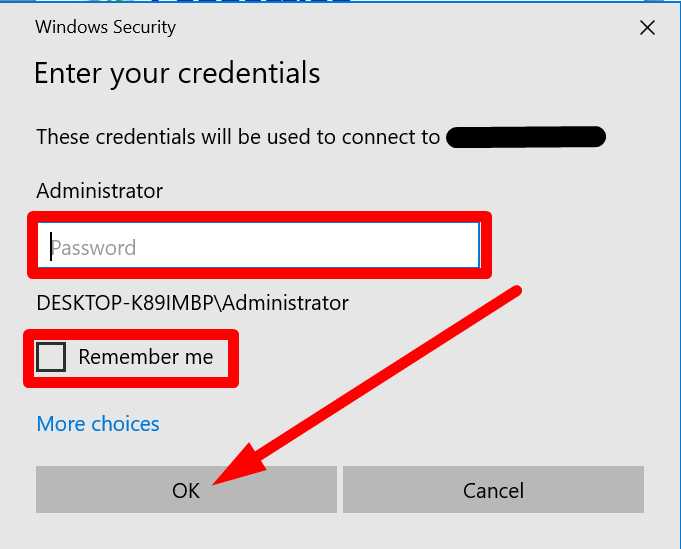
In the opened window, enter the password (Copy the password from the “Password” section in your instructions) → Click the “OK” button
If you plan to regularly connect to the remote desktop, check the box “Remember Me”. Then the system will not ask for the password again on subsequent connections.
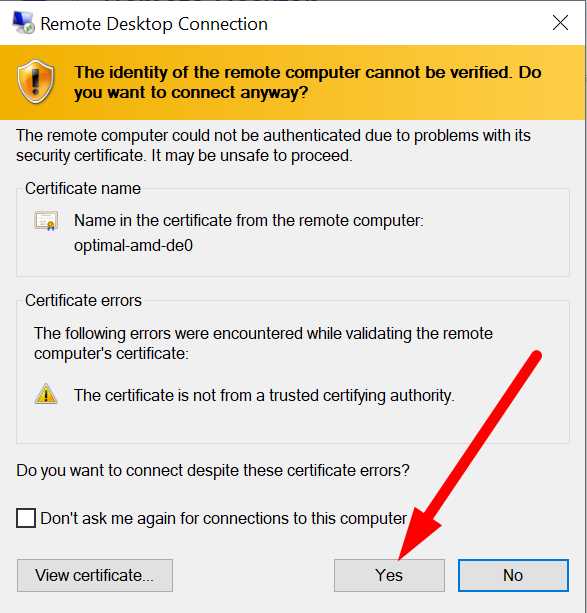
If a certificate warning appears, click Yes (if you are connecting to your own server).
How to use the remote desktop
Immediately after connecting, the Server Manager window may open on the server, and a notification about network settings may appear.
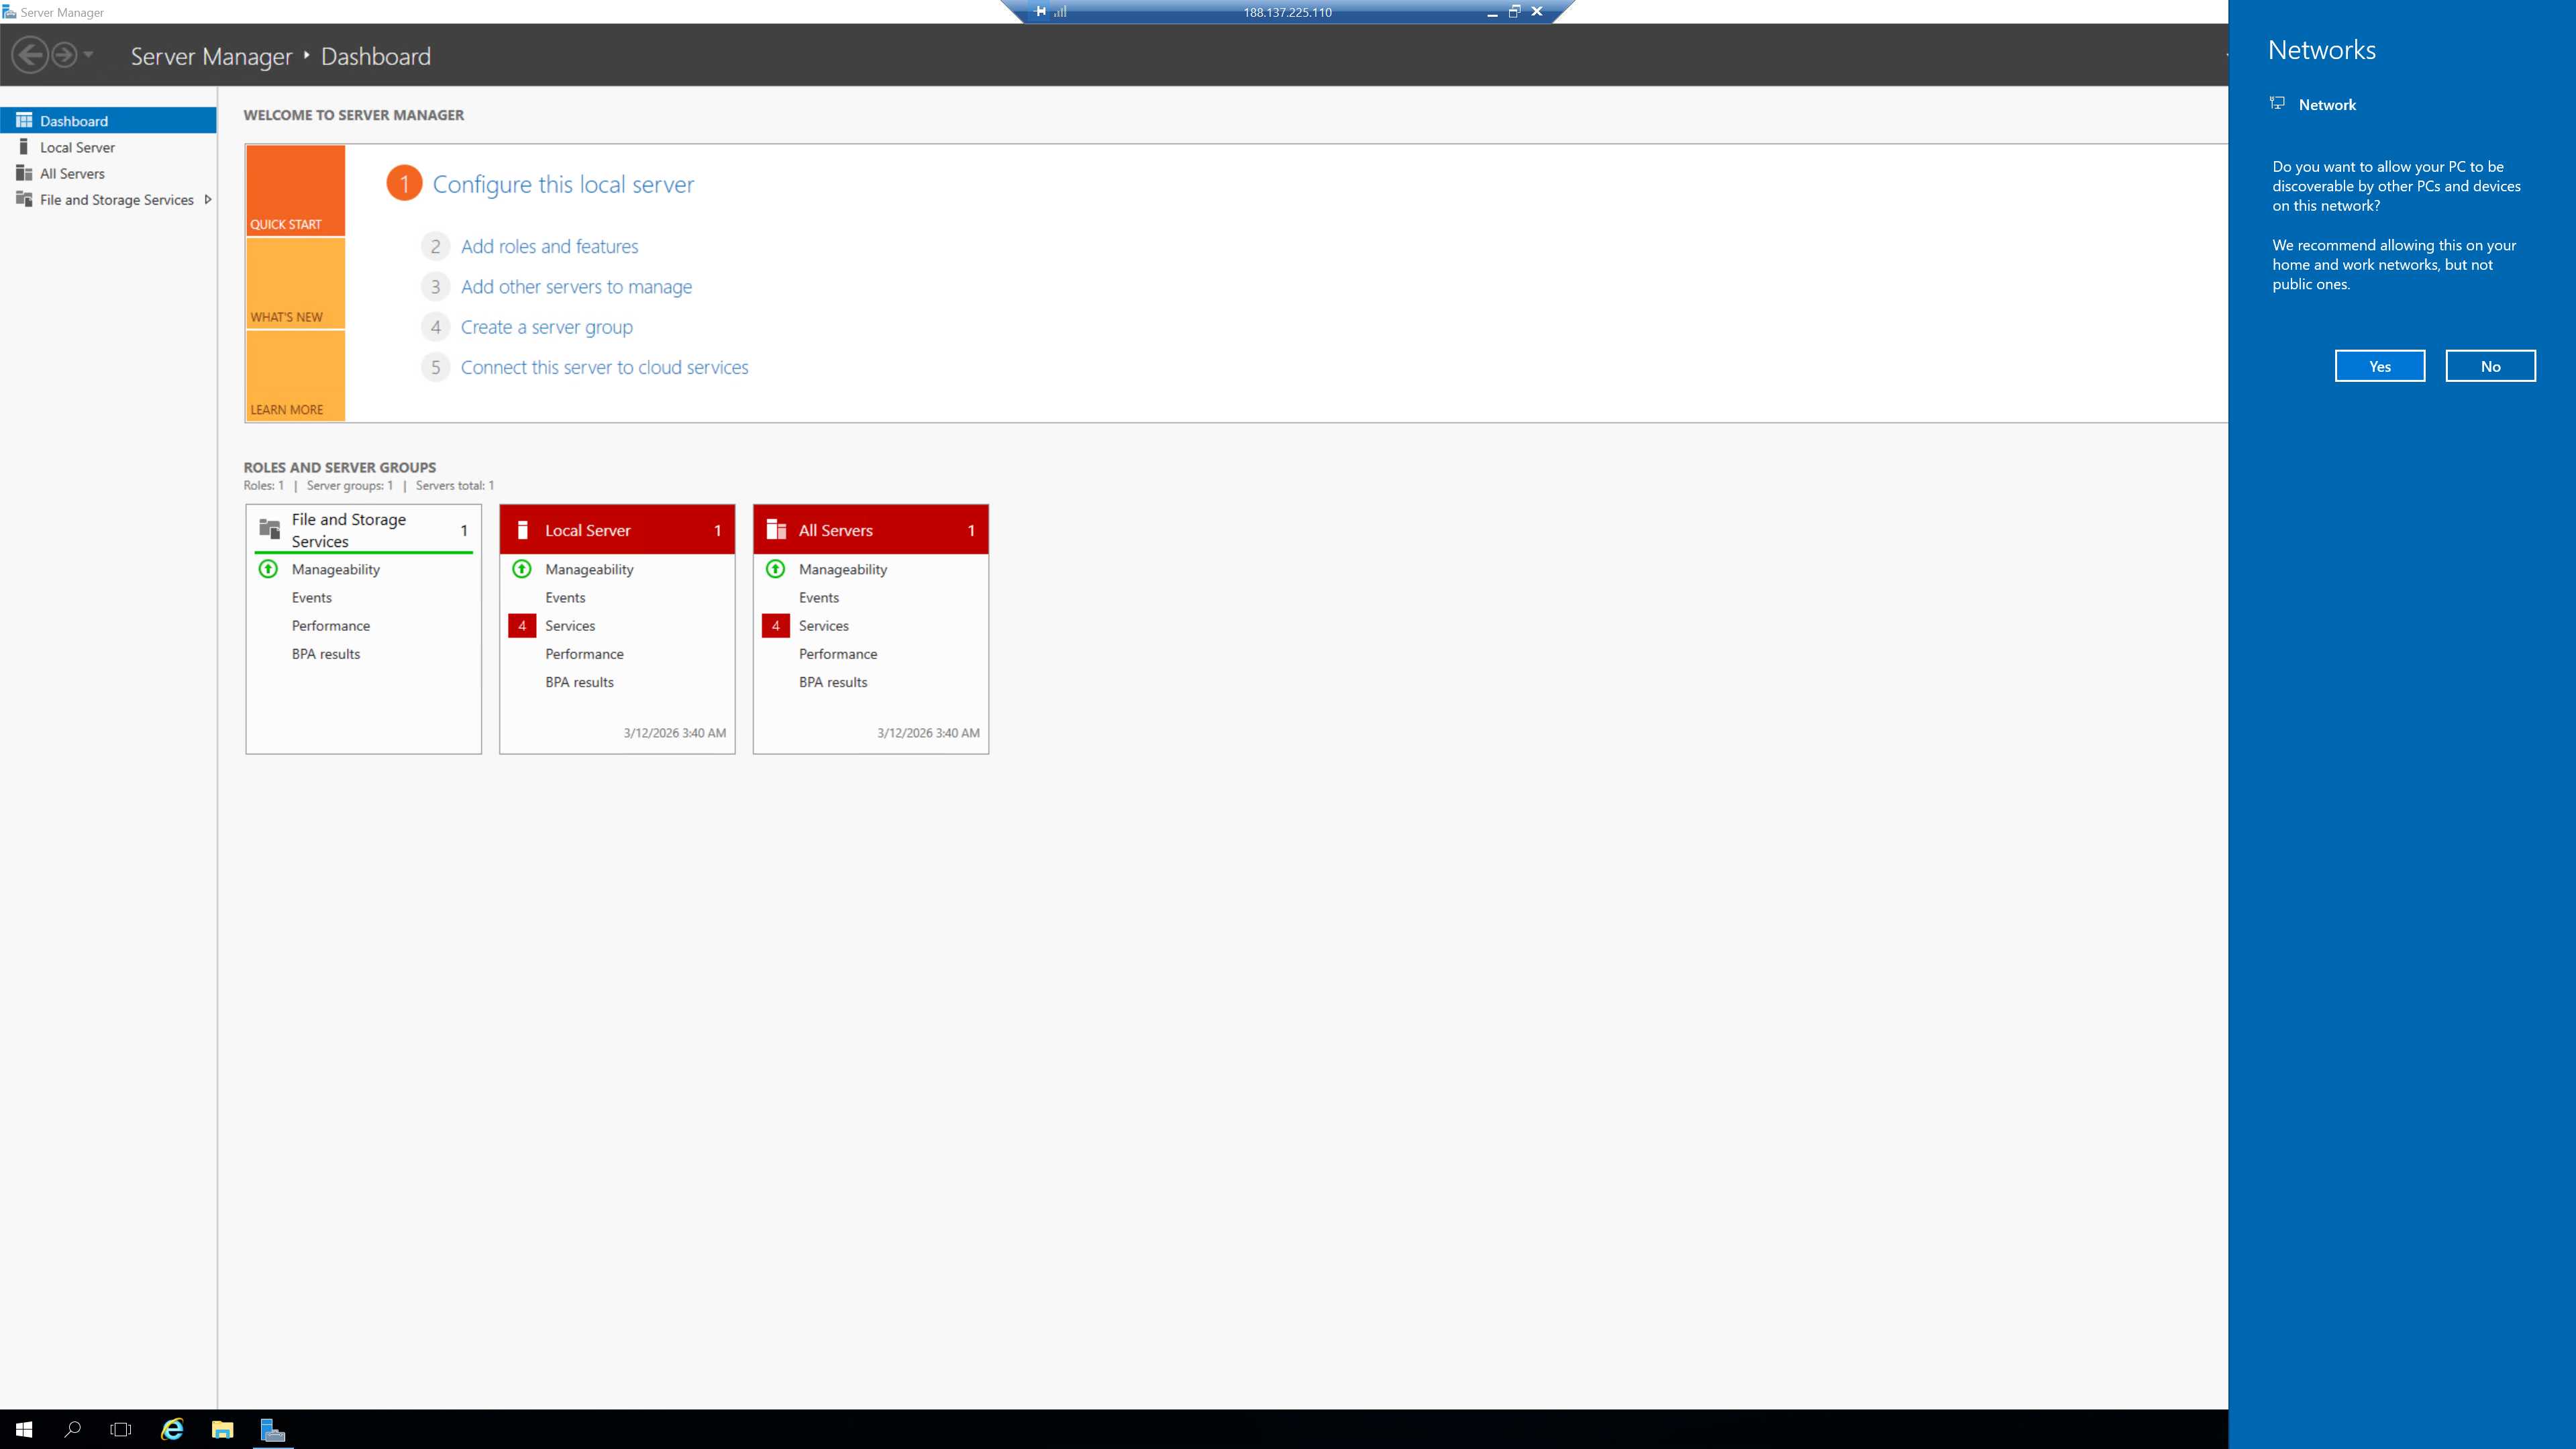
What to do:
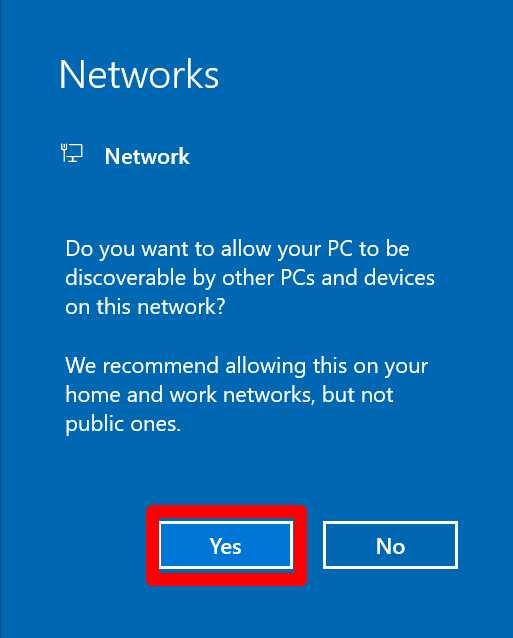
In the Network pop-up window, click Yes (on the right).
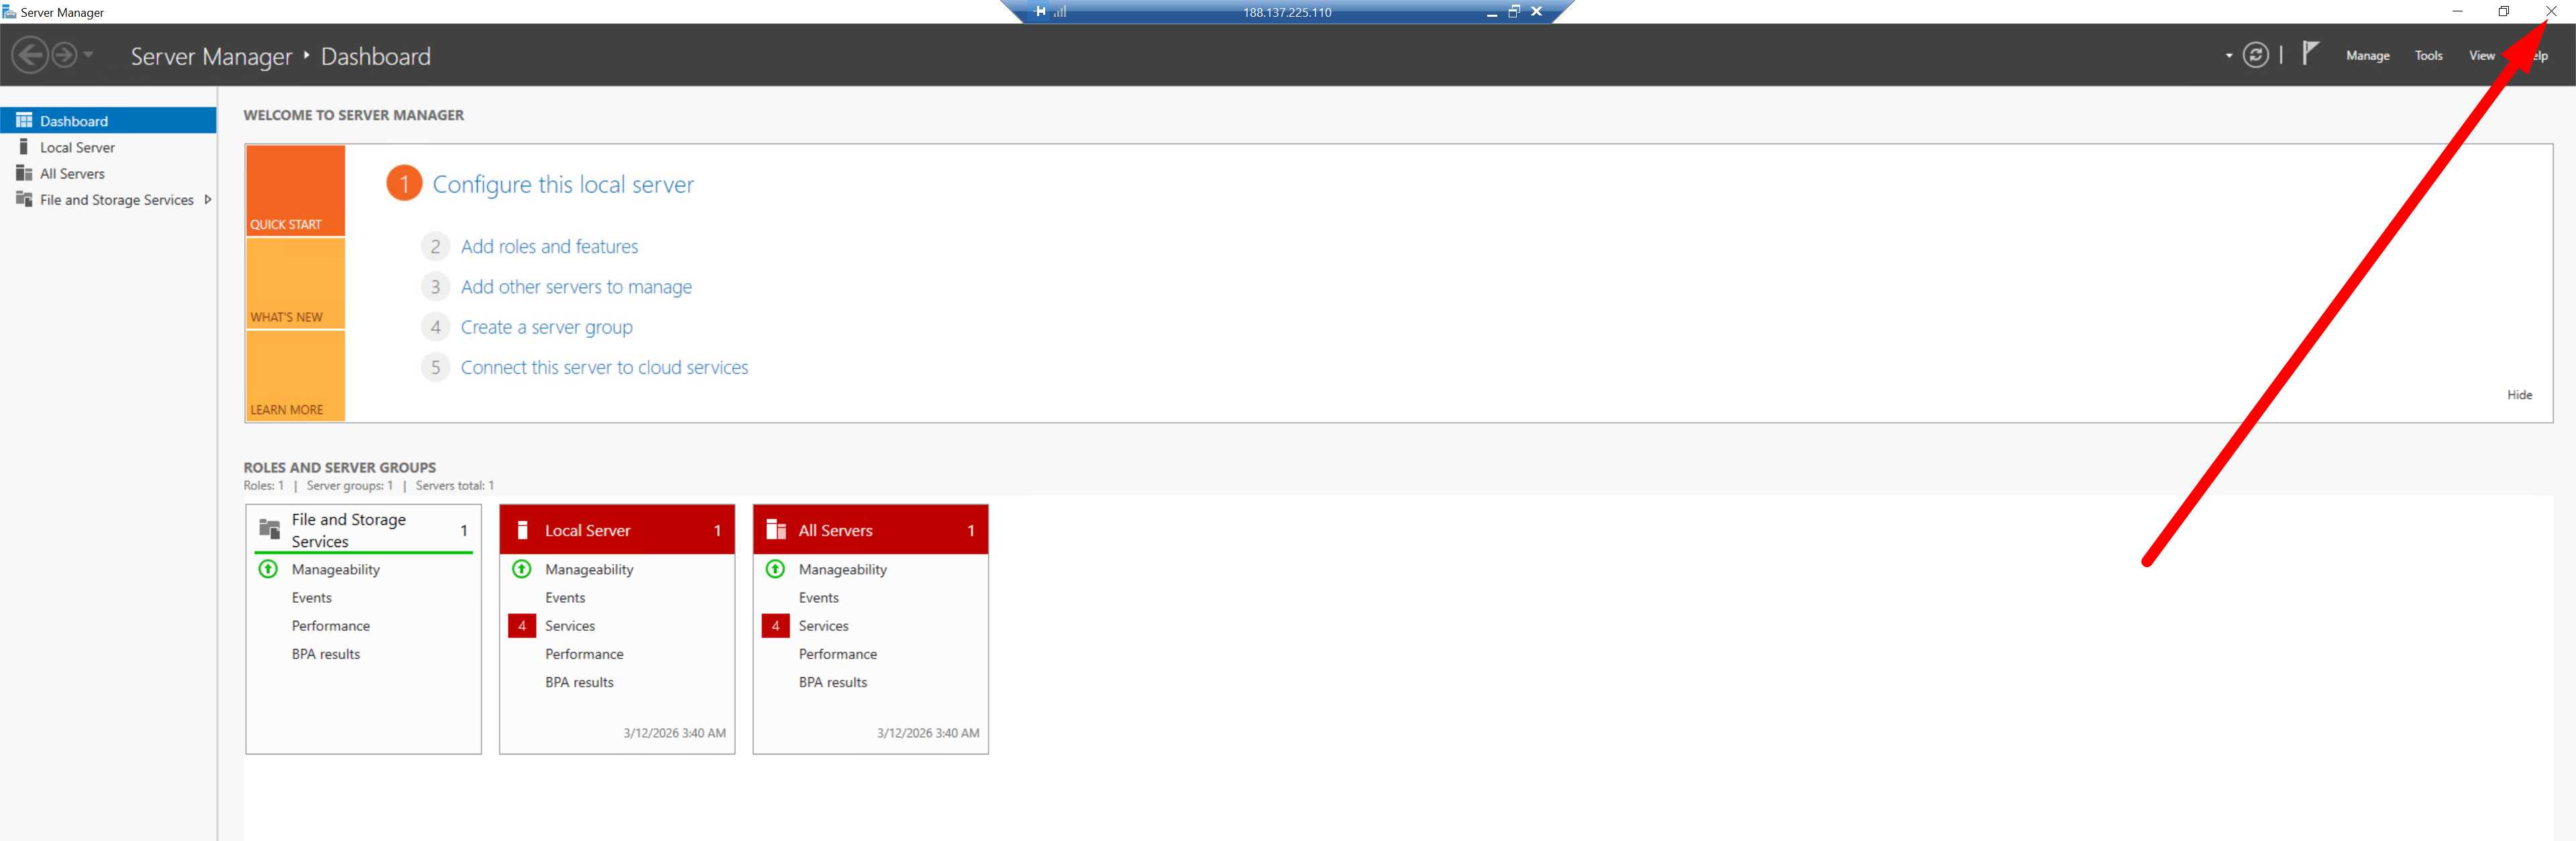
Close the Server Manager window.
Internet access on Windows Server 2020 and earlier
Internet Explorer is often available for internet access on such images, but it is unsupported and may create problems:
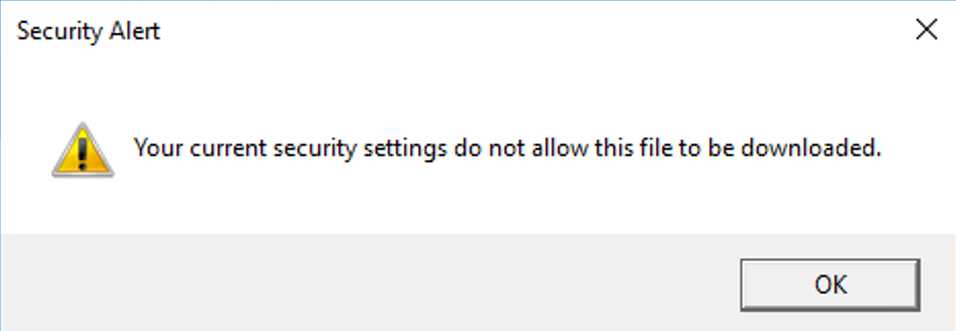
Problem 1: Internet Explorer is outdated - a warning/block appears from the browser when opening websites.
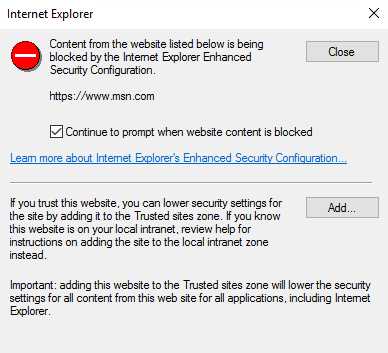
Problem 2: even when granting all permissions to the browser, file downloading may not work.
Solution: Install a modern browser via PowerShell (e.g., Google Chrome)
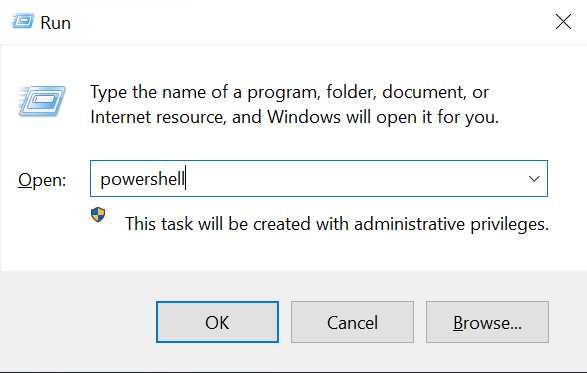
On the remote desktop, press the key combination Win + R on your computer keyboard → in the window that opens, type powershell → press Enter on the keyboard (or the "OK" button in the window).
When Powershell opens, copy and paste the following code into the window:
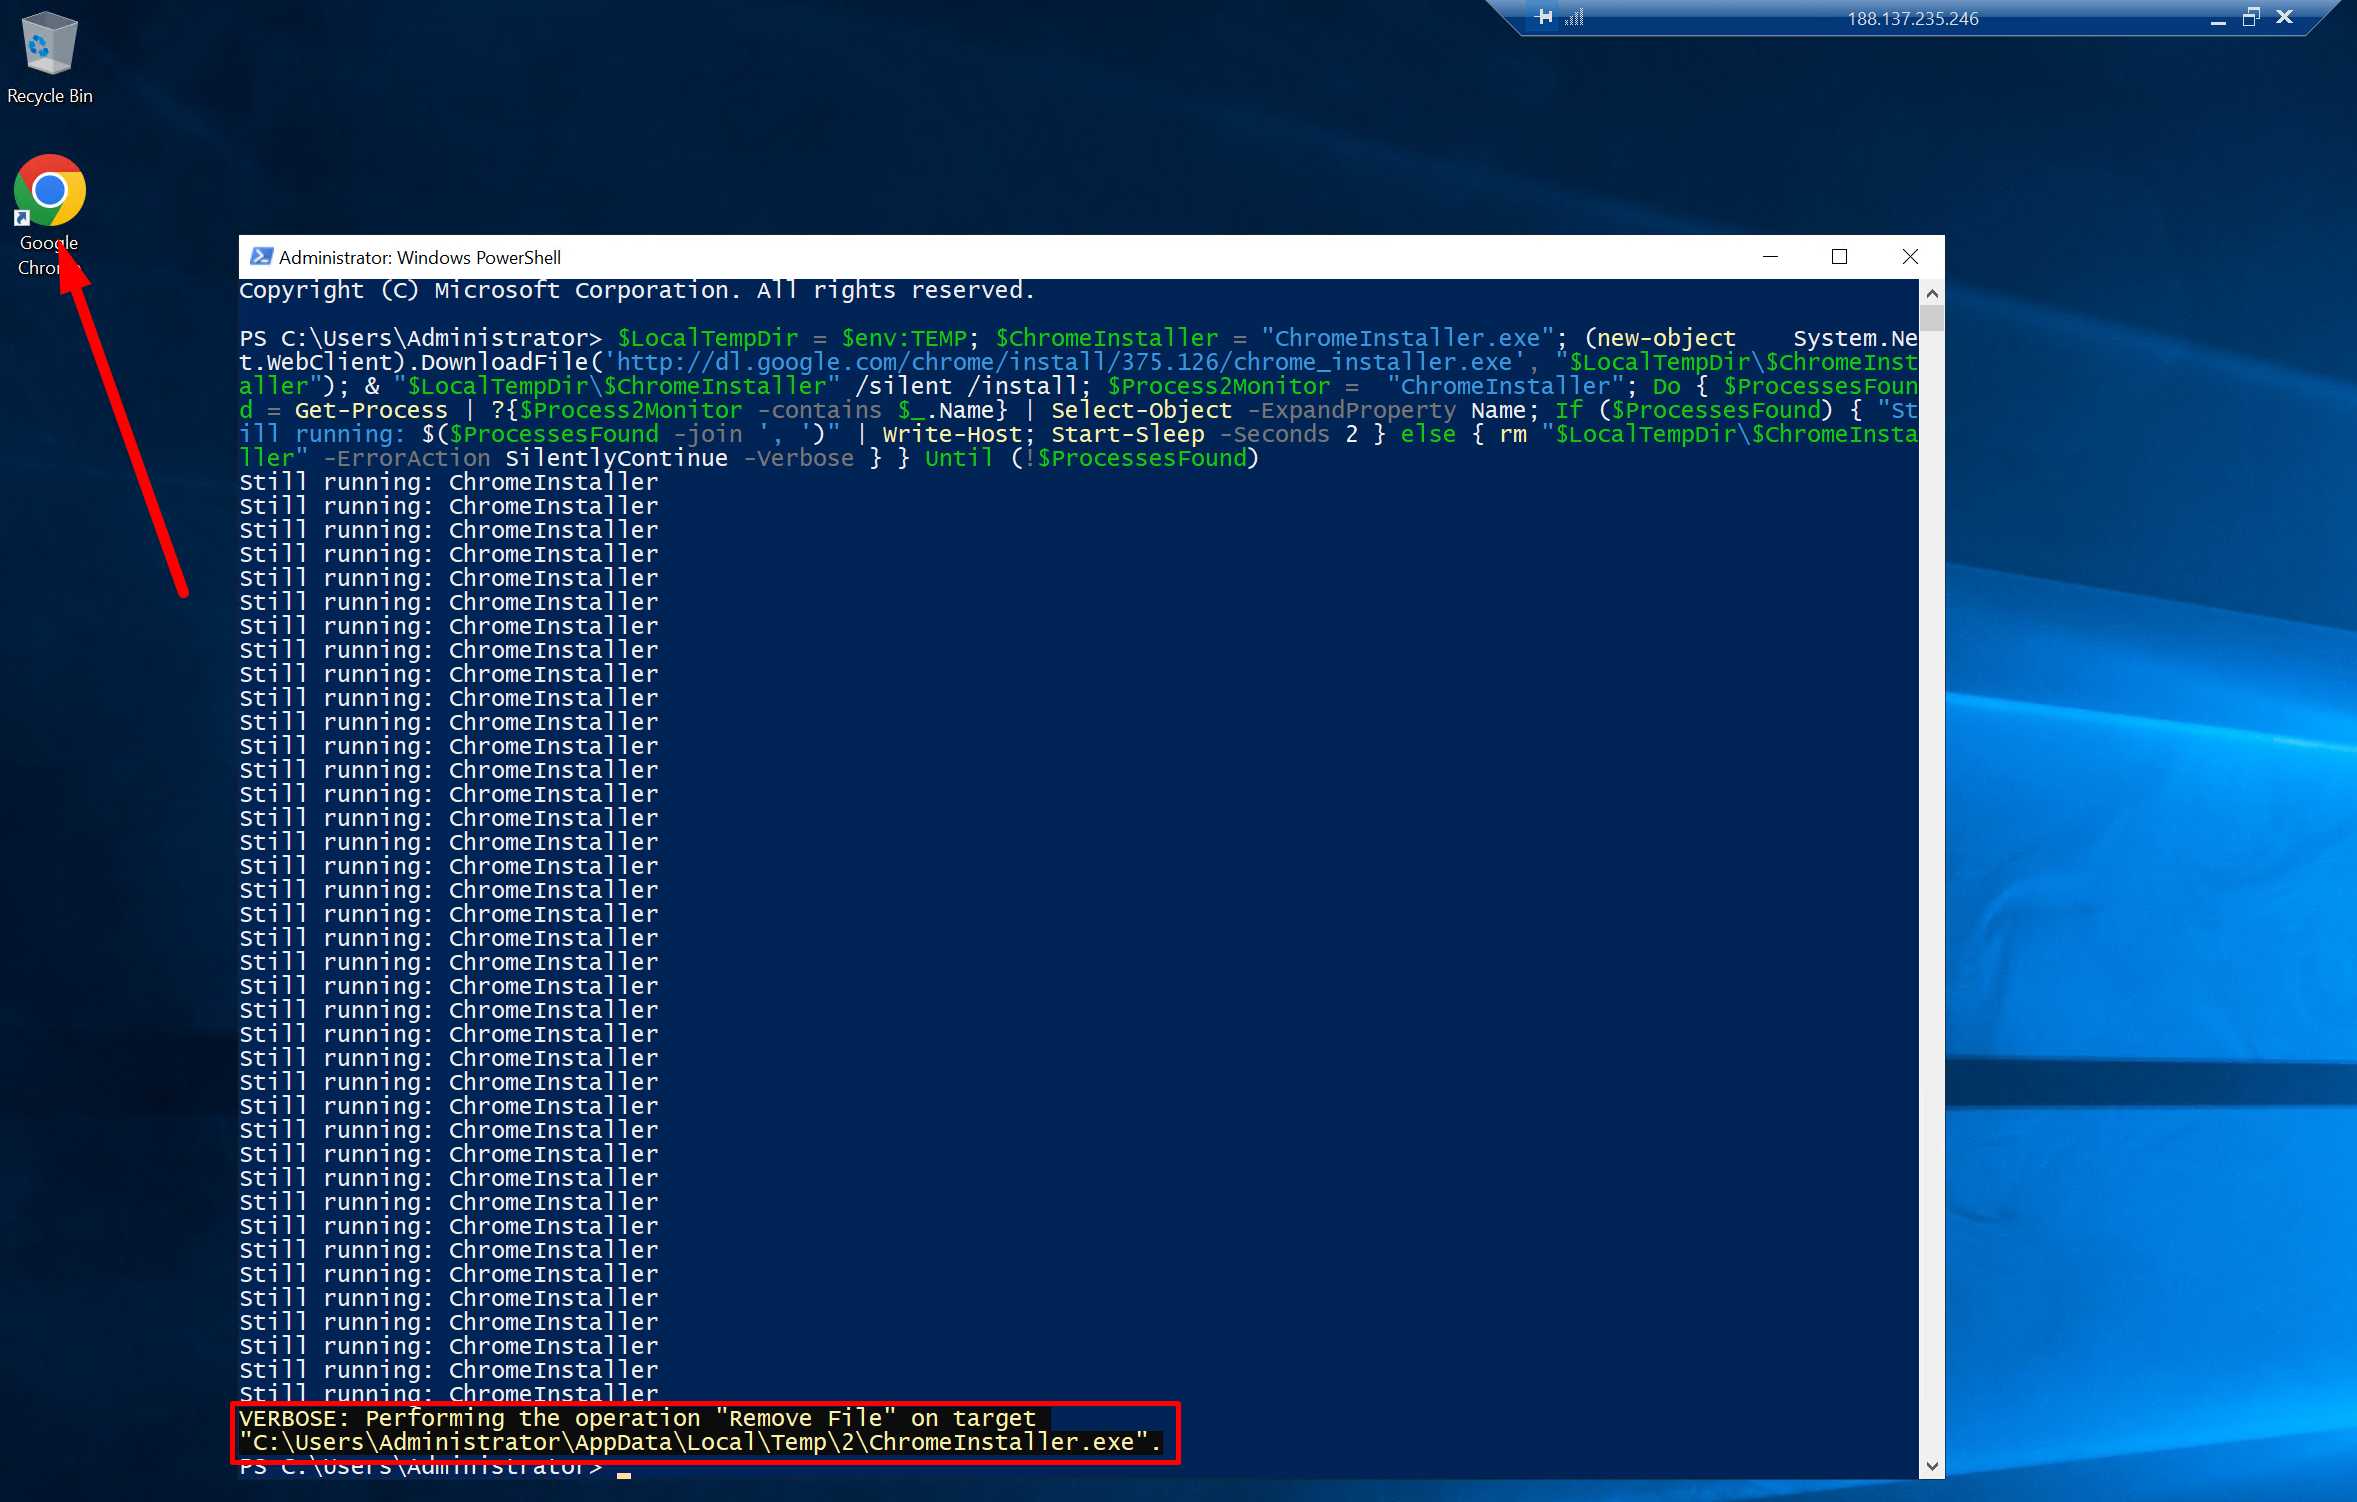
$LocalTempDir = $env:TEMP; $ChromeInstaller = "ChromeInstaller.exe"; (new-object System.Net.WebClient).DownloadFile('http://dl.google.com/chrome/install/375.126/chrome_installer.exe', "$LocalTempDir\$ChromeInstaller"); & "$LocalTempDir\$ChromeInstaller" /silent /install; $Process2Monitor = "ChromeInstaller"; Do { $ProcessesFound = Get-Process | ?{$Process2Monitor -contains $_.Name} | Select-Object -ExpandProperty Name; If ($ProcessesFound) { "Still running: $($ProcessesFound -join ', ')" | Write-Host; Start-Sleep -Seconds 2 } else { rm "$LocalTempDir\$ChromeInstaller" -ErrorAction SilentlyContinue -Verbose } } Until (!$ProcessesFound)

Press Enter on the keyboard to run the code. Wait for the installation…
The installation should start automatically and finish within a few minutes. Once this is done, Chrome will be installed on your remote desktop.
If familiar programs are missing (photo viewer, archive managers, etc.)
Windows Server images often do not include many familiar applications (e.g., "Photos," etc.). If you lack programs for working with files:
Option 1: install the necessary programs manually (as on a new computer).
Option 2: install a set of programs with a single file using the ninite.com service (interface in English).
If you chose a Windows Server 2022 or newer image when purchasing (recommended)
Use the built-in Microsoft Edge browser for internet access.
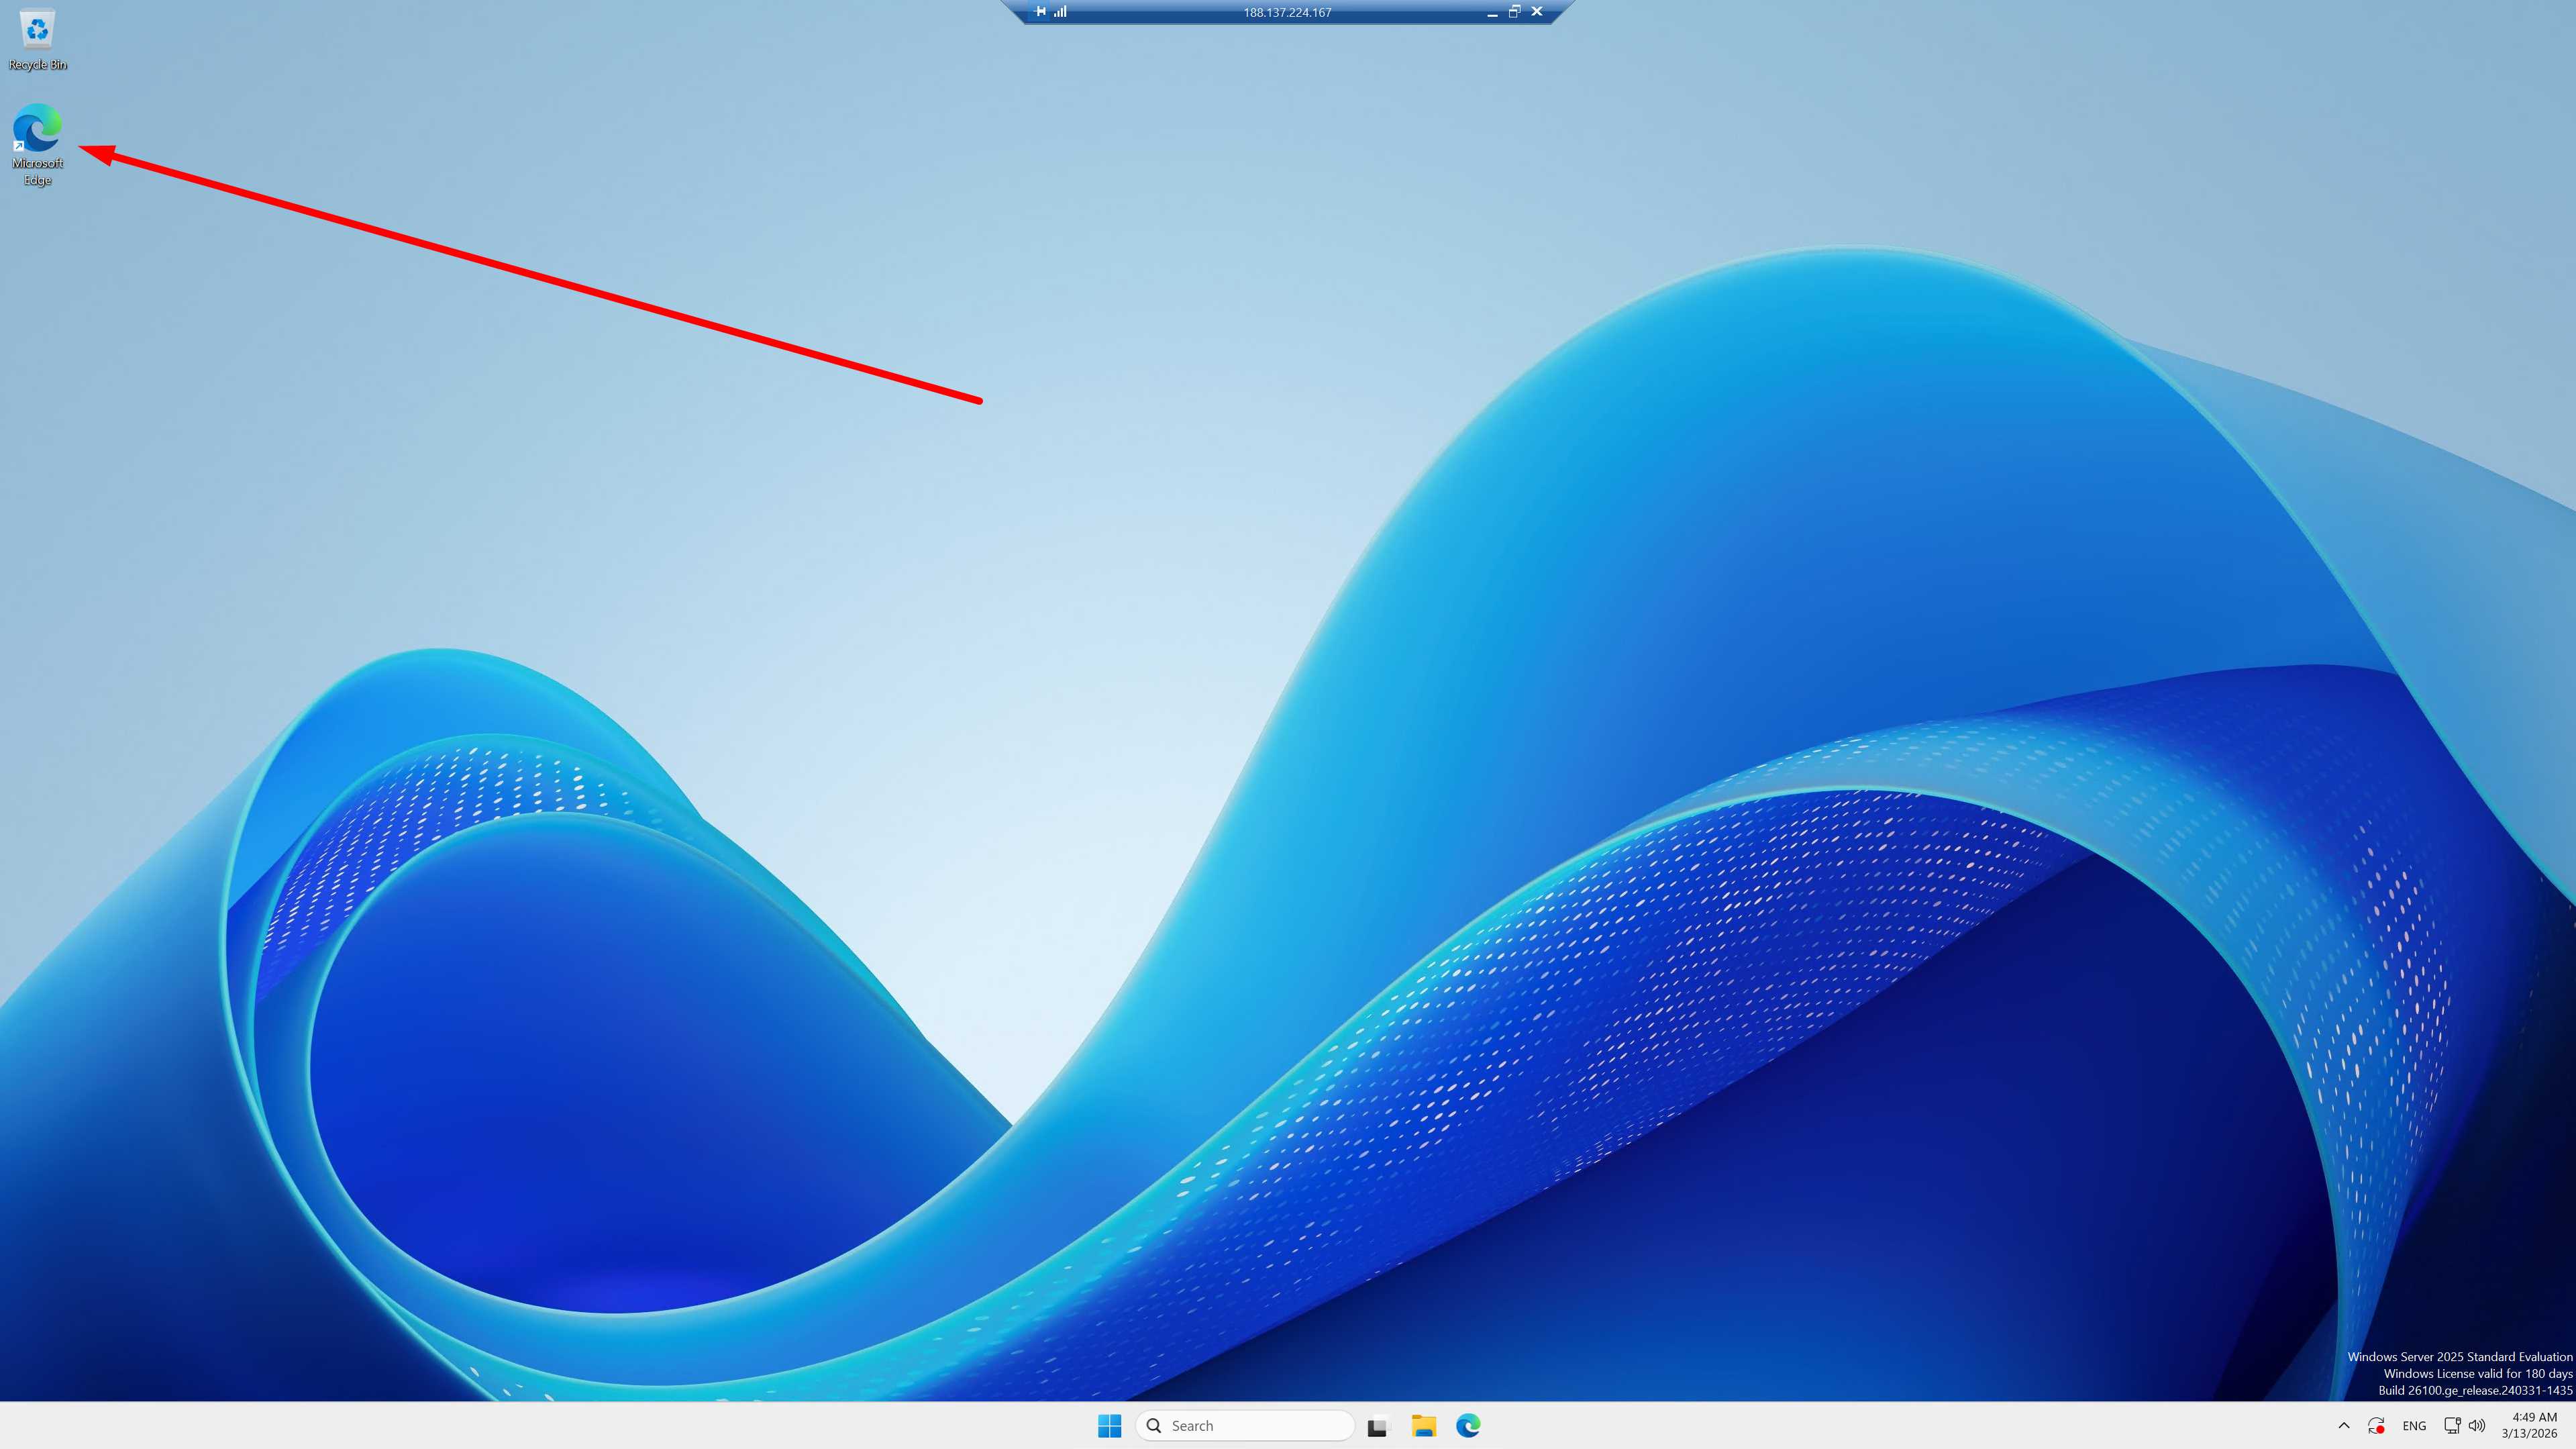
Also note that some familiar programs may be missing on Windows Server. The solution is the same:
install applications manually, or
use ninite.com to install a set of programs.
How to disconnect from the remote desktop and reconnect
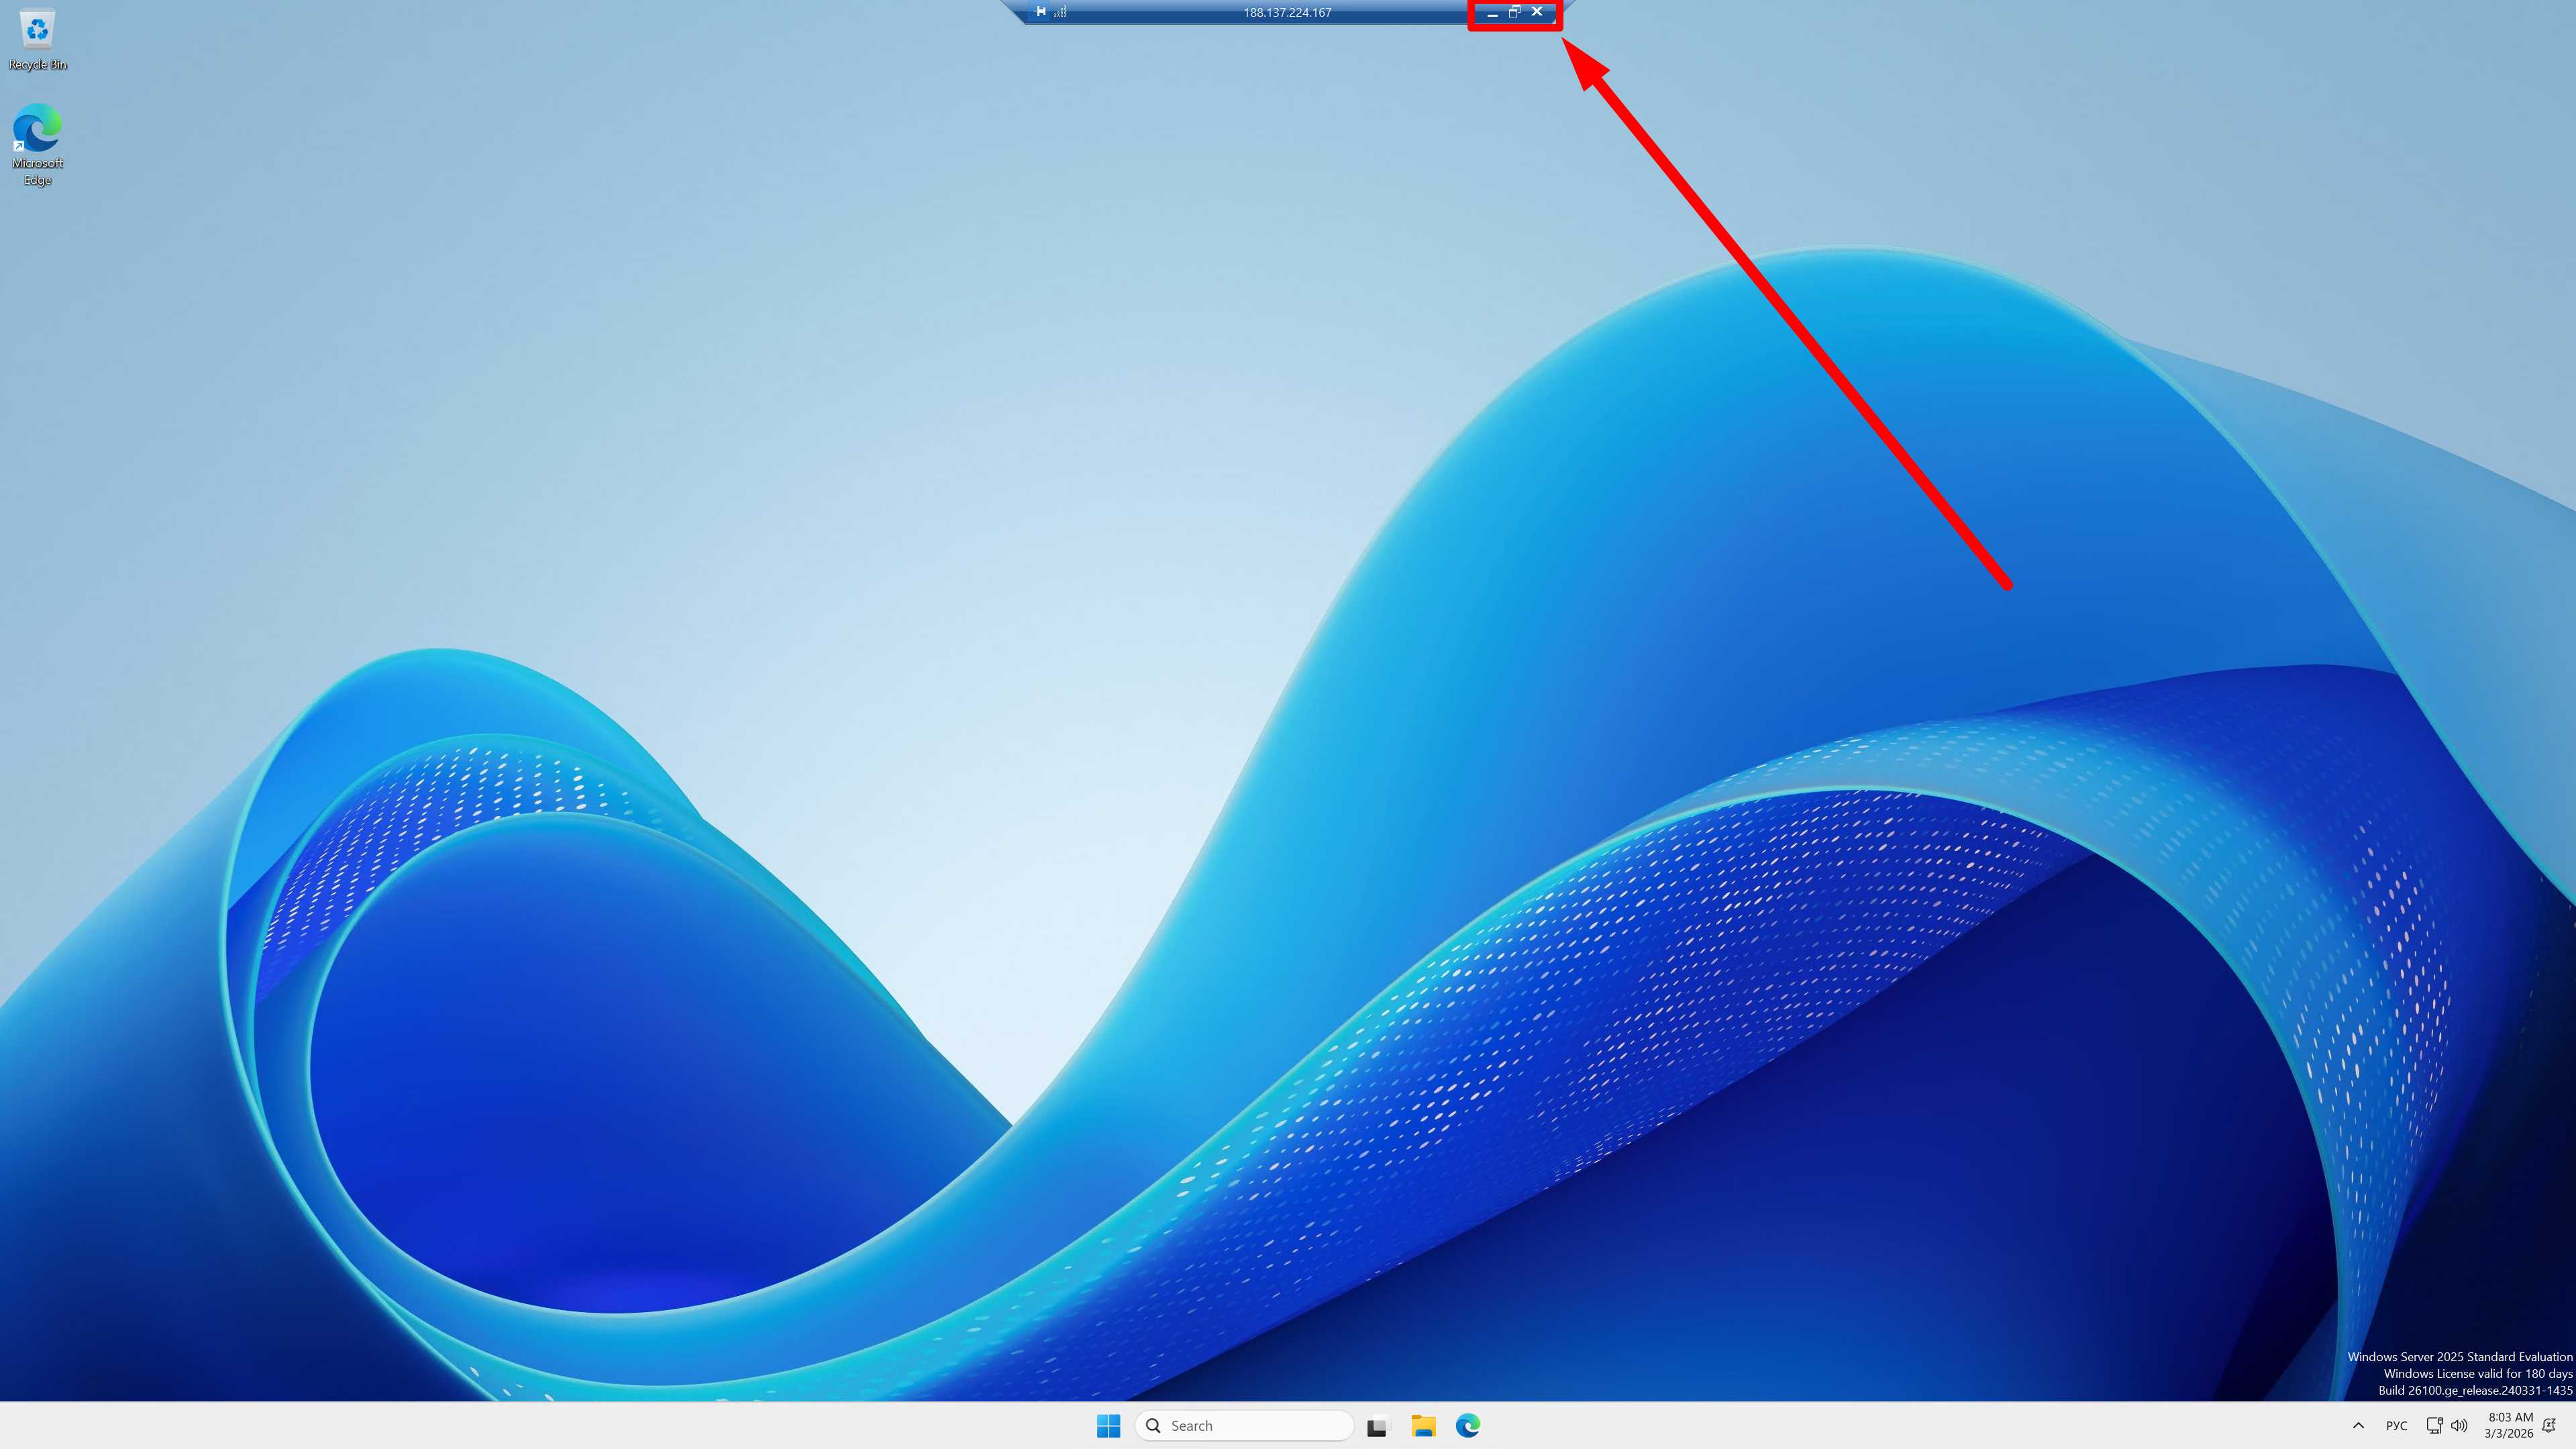
The remote desktop works like a regular program. There is a control panel at the top of the window where you can:
minimize the window,
maximize/restore,
close the connection.
Reconnecting
To connect to the remote desktop again, repeat the steps from the instruction: «Connecting from Windows 10/11».
If the server does not connect - Windows
Check the most common issues
If the server itself is enabled.
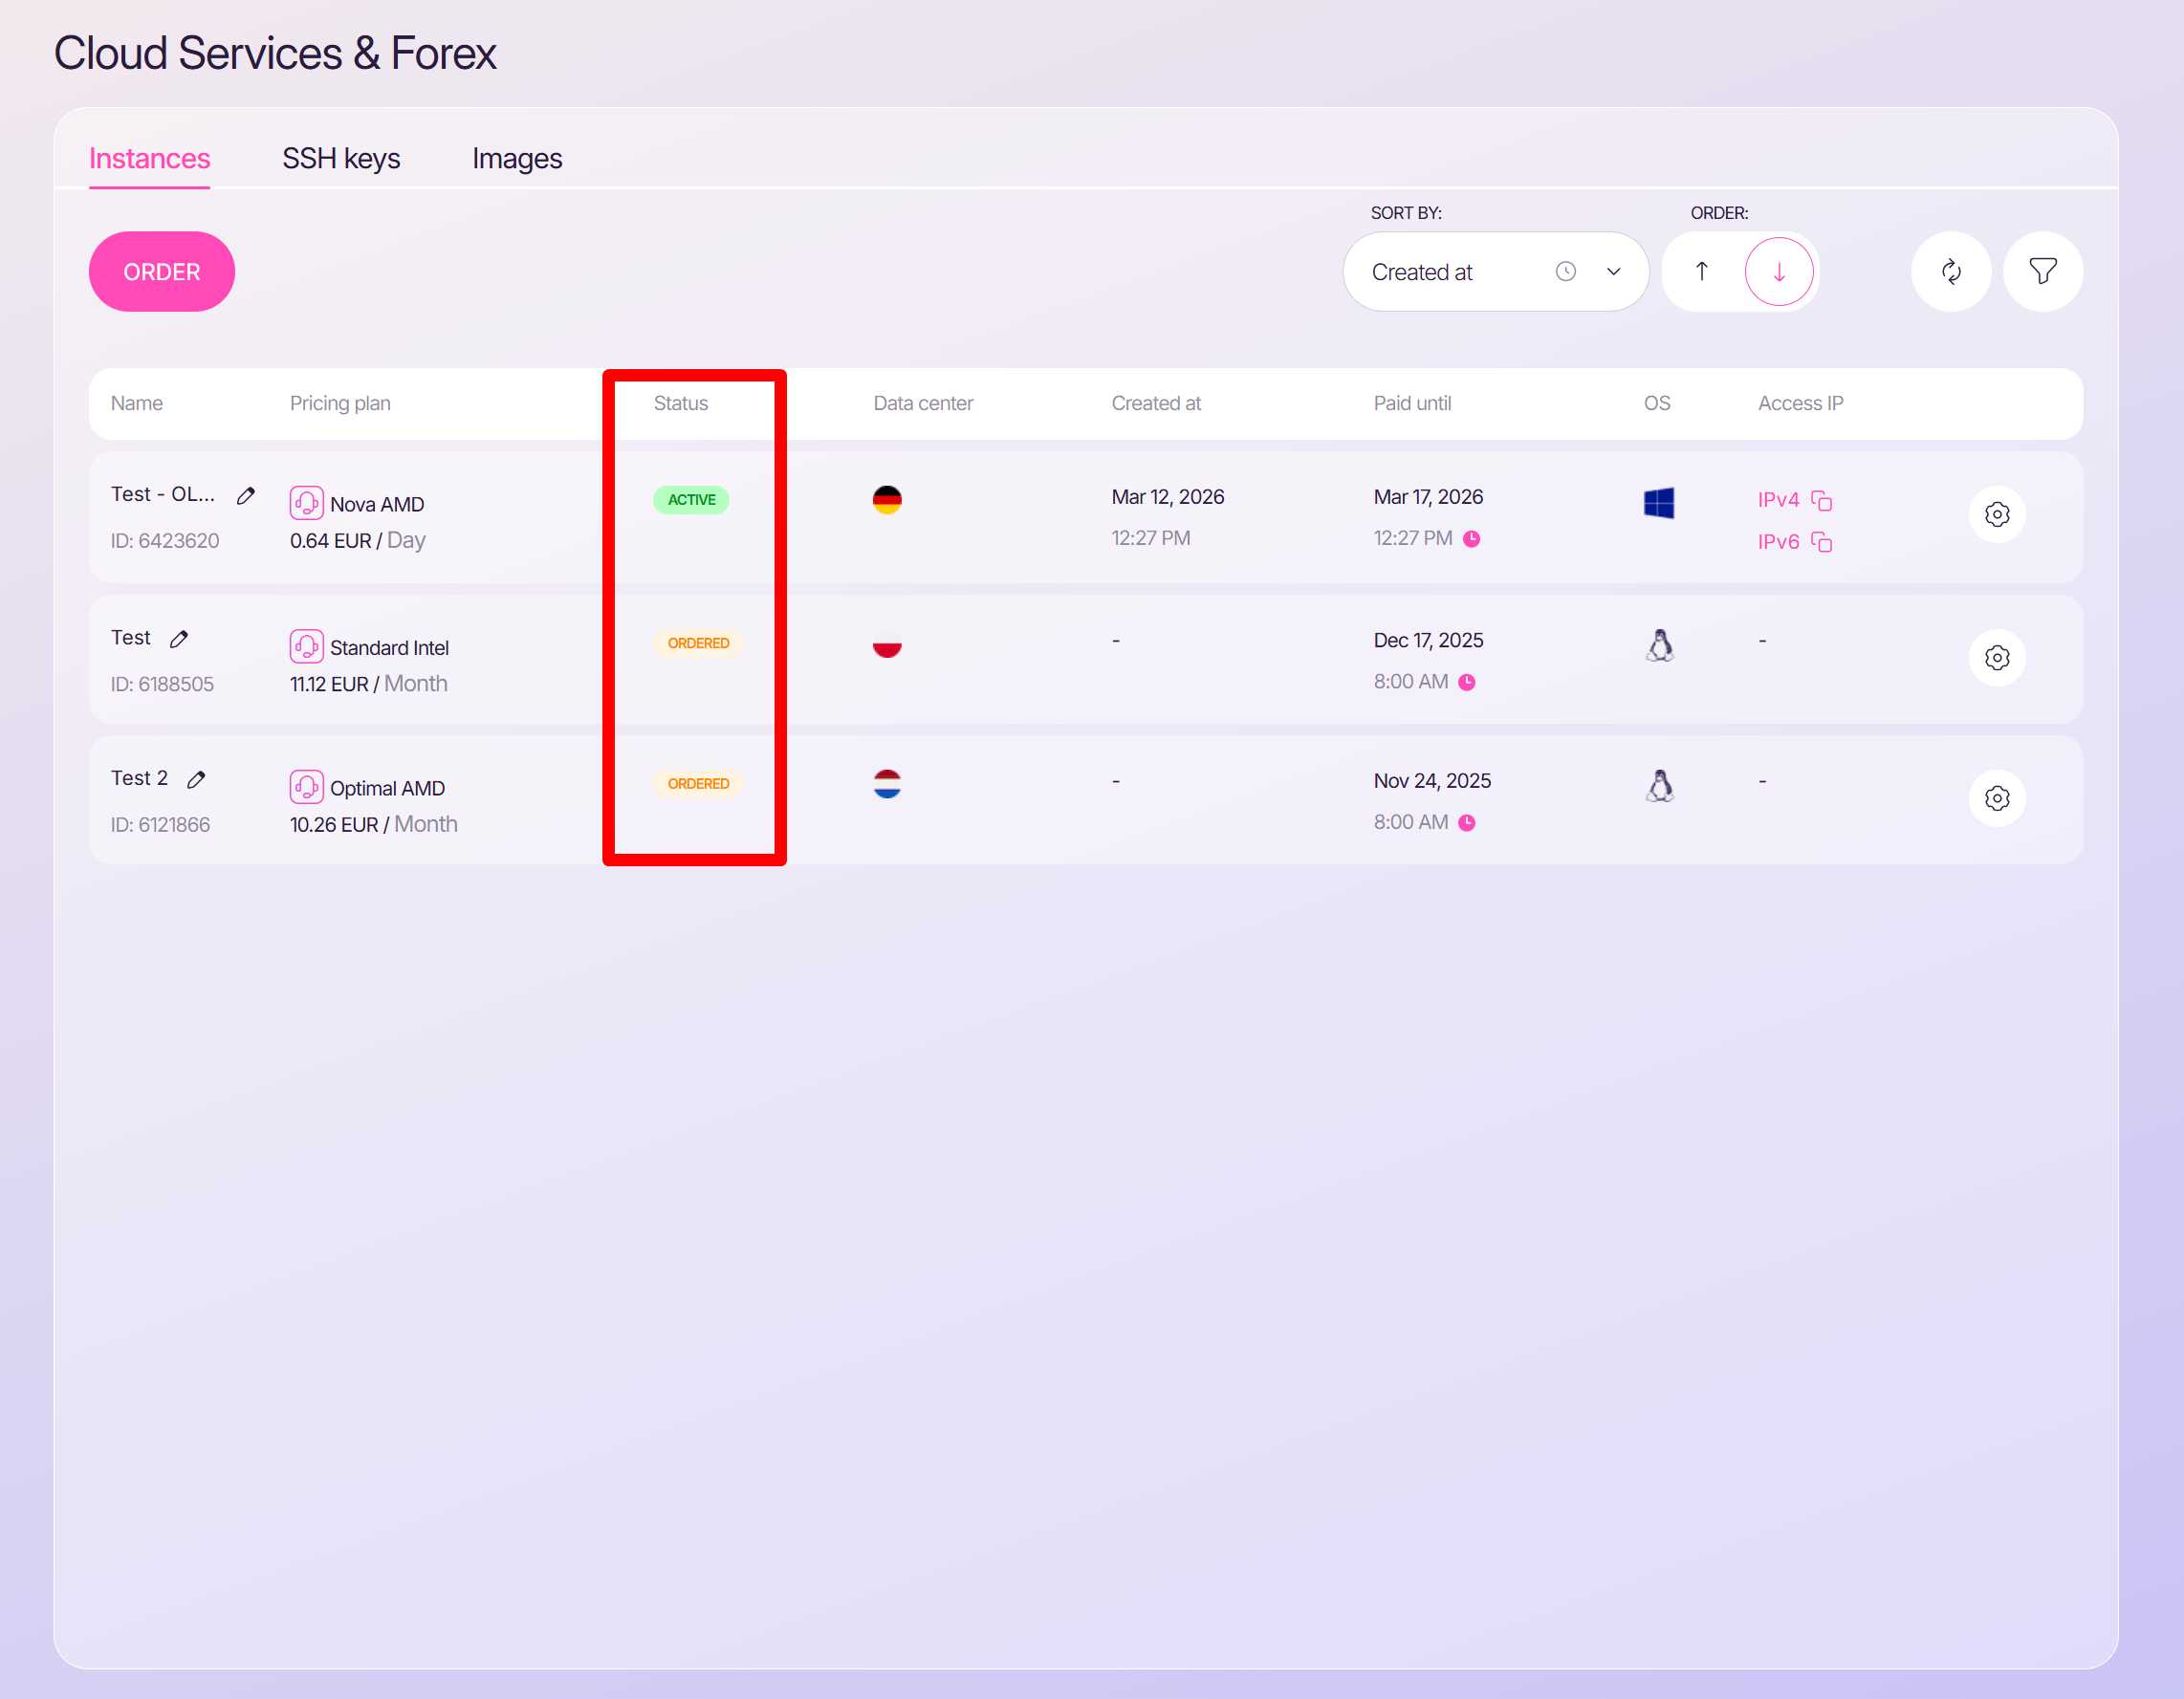
Open your Zomro personal account
Go to your service section: Services > Cloud Services & Forex
Check the server status in the Status column - Active/Suspended
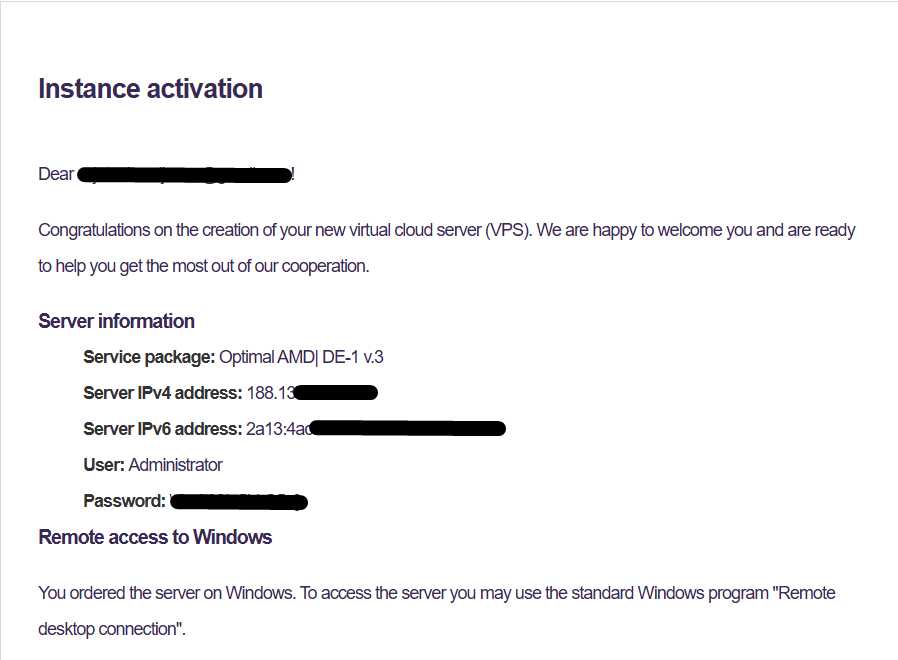
The IP and password are definitely for this server.
Open your Zomro personal account.
Go to your service section: Services > Cloud Services & Forex
Click on the gear icon for the specific server → choose Instructions
If the port was changed - use IP:port.
Windows Port Check
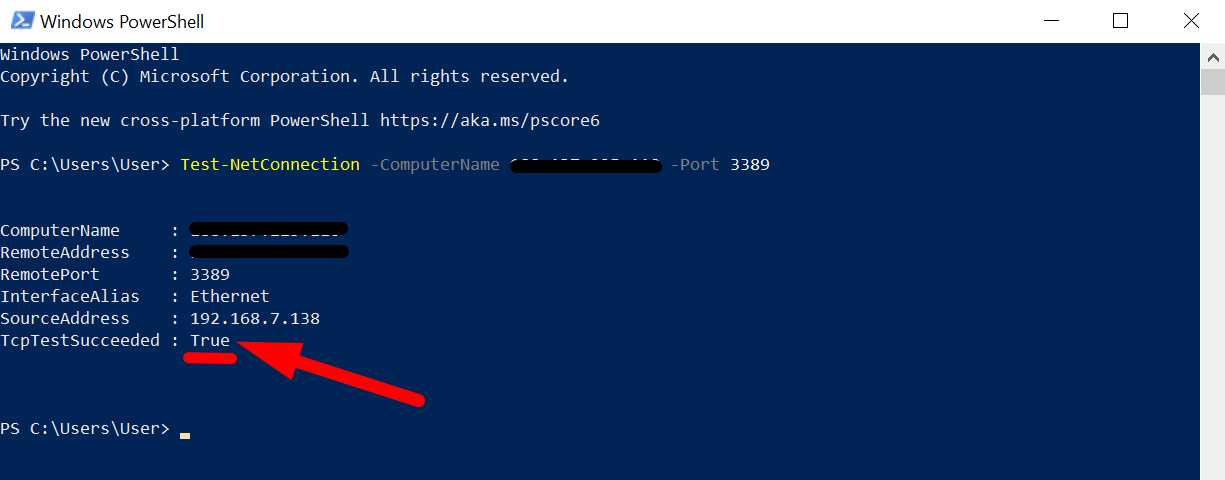
1. Open the standard Windows PowerShell application on your computer.
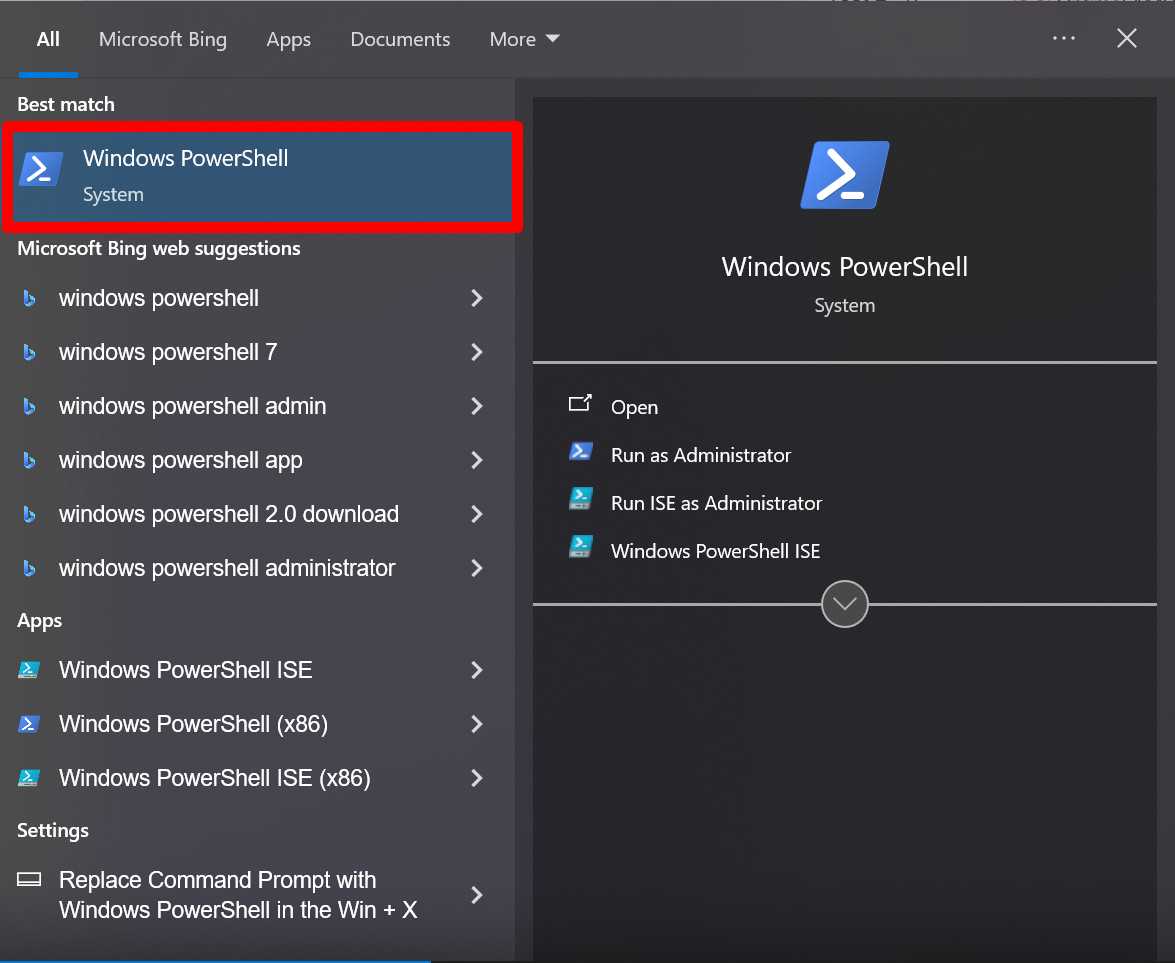
2. In the Windows PowerShell application, enter this command and press Enter on your keyboard:

If TcpTestSucceeded : False - the port is closed/filtered (Firewall, access rules, non-standard port).
If TcpTestSucceeded : True - the port is accessible over the network. The problem is not with the blocking of this port along the connection path.
Frequent Errors
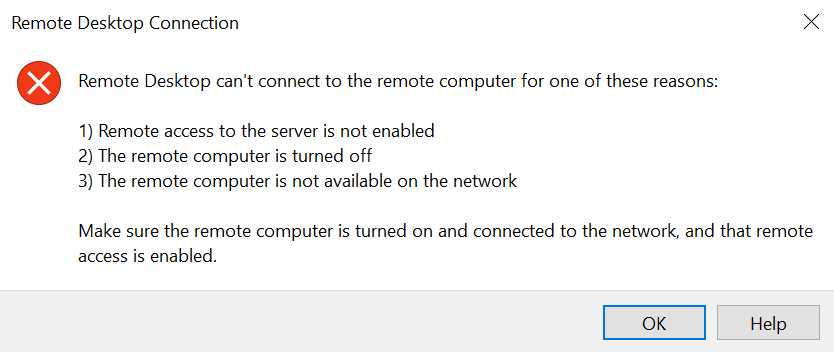
“Remote Desktop can’t connect…” → network/port problem. Server is off.
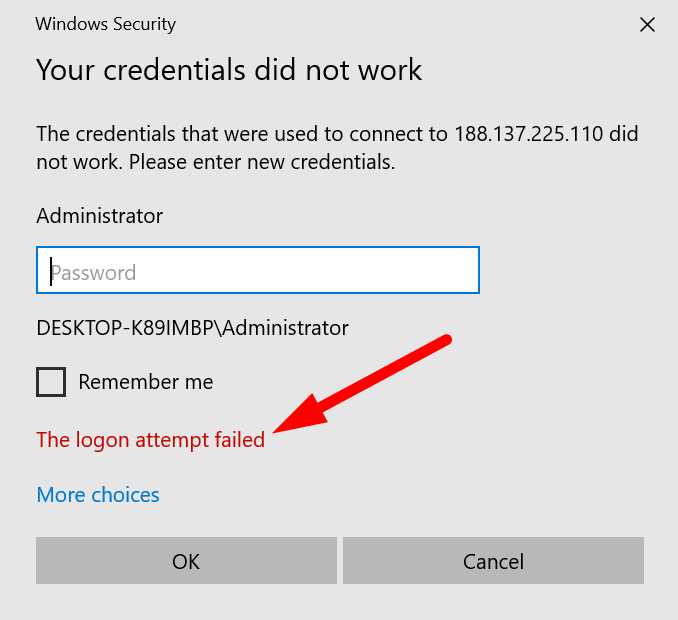
“The logon attempt failed” → incorrect login/password, Caps Lock, keyboard layout.
Black screen / very slow → reduce quality in the Experience tab.
What to send to support if you can't solve the problem yourself
Server IP you are trying to connect to
Date and time of the connection attempt to the server
Text/screenshot of the error
Result of Test-NetConnection from the Windows PowerShell application
Connecting with macOS
Installing the Windows App
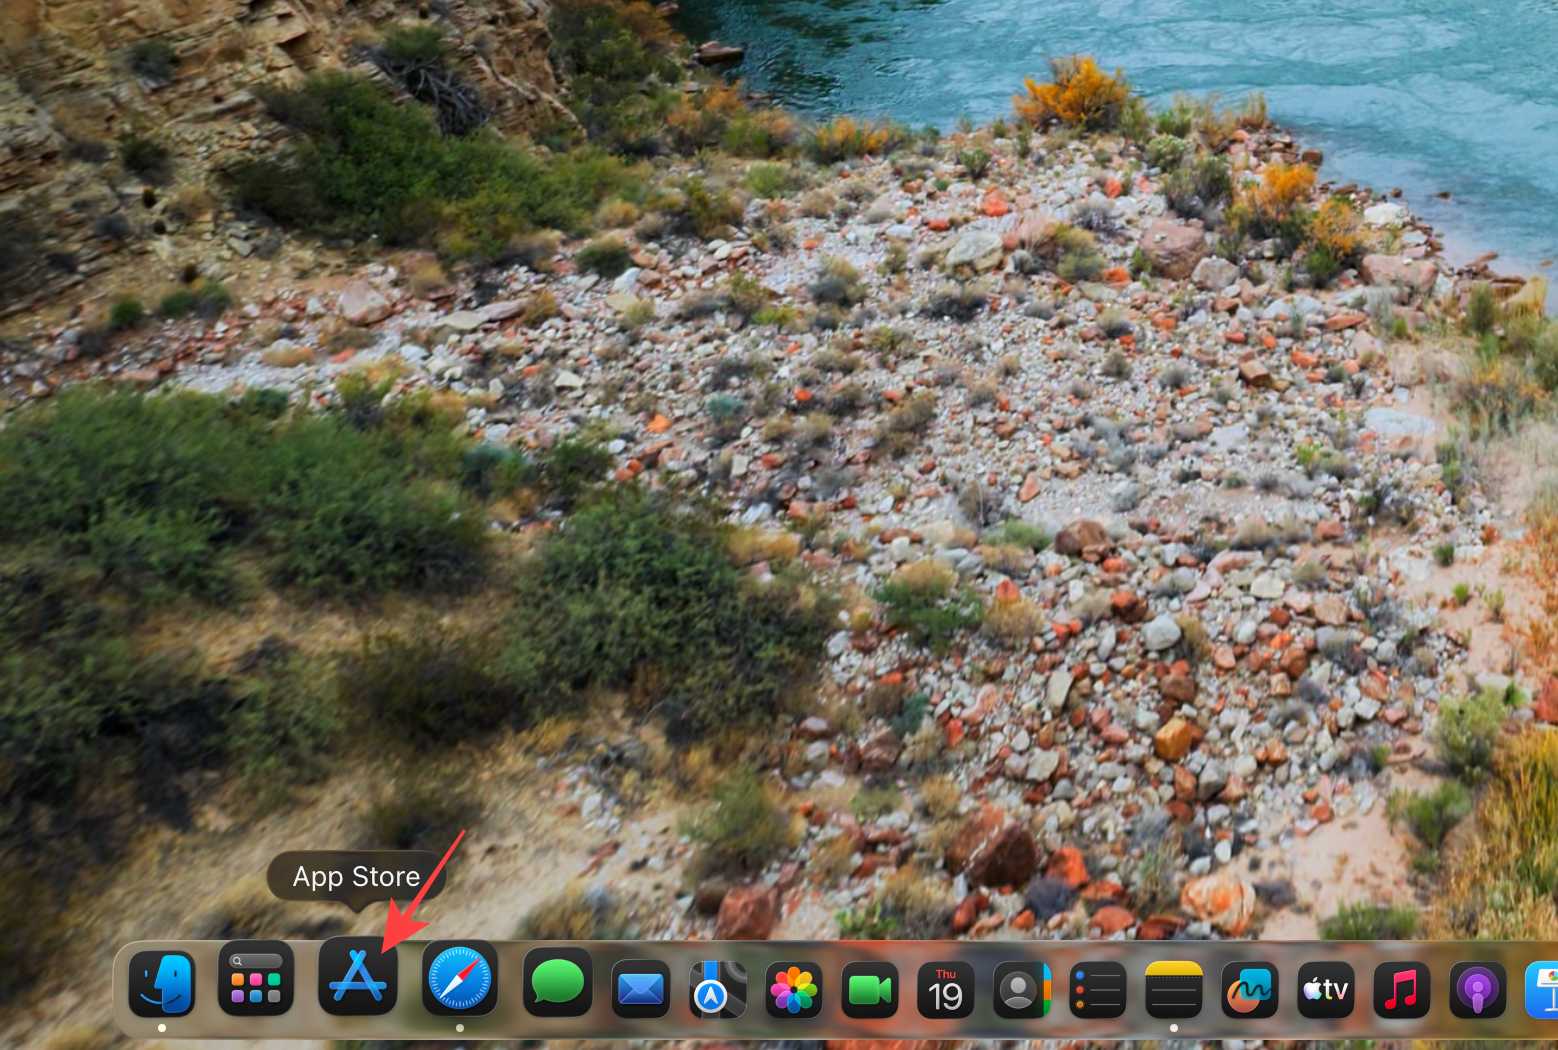
Open the AppStore on your Mac.
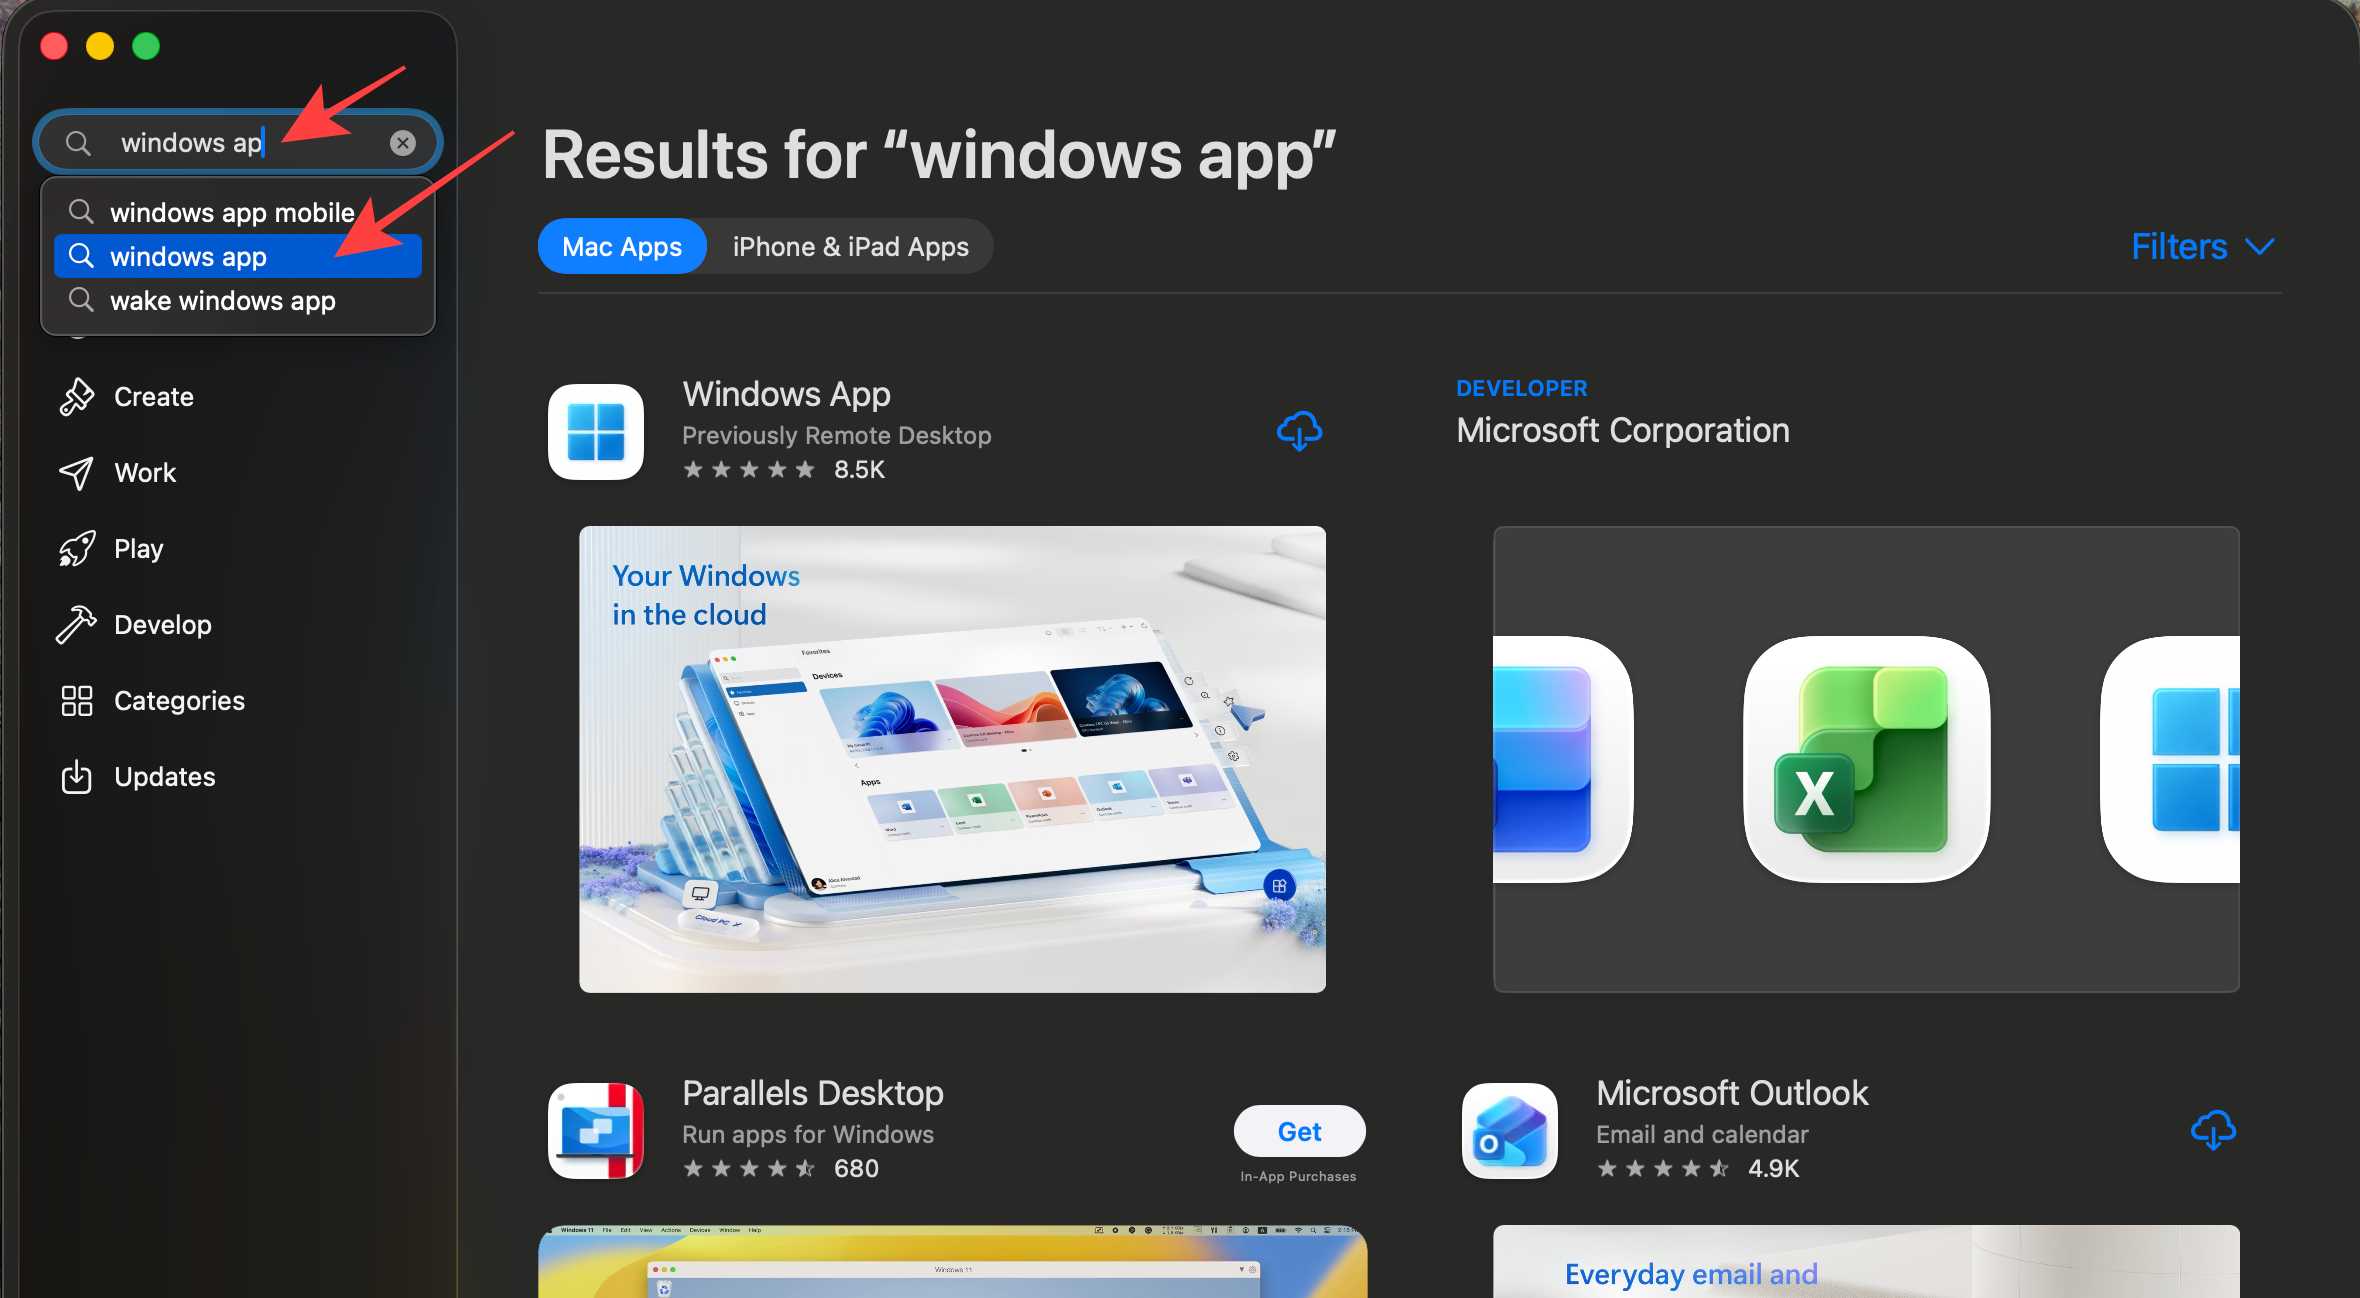
Enter “Windows App” in the search bar and select the application from the list.
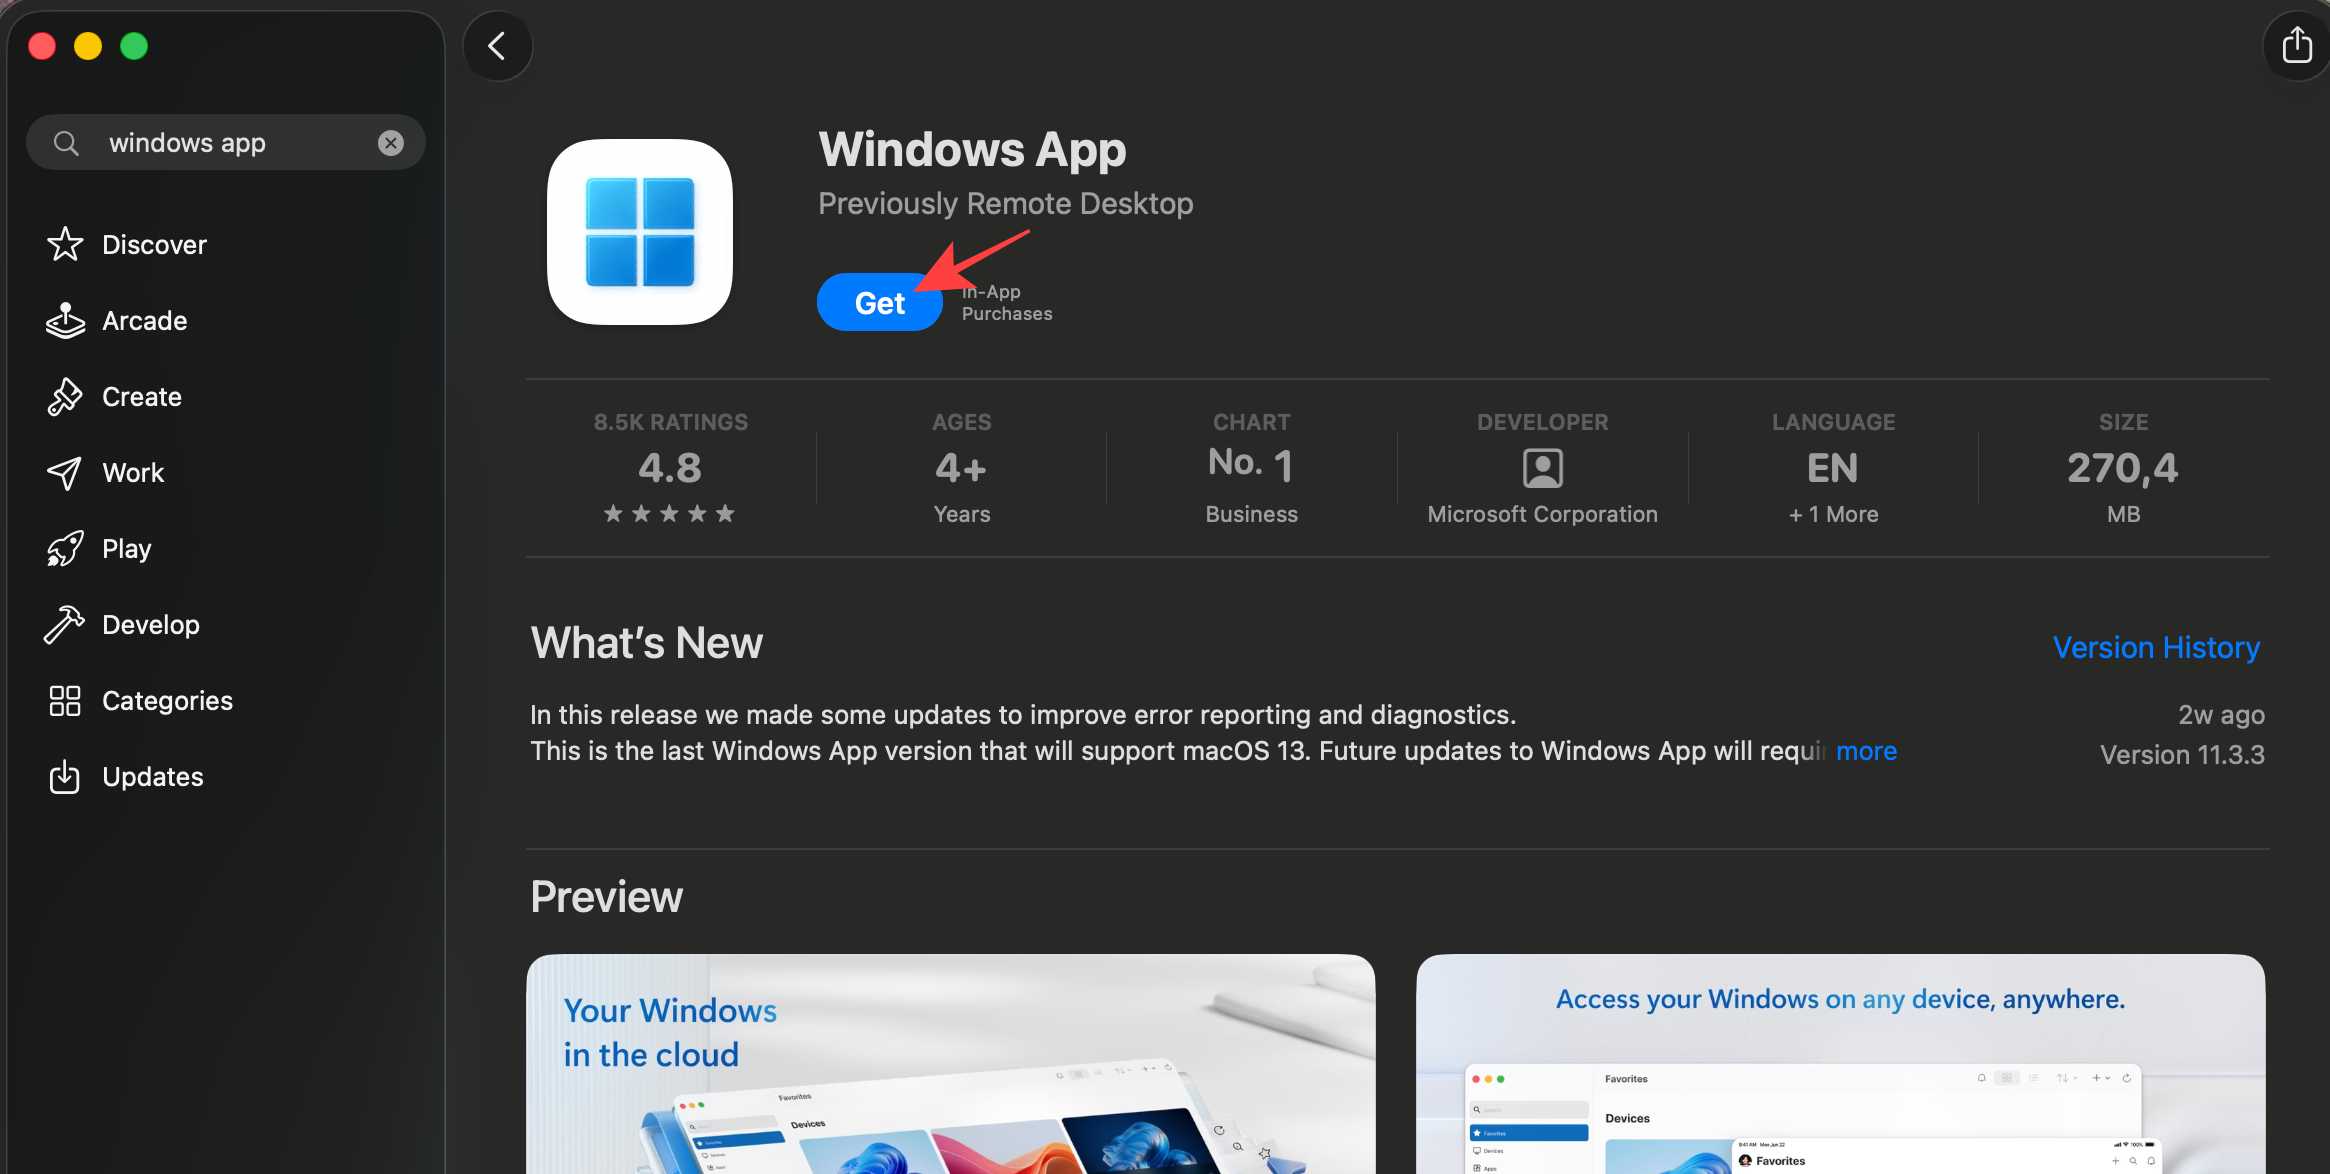
Click “Get” to download and install the application on your Mac.
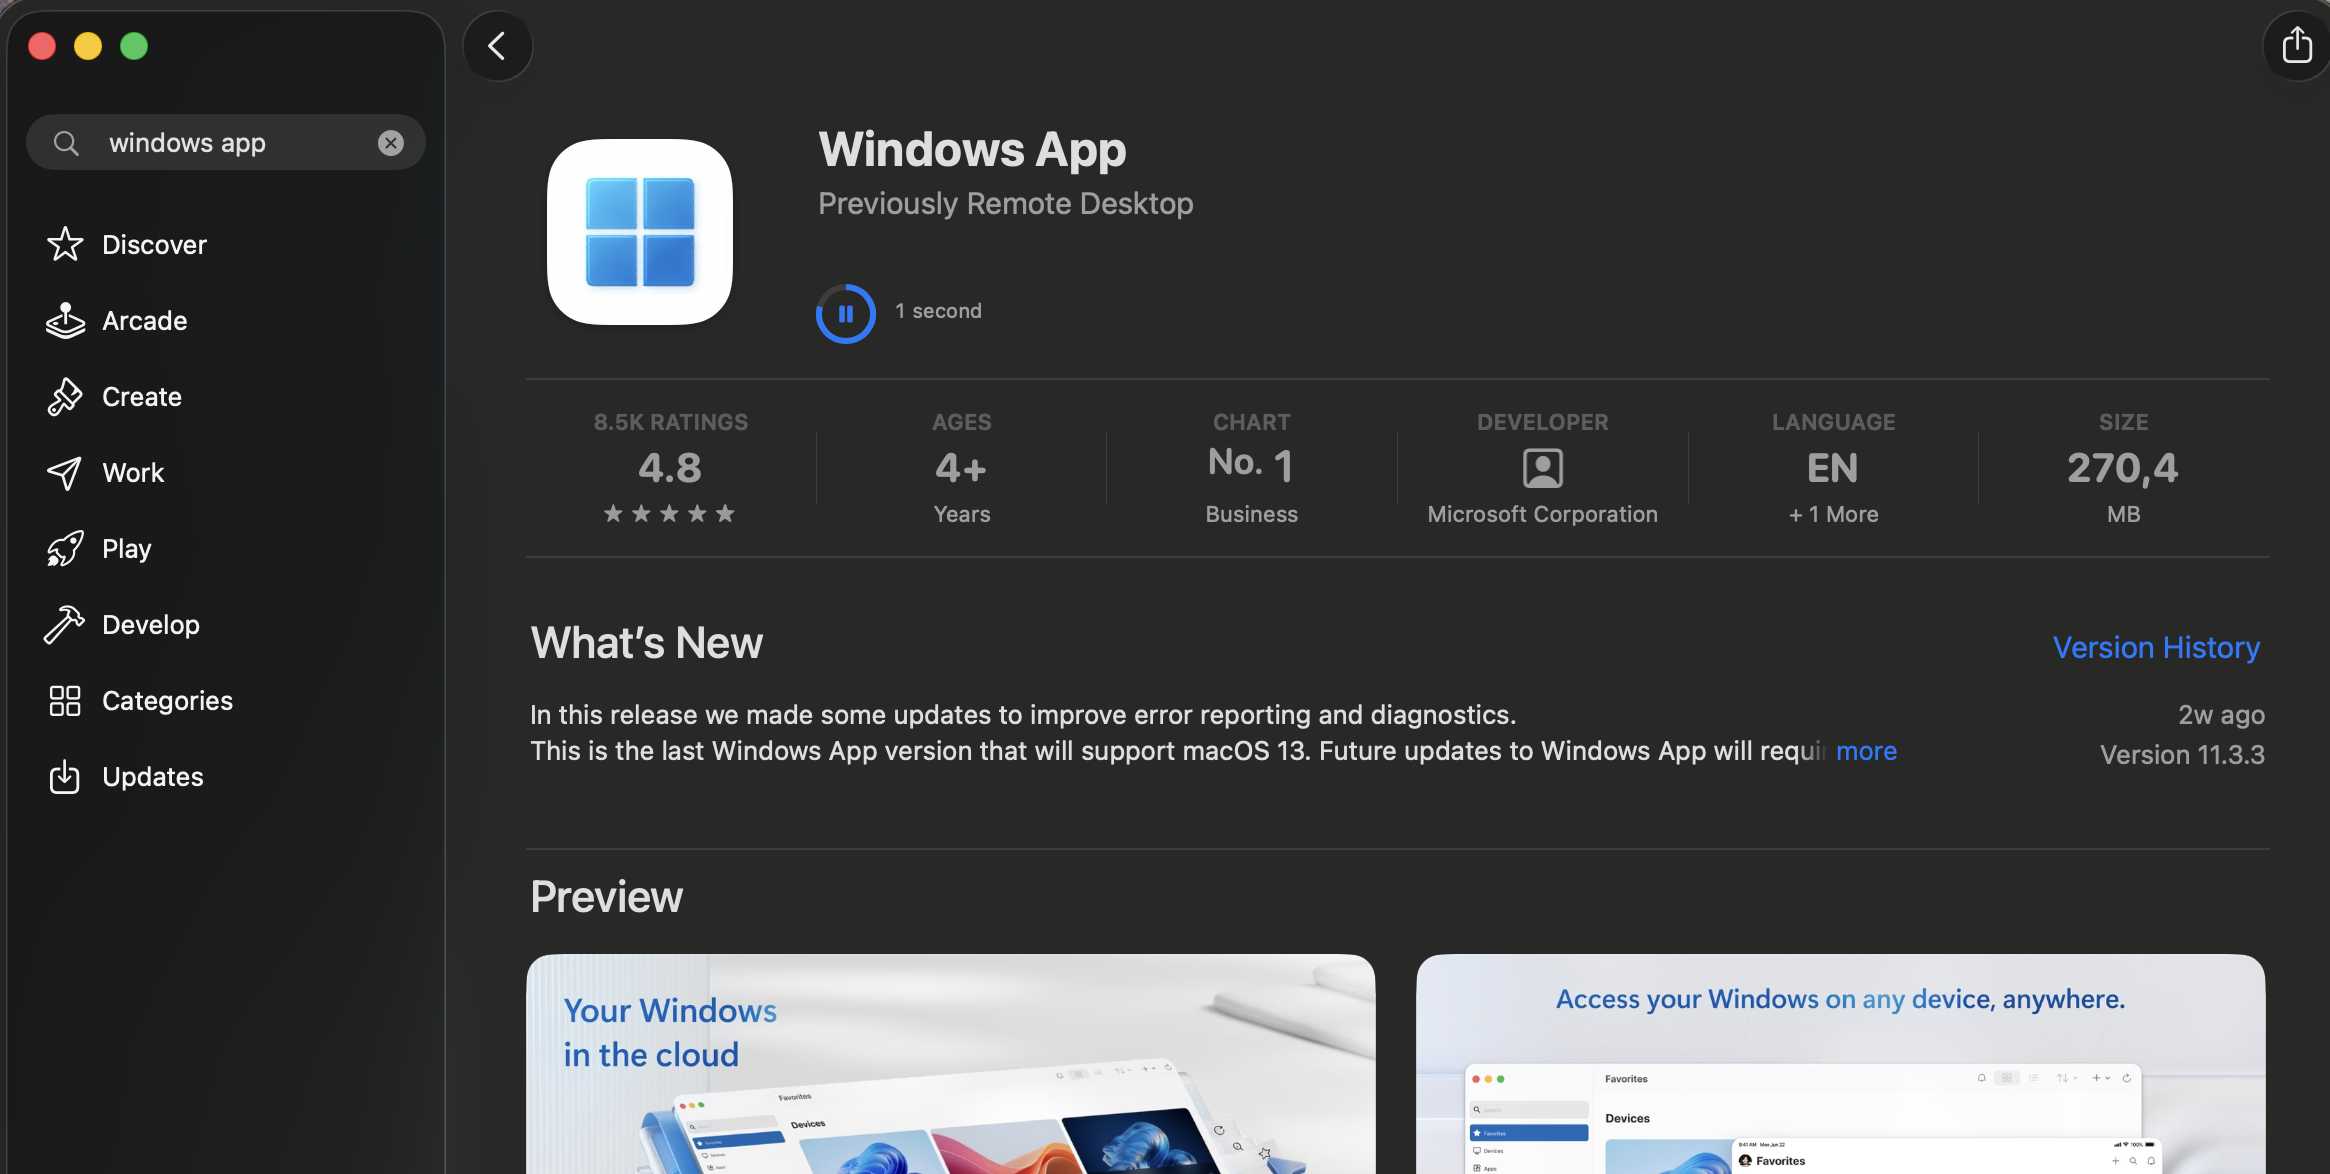
Wait for the download and installation process to complete.
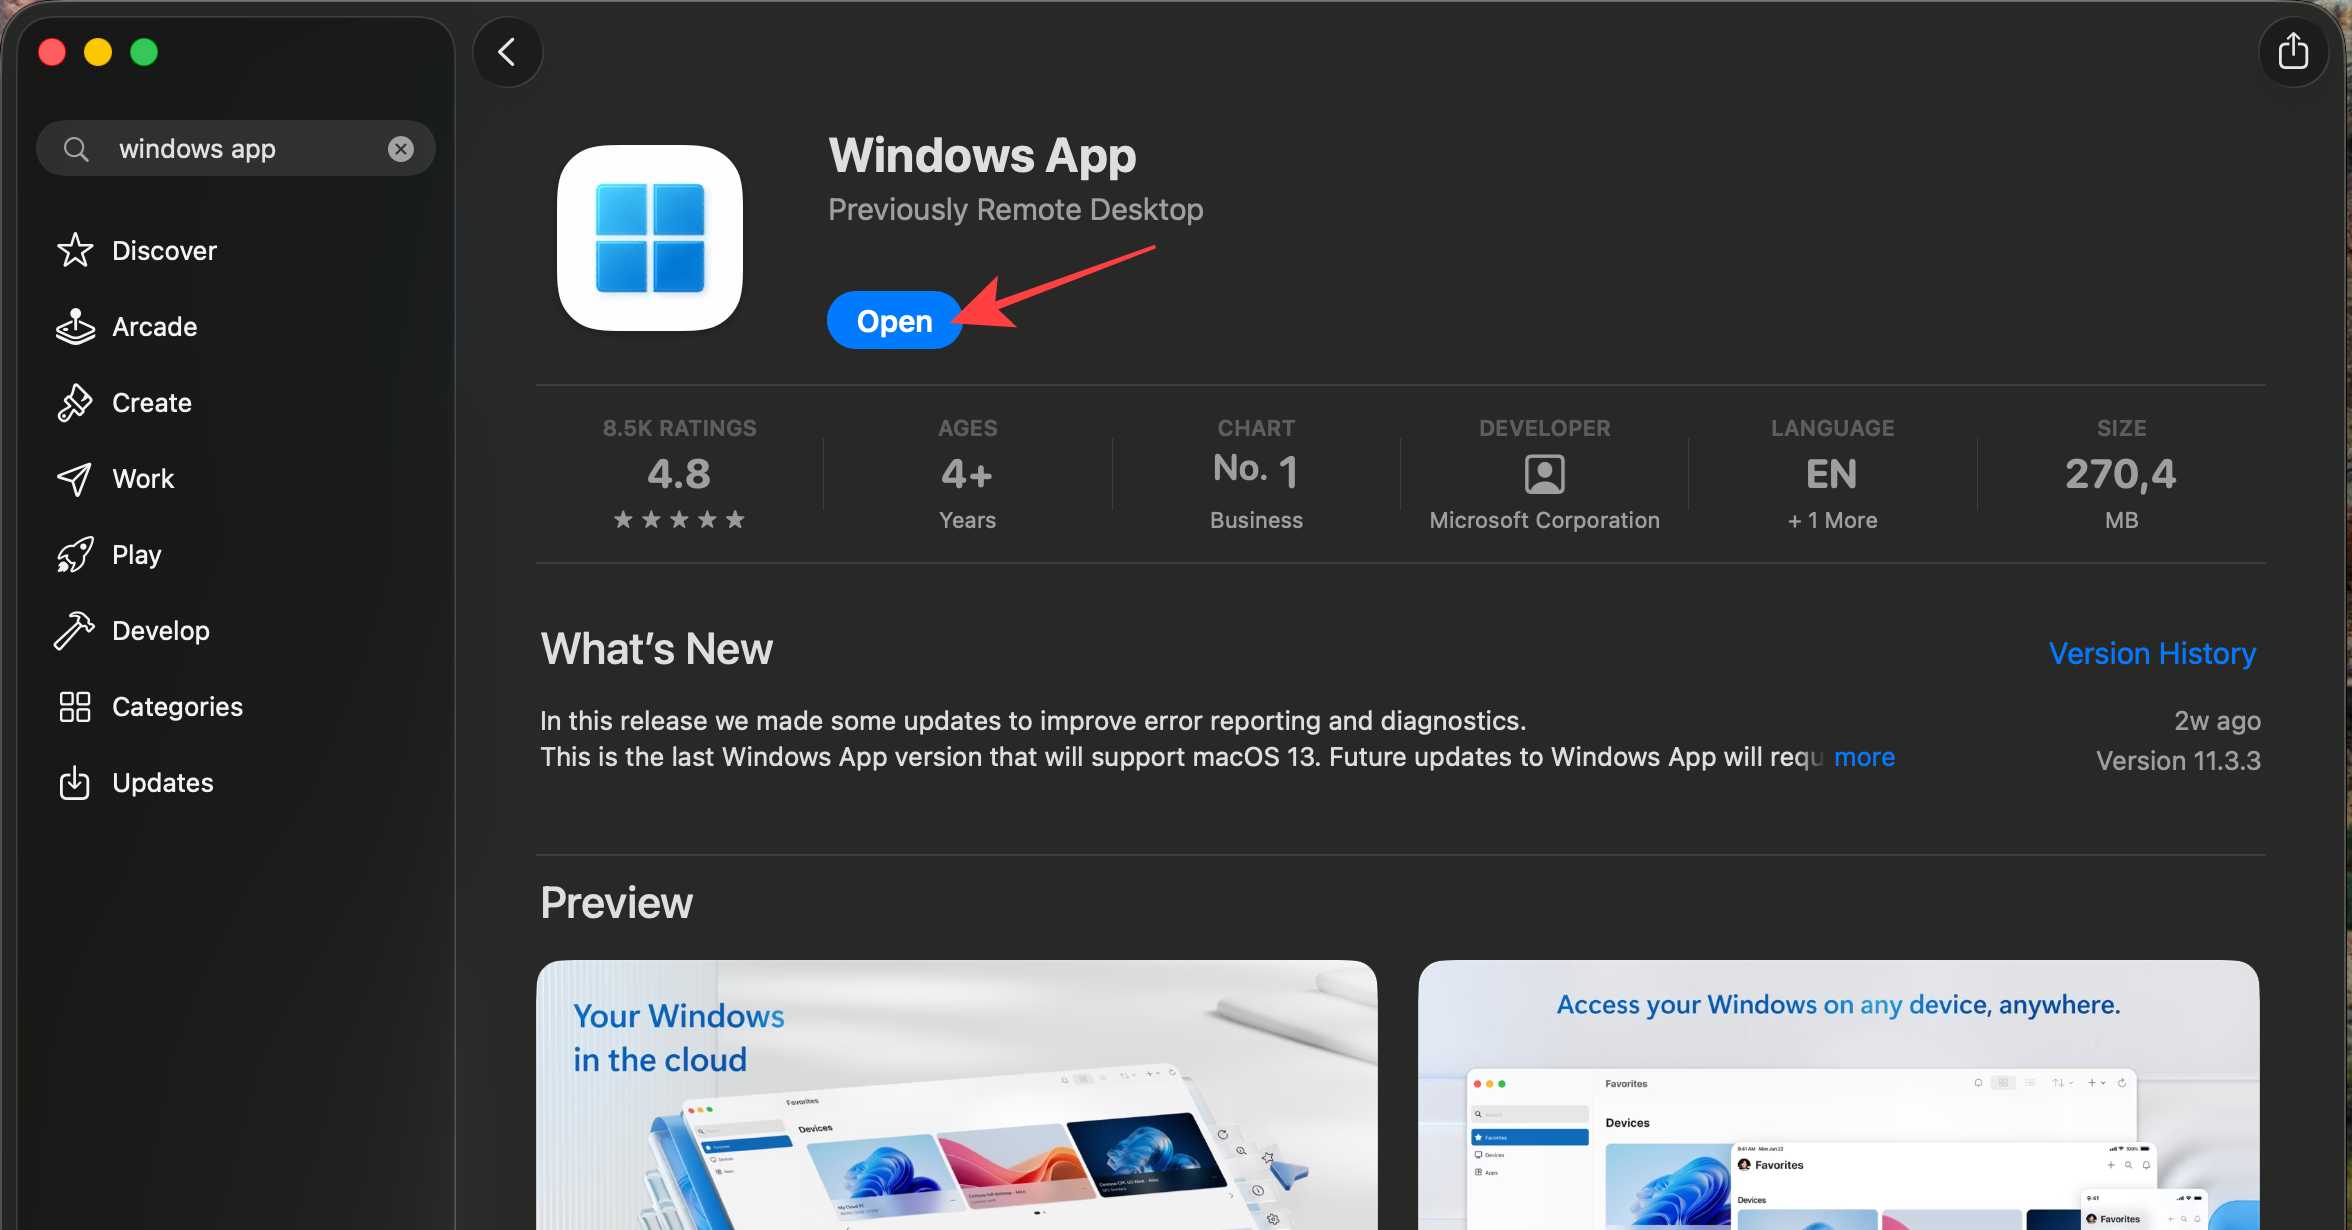
When the process is complete, the button “Open” will appear. Click on it to open the application.
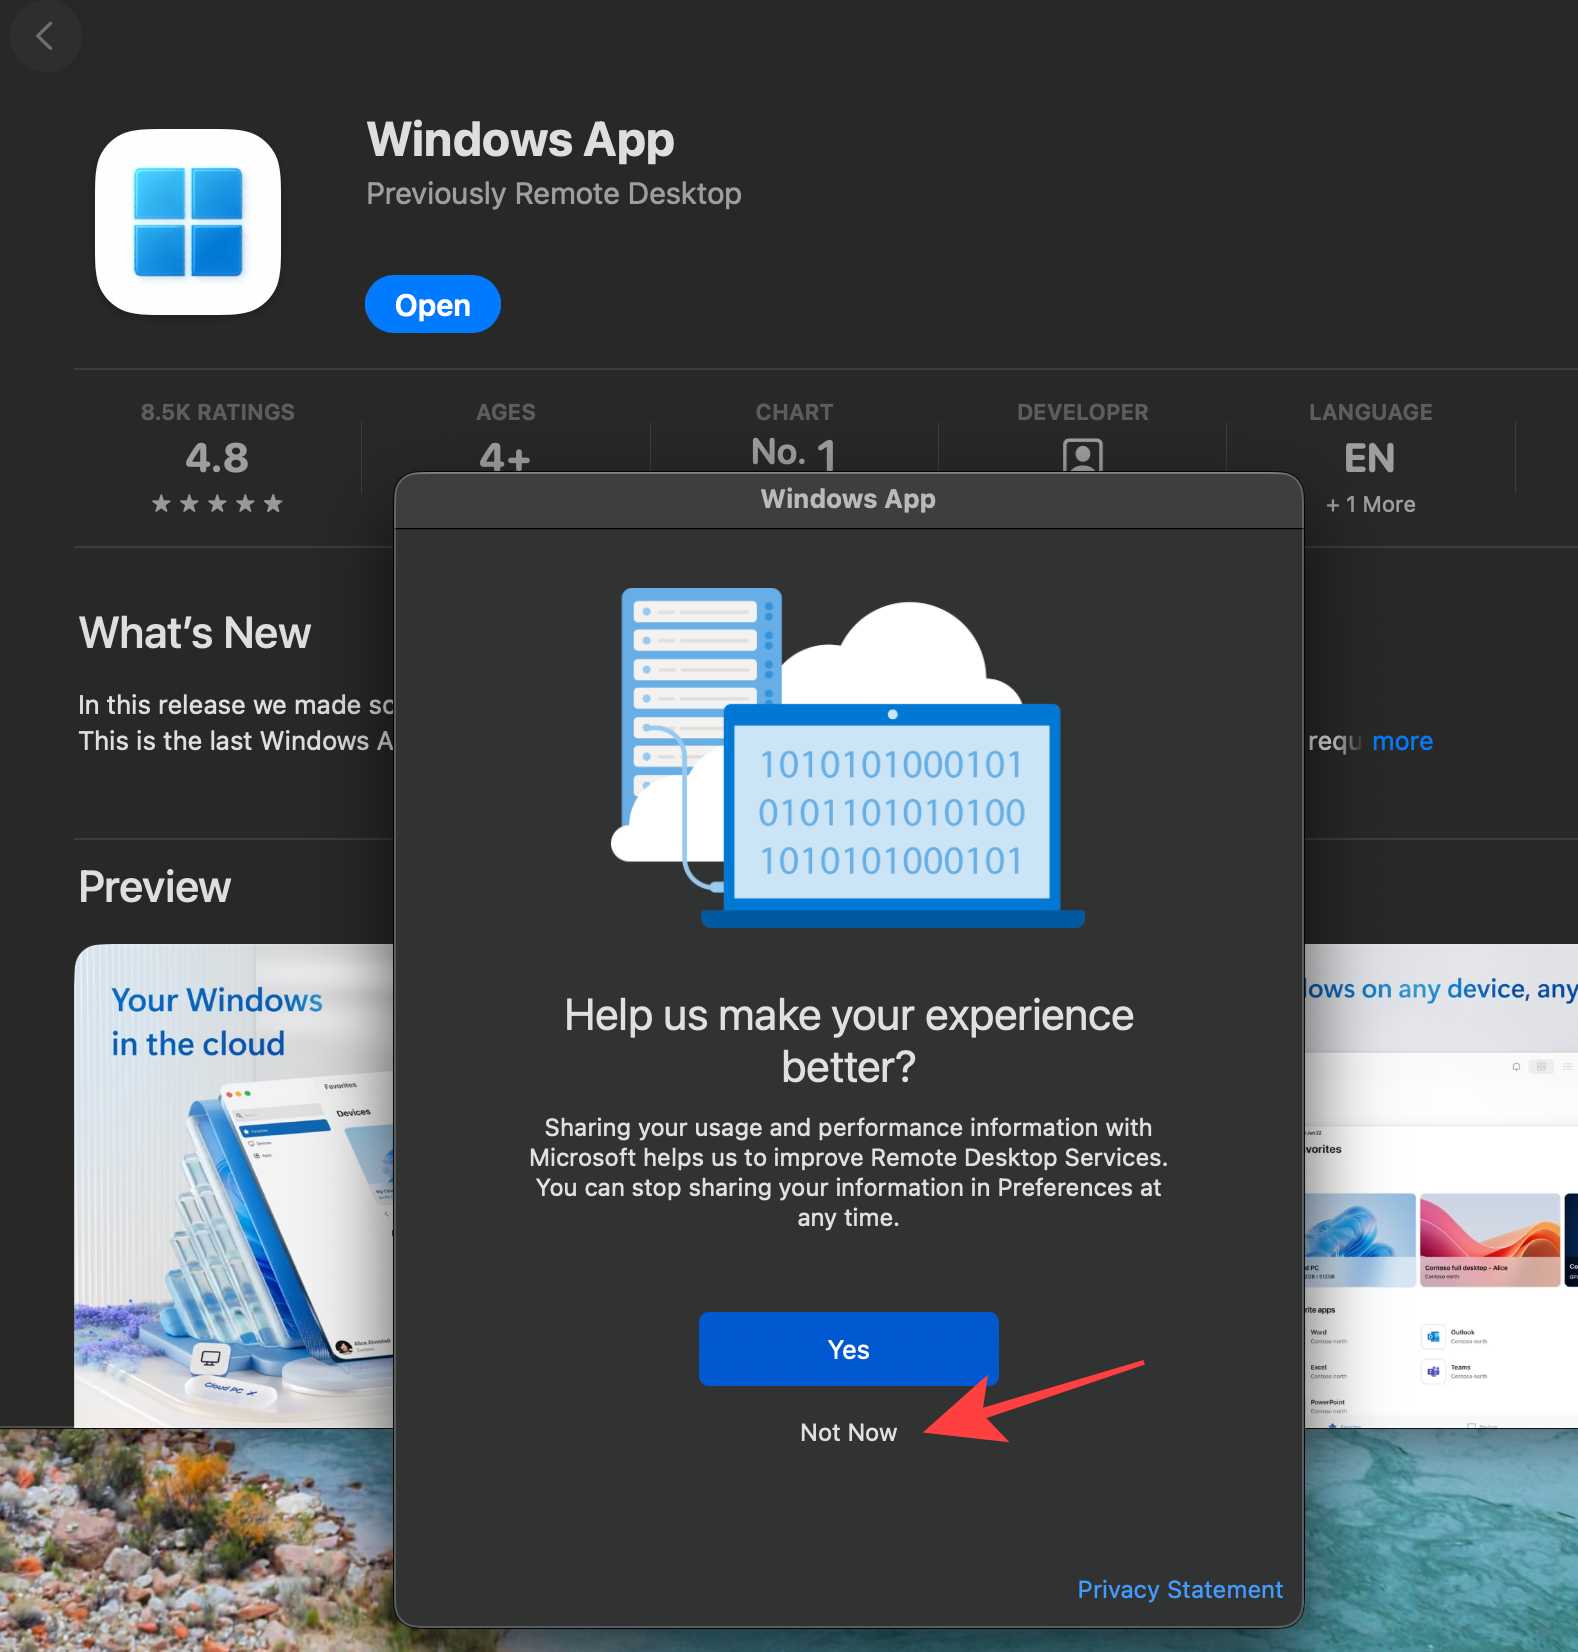
Click “Yes” or “Not now”, depending on whether you want to share information about your app usage.
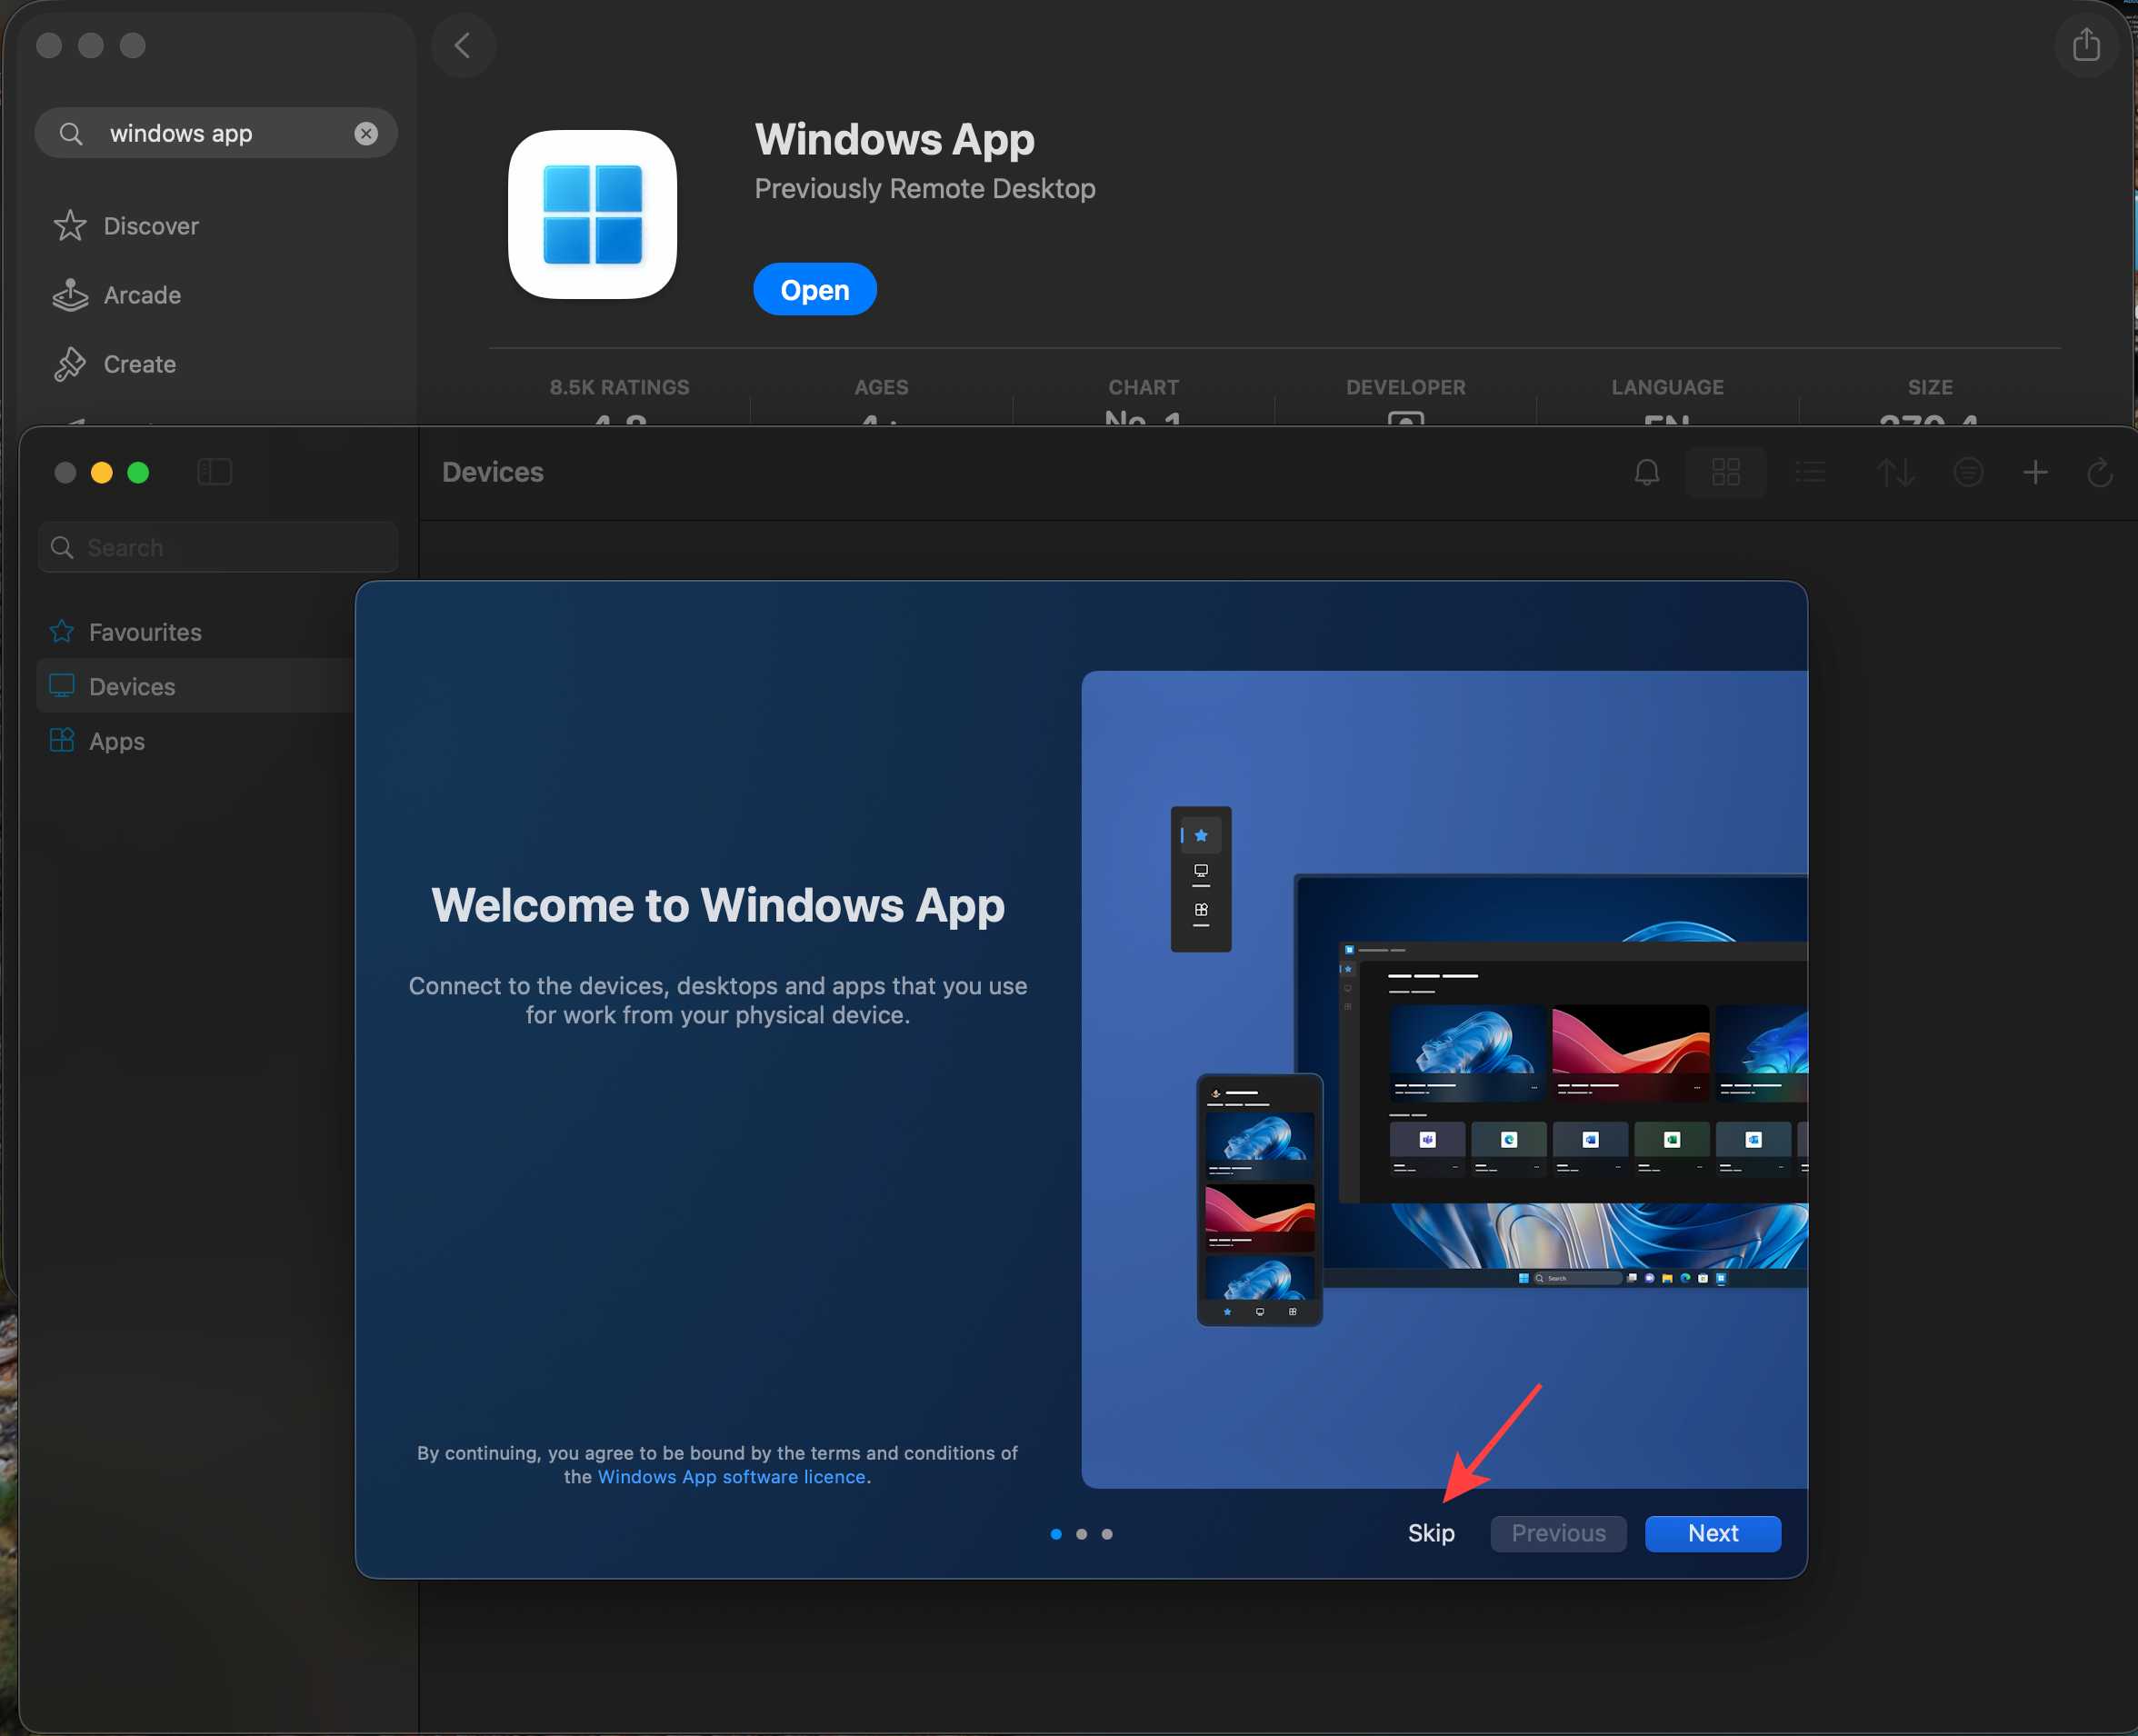
You can view information about the application by clicking the button “Next”, or click “Skip” if you do not want to.
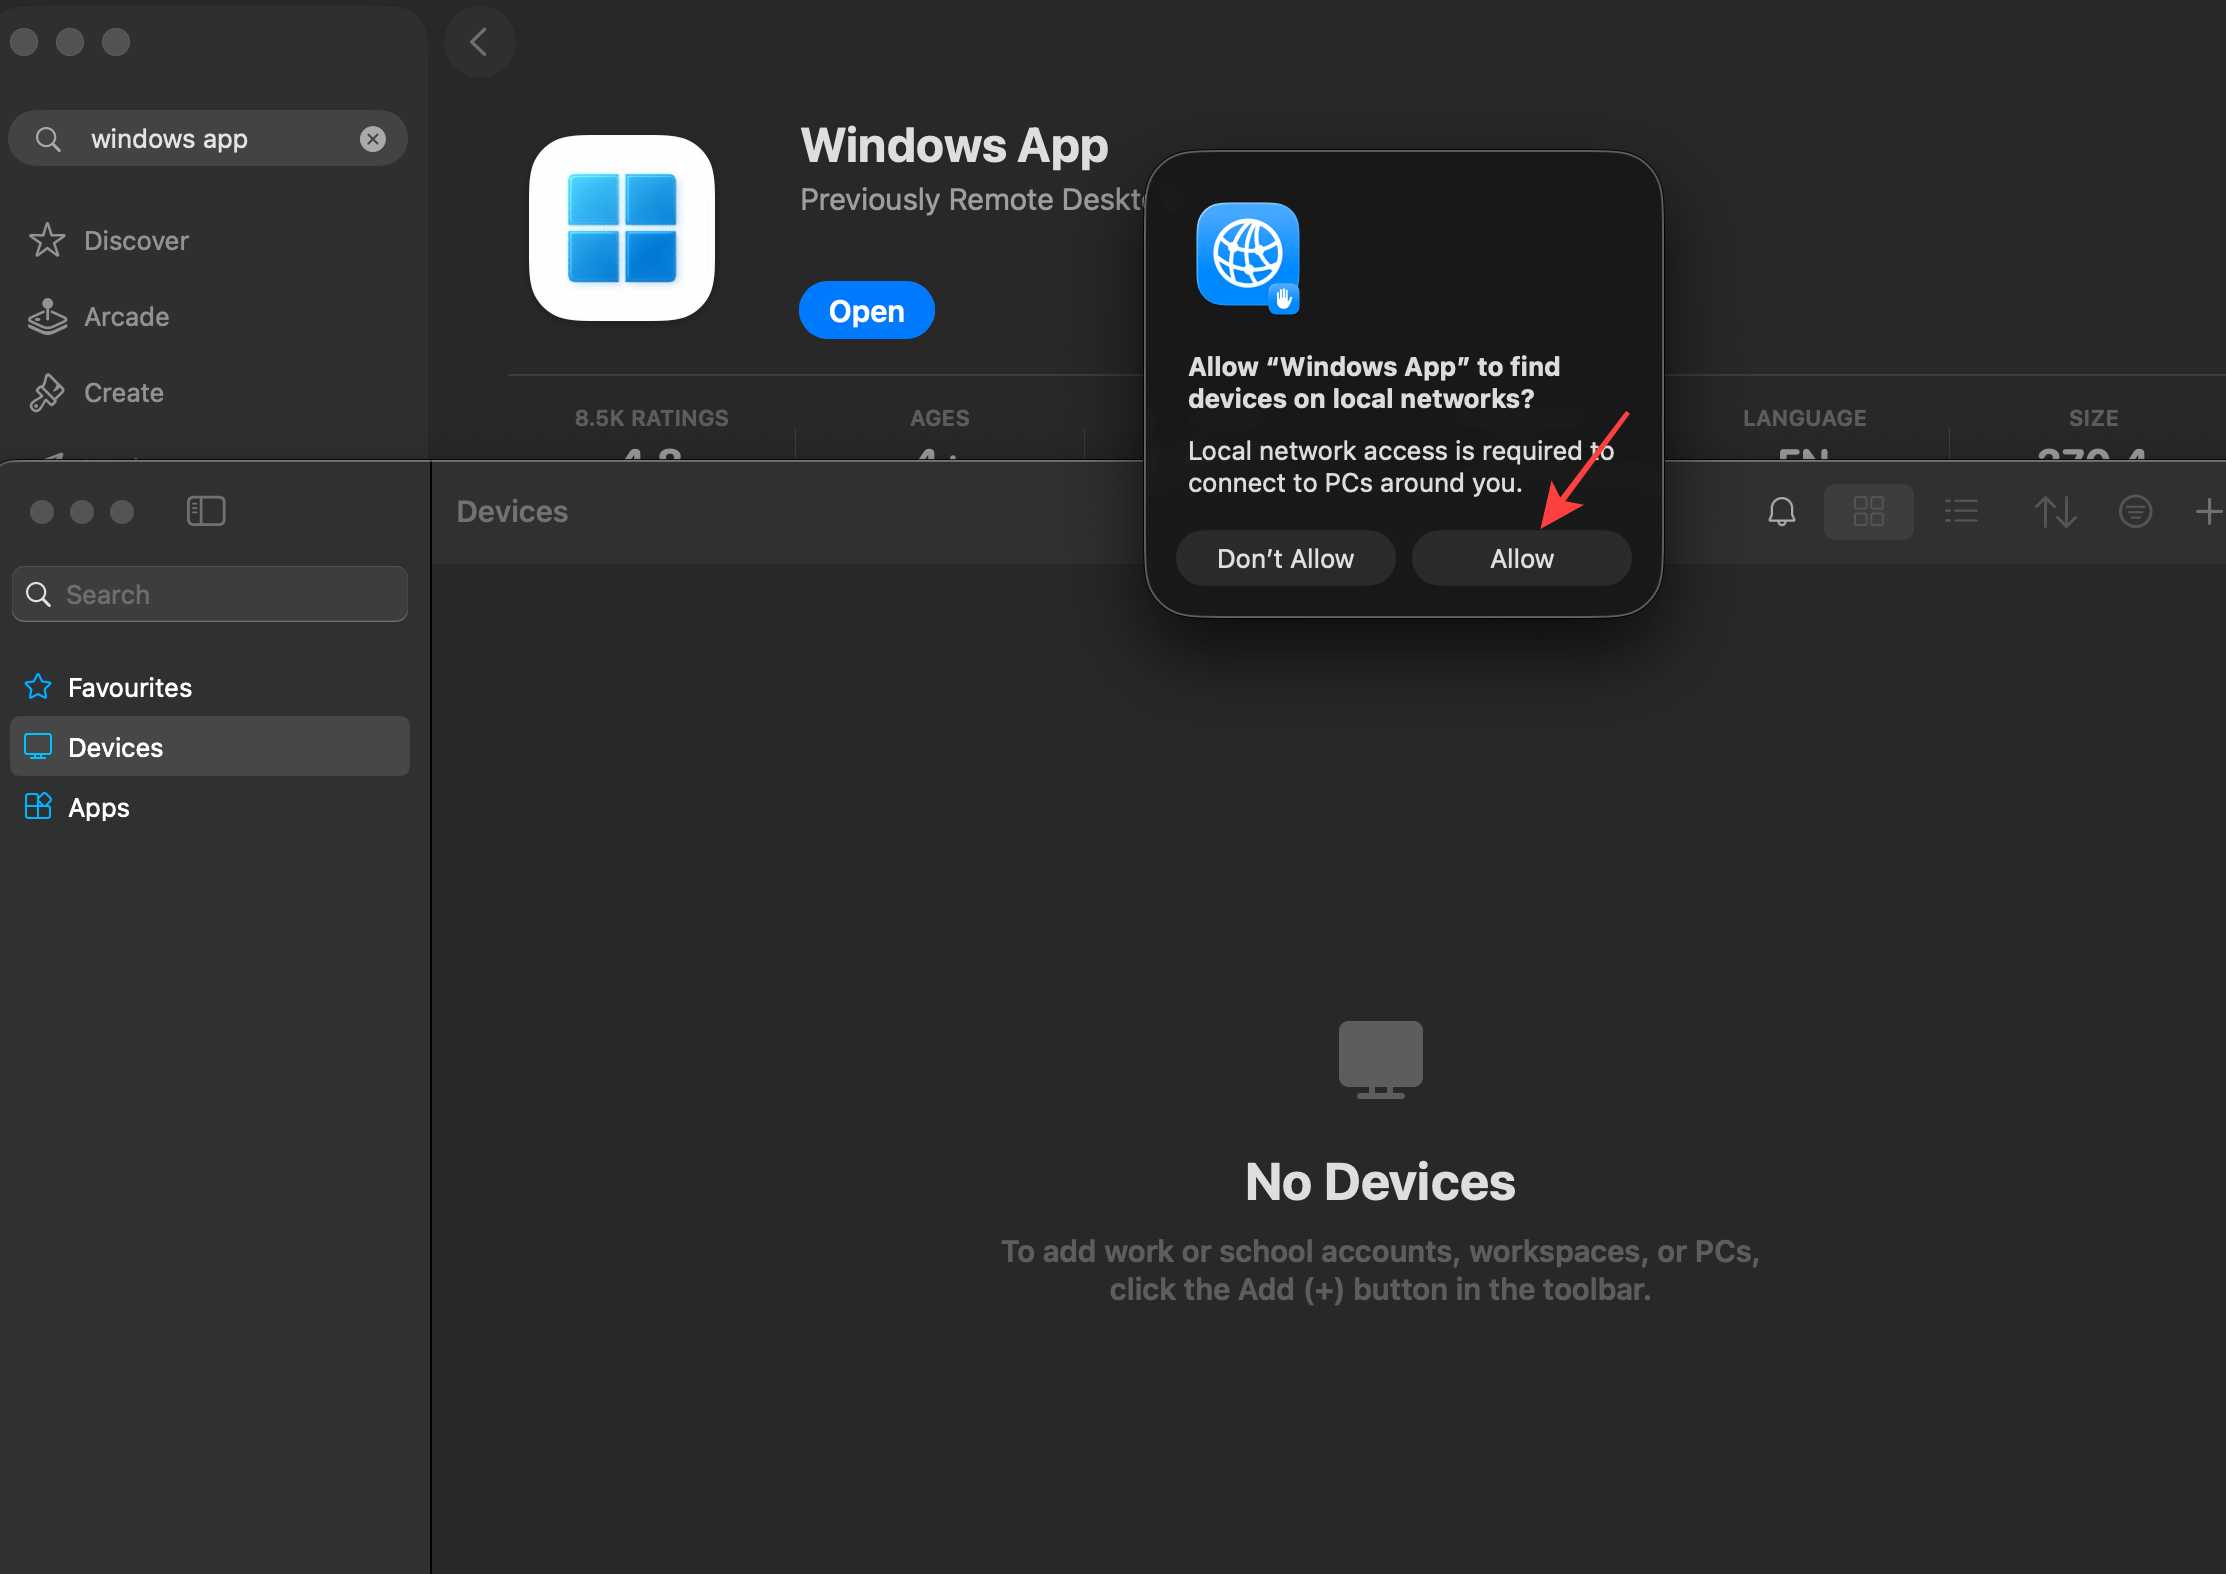
If you want to allow the “Windows App” application to find devices on local networks, click “Allow”.
Setting up the connection in the Windows App
The application is already open. Go to the “Devices” tab.
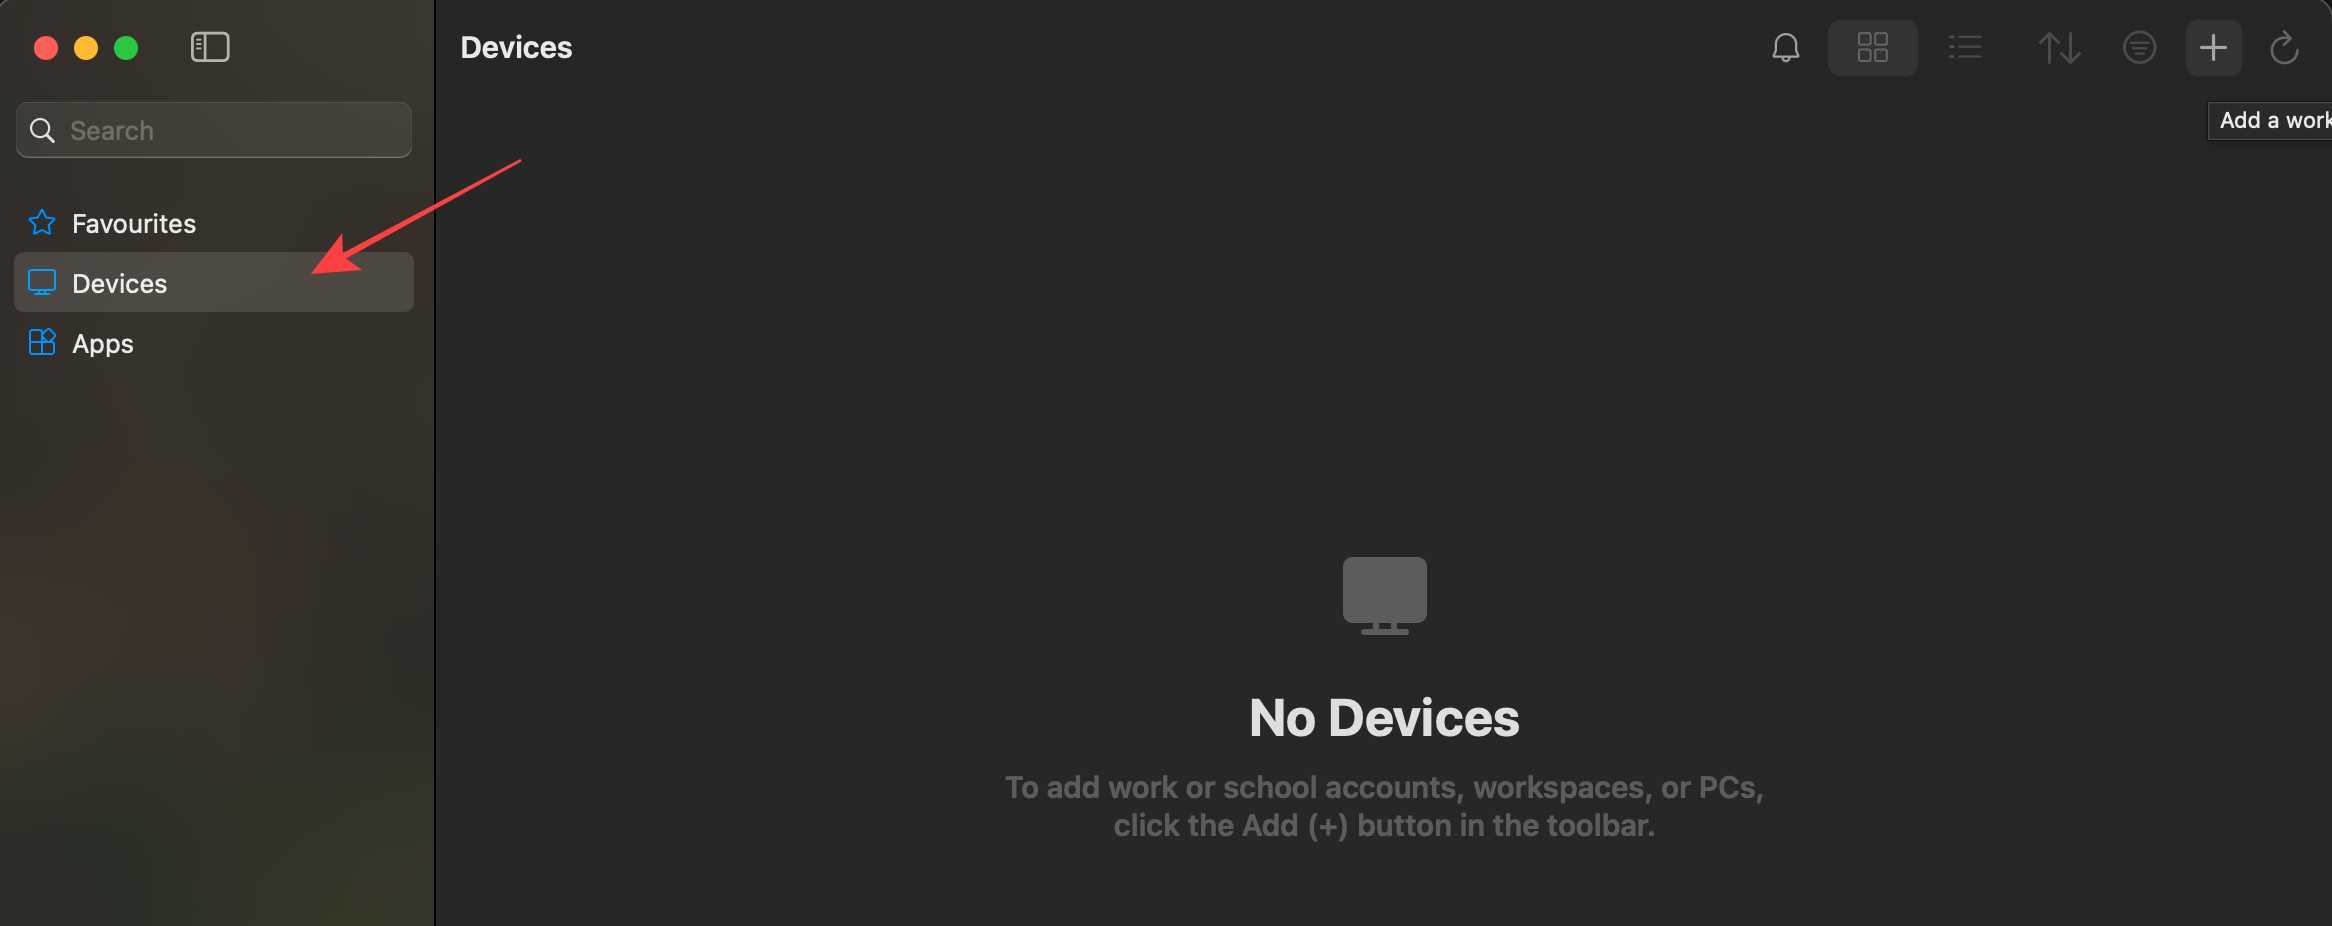
Then hover the cursor over the + in the upper right corner of the open window.
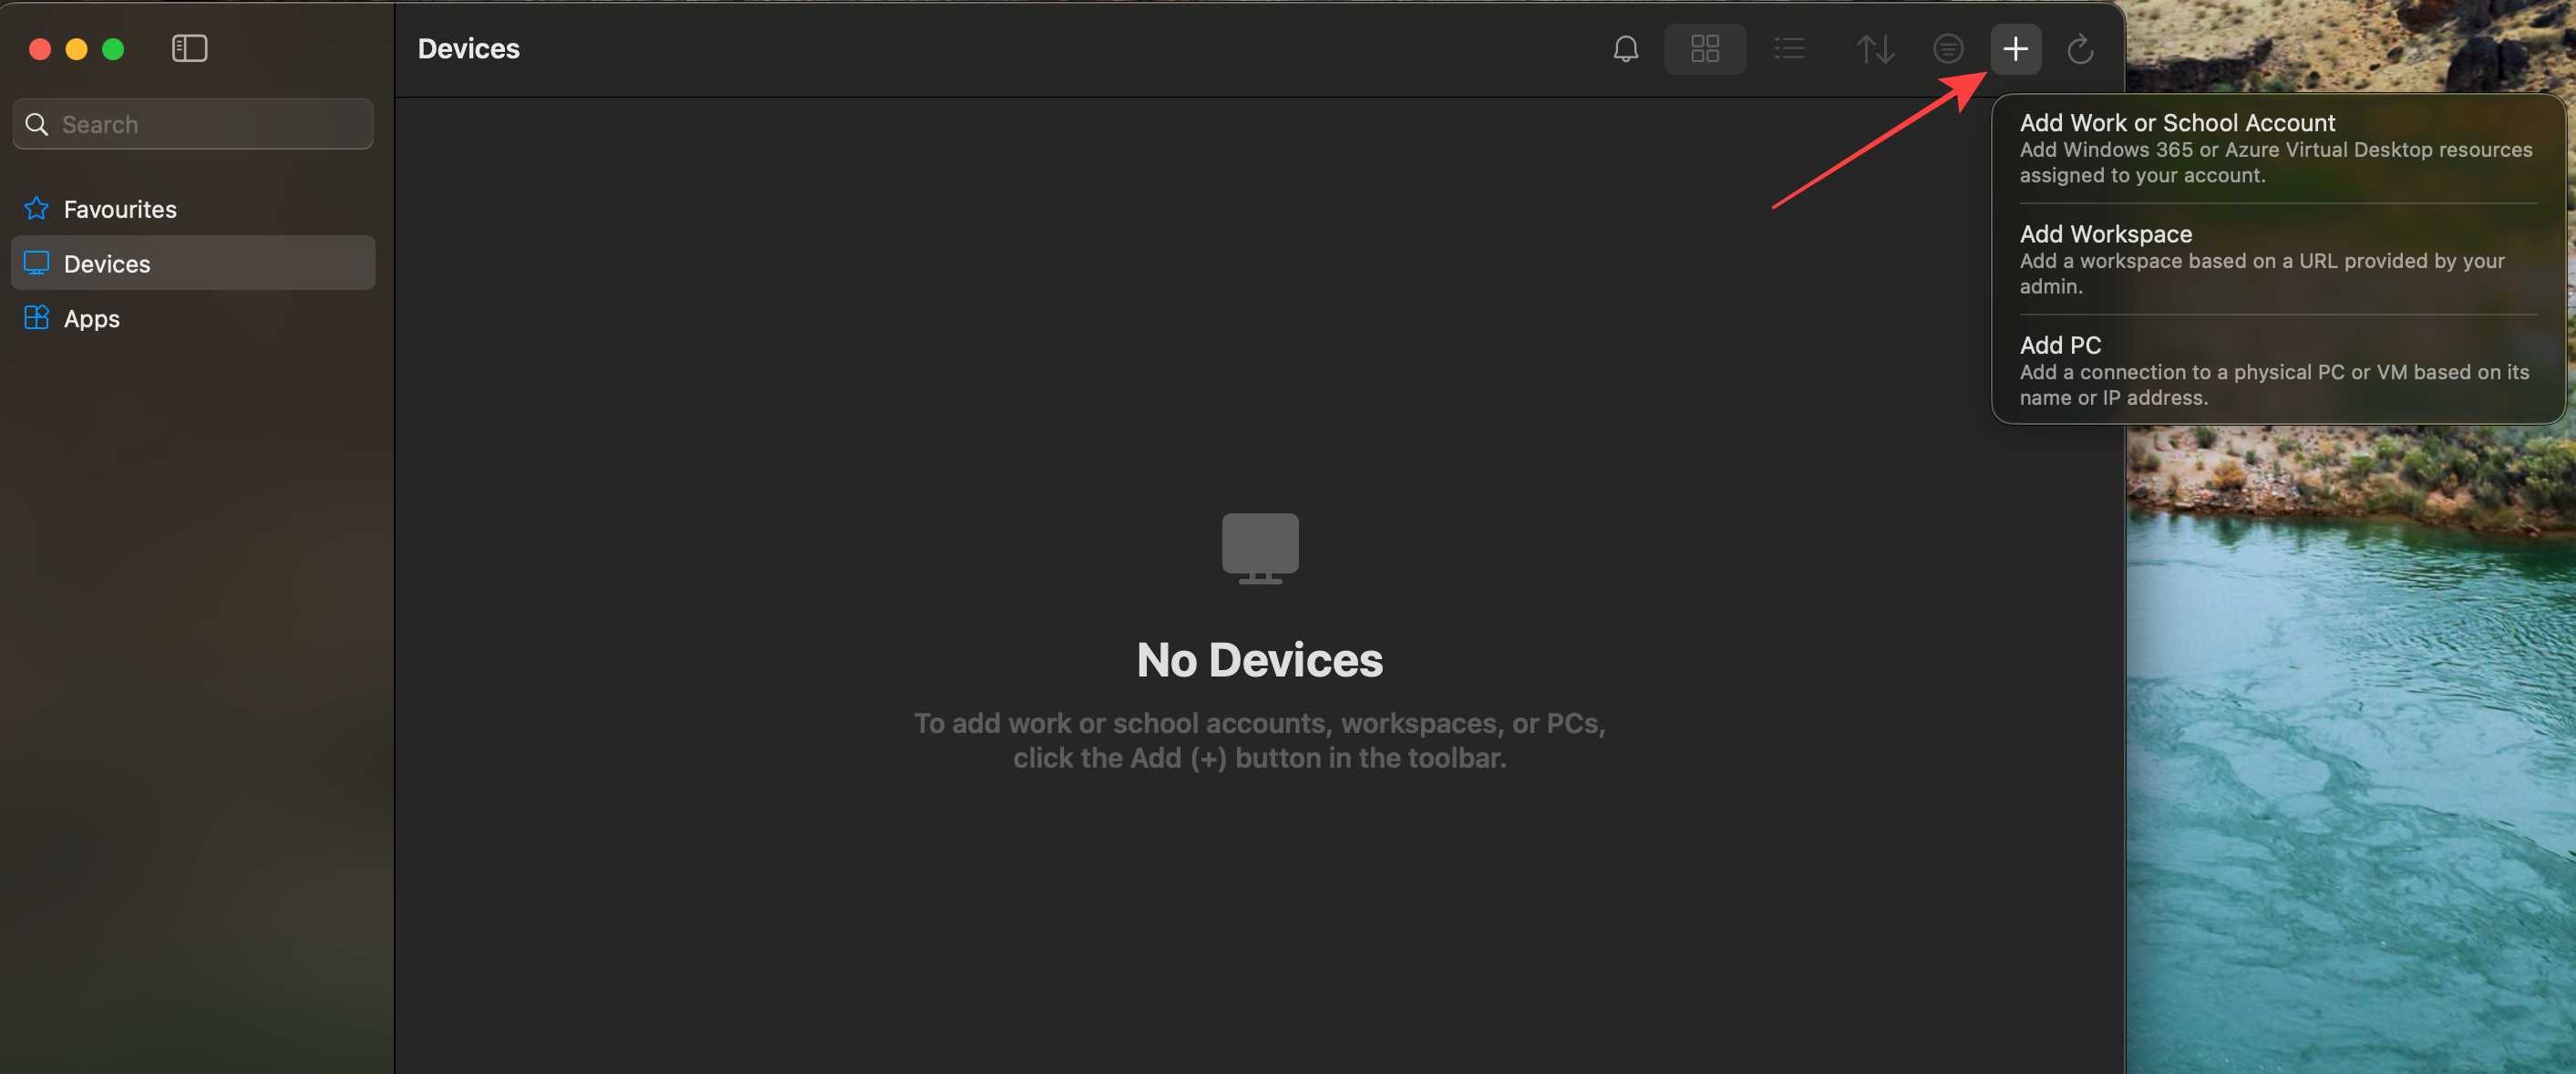
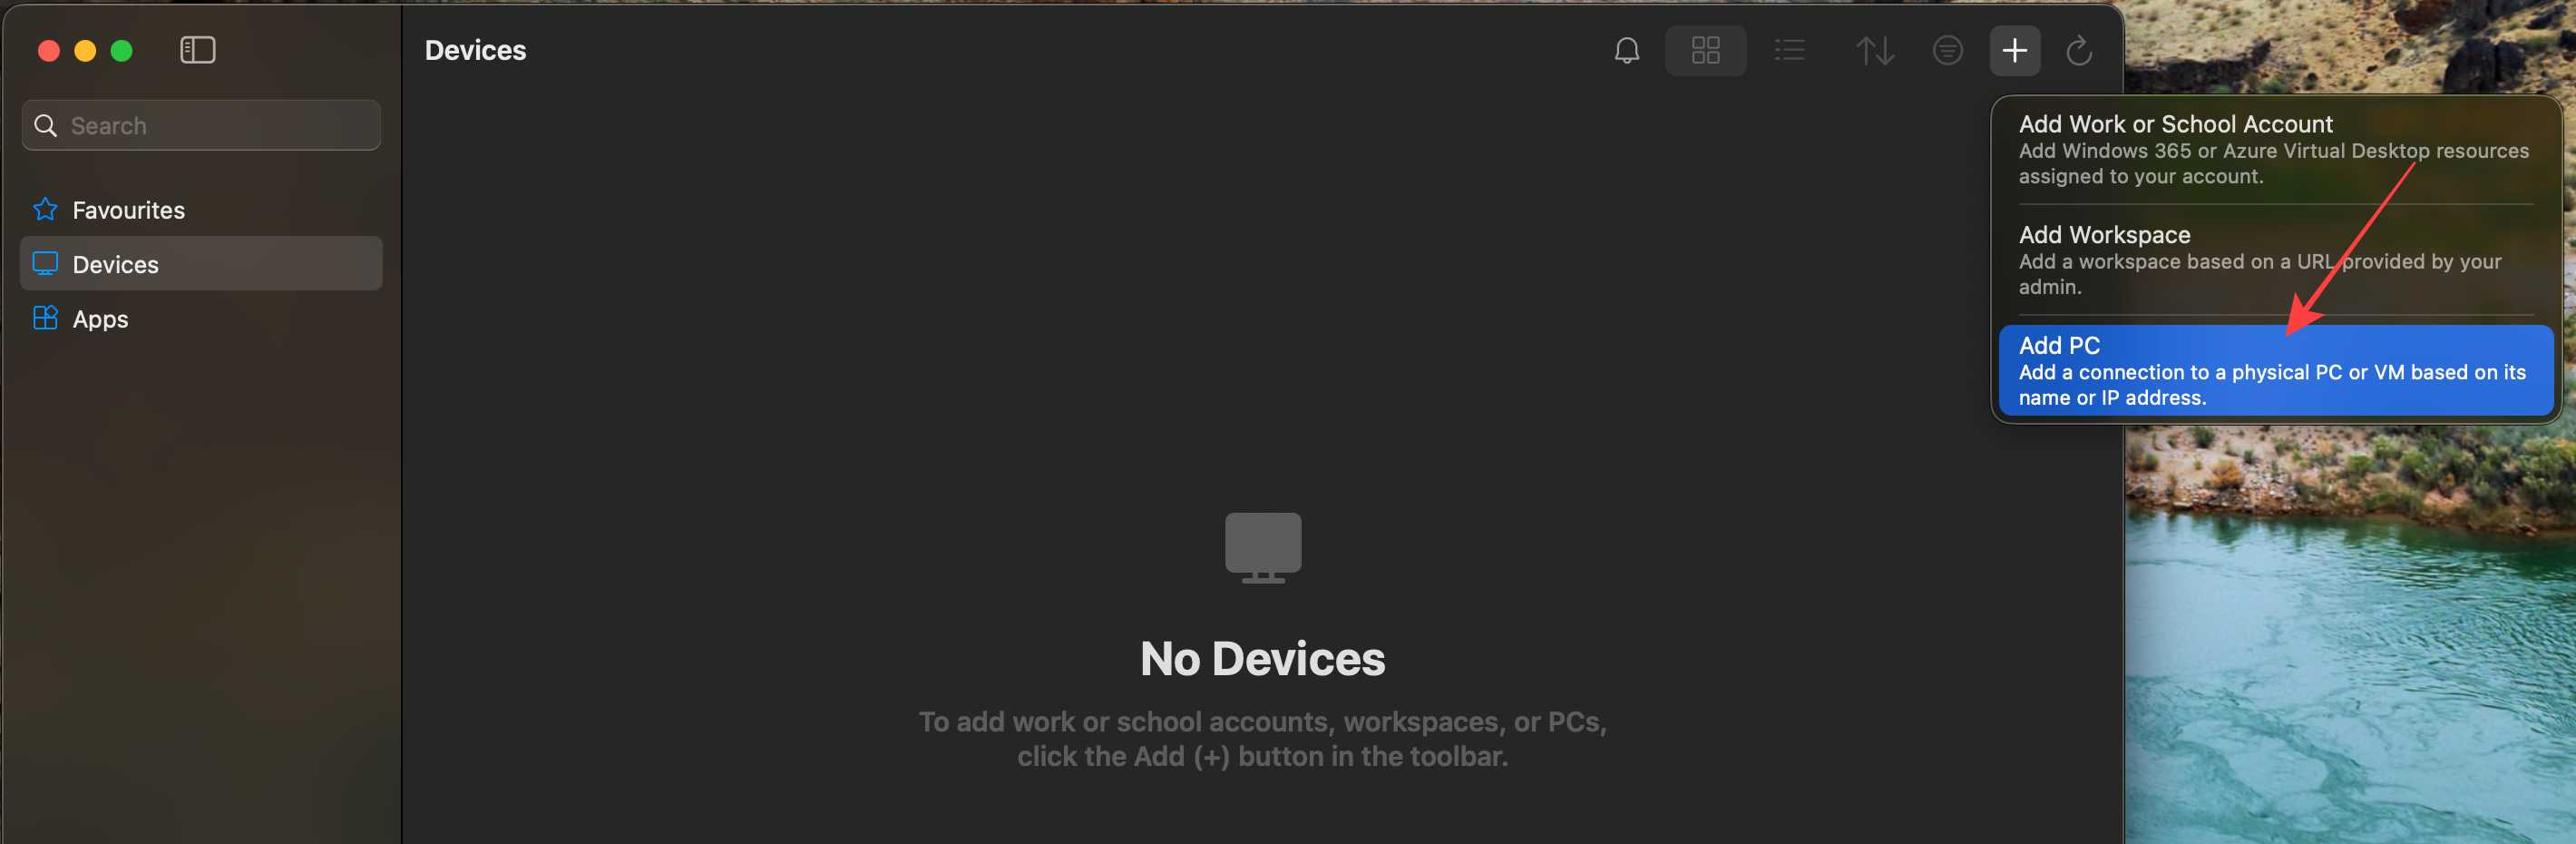
In accordance with the server access details from our “Instructions”, select the option “Add PC”.
A window will open for entering and selecting connection parameters for your remote Windows desktop.
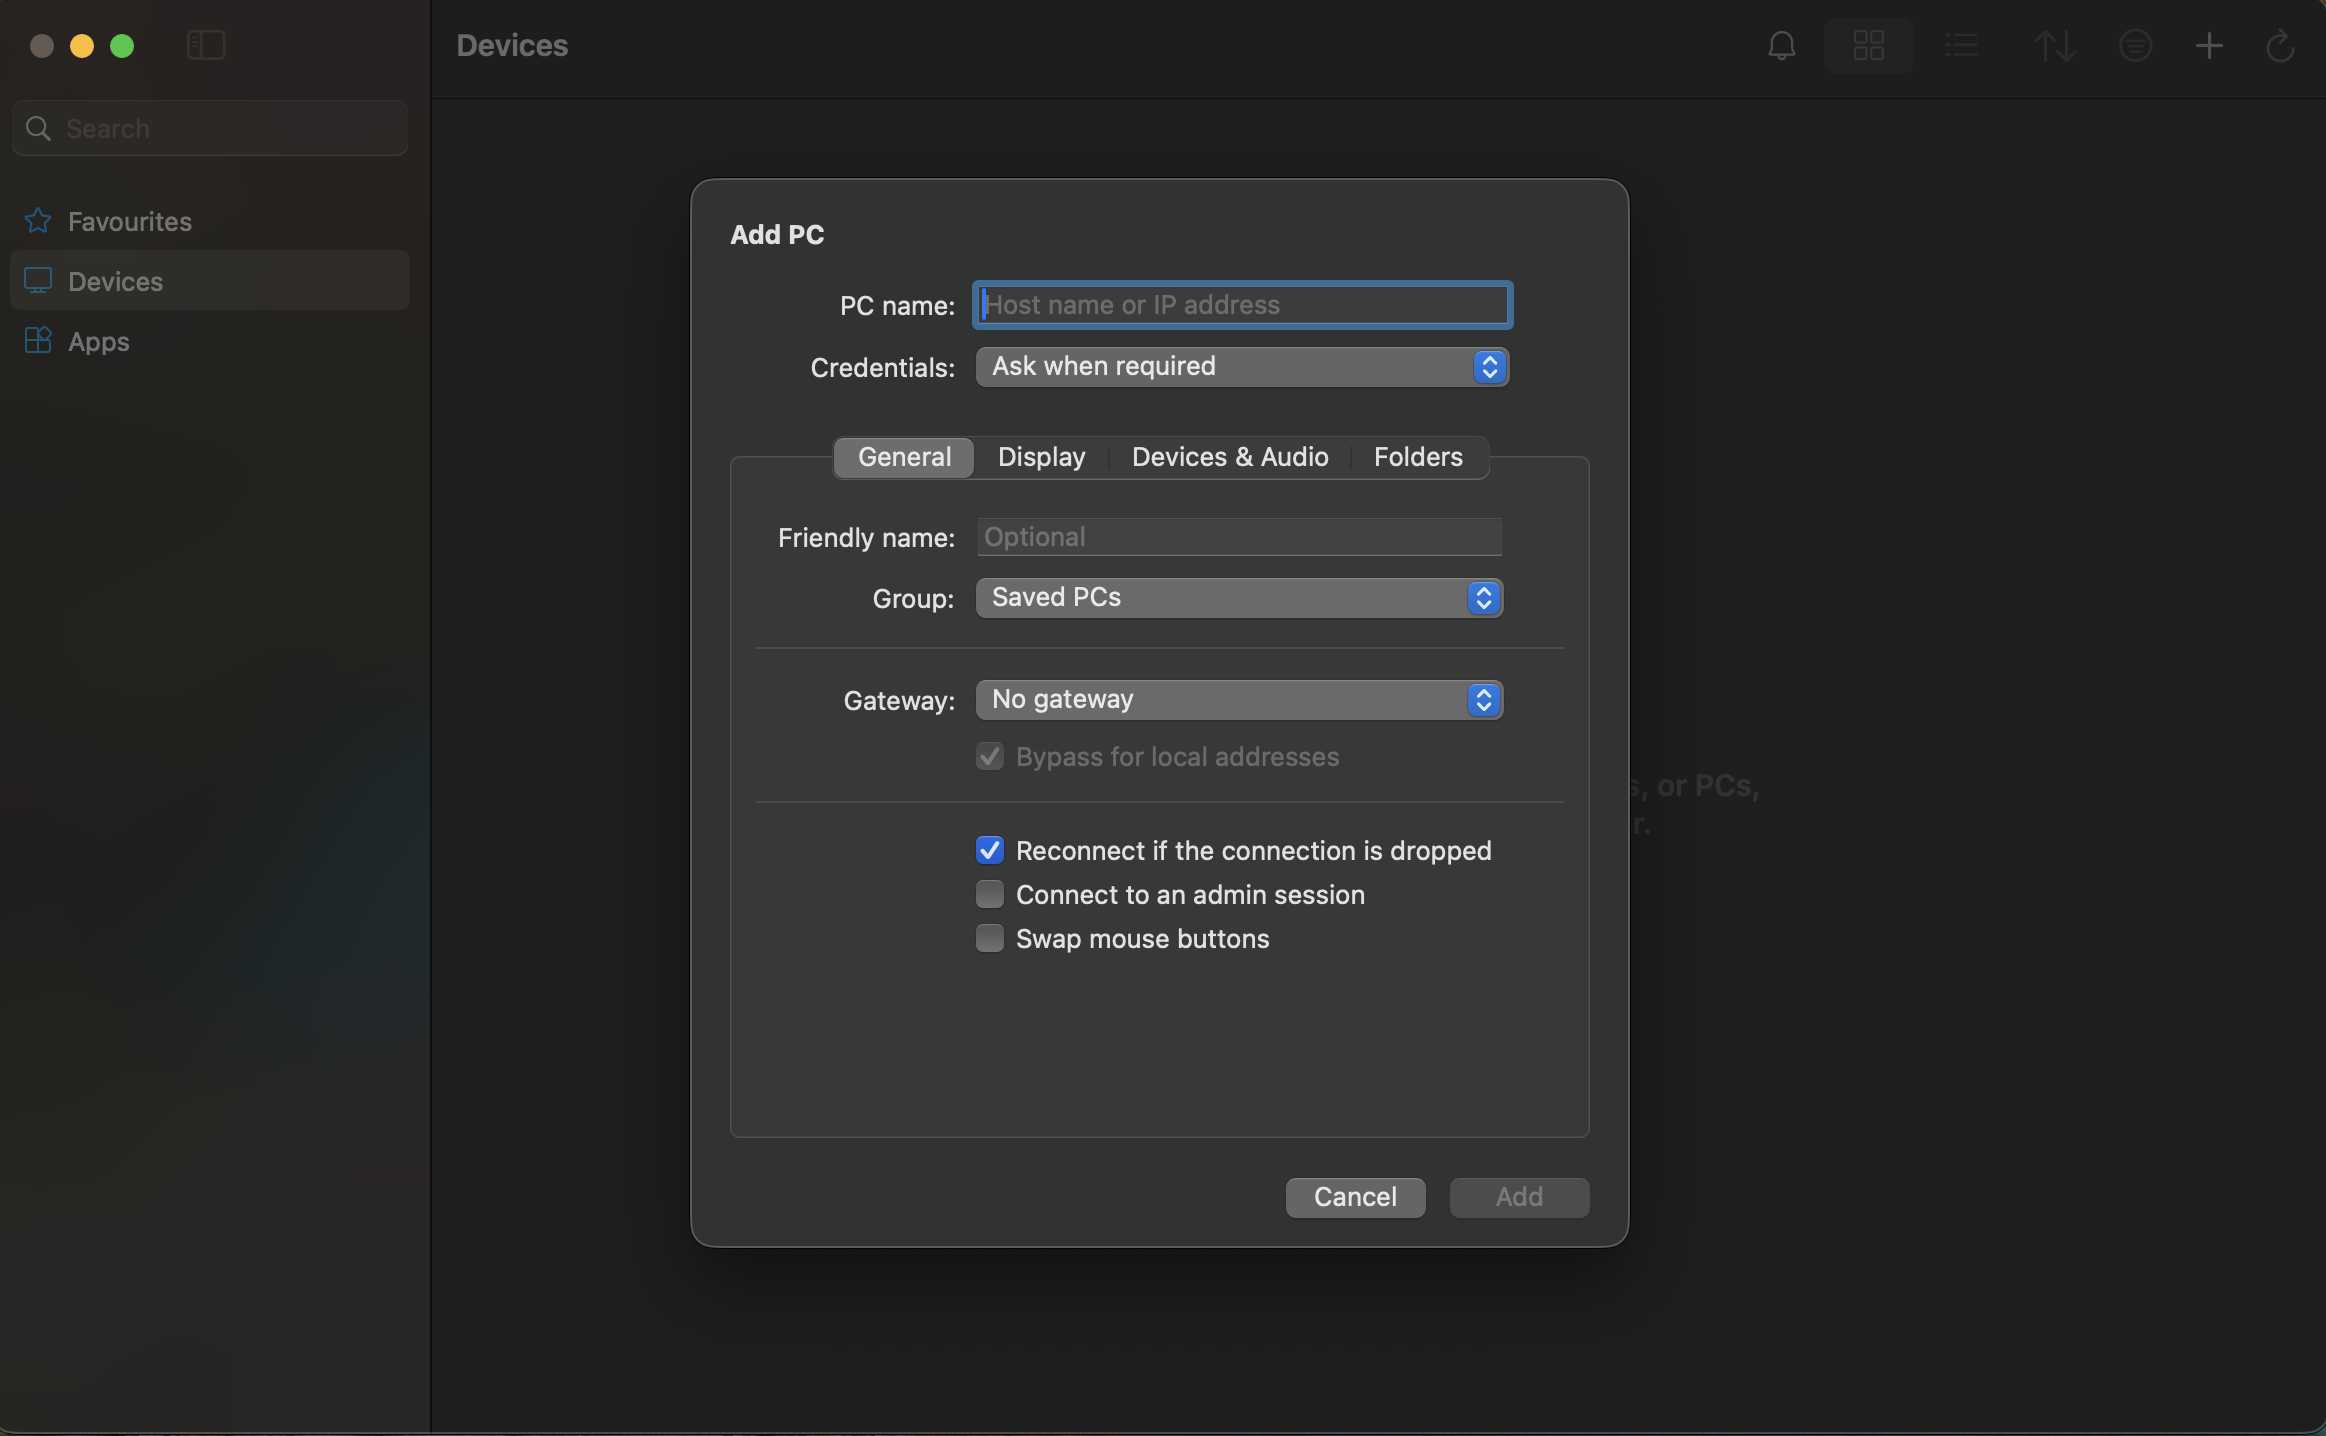
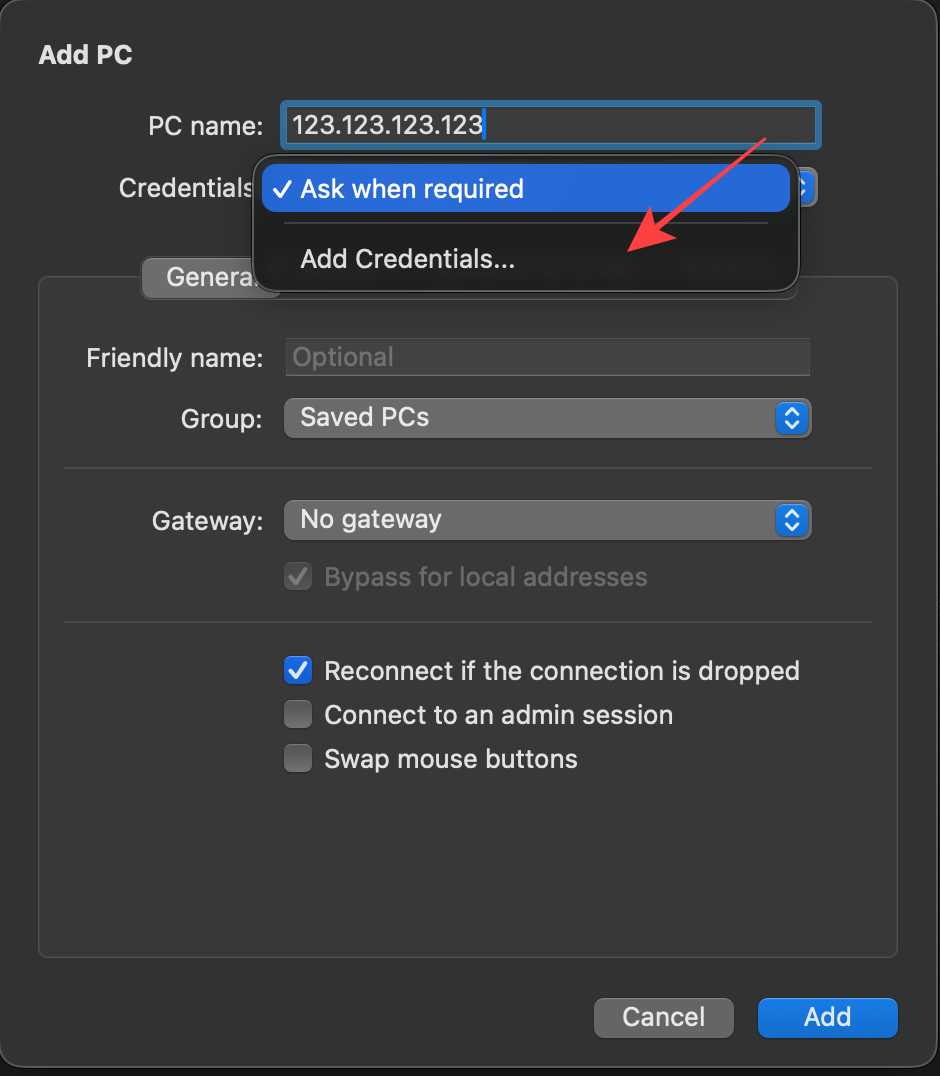
In the field "PC name" enter the IP address from your instructions. In the section “Credentials” select one of the following options:
“Ask when required” - you will need to enter the login details for the server every time.
“Add credentials” - enter the connection details, and they will be saved in the application, so you won't need to enter them again when connecting.
We selected the second option.
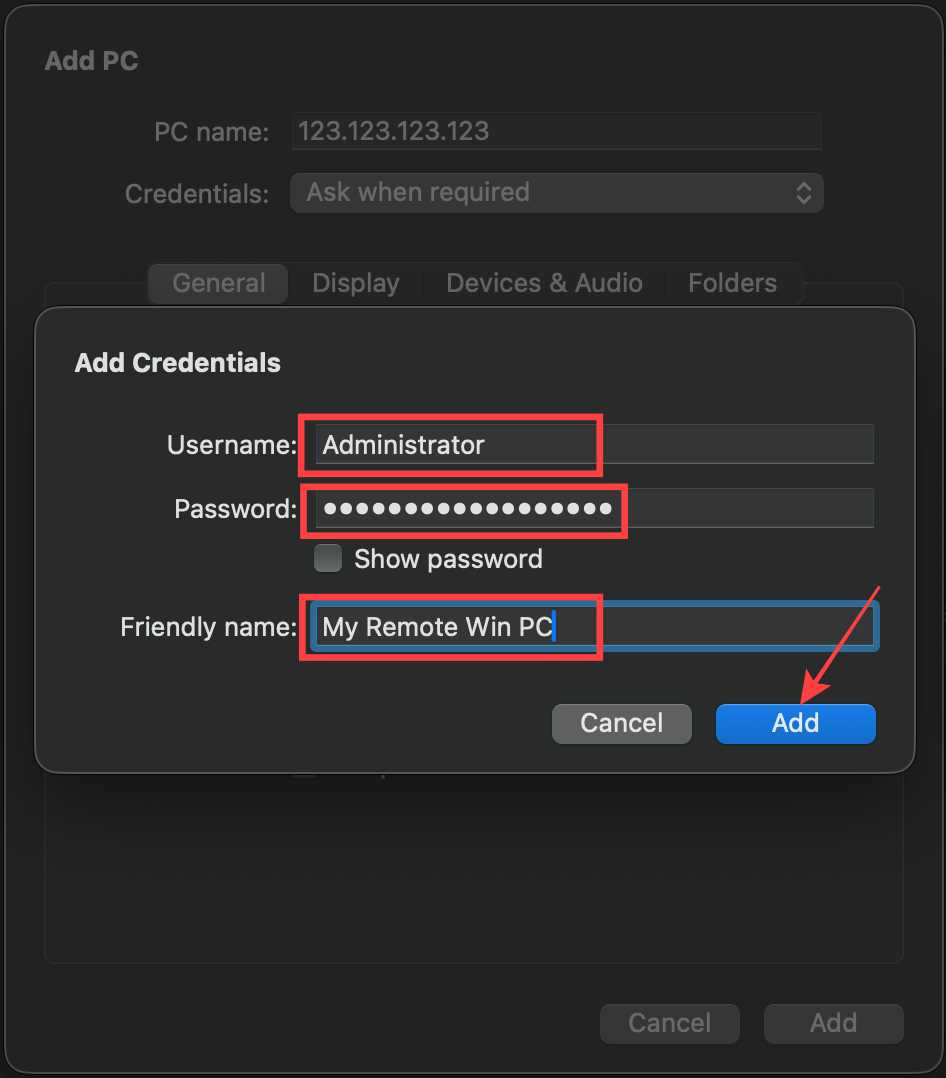
In the form “Add Credentials” enter your “Username” and “Password”. The username will be Administrator, and the password is the one specified in the section “Password” in the instructions. In the field “Friendly name” enter a name for your server. After this, click the button “Add” to save the entered credentials.
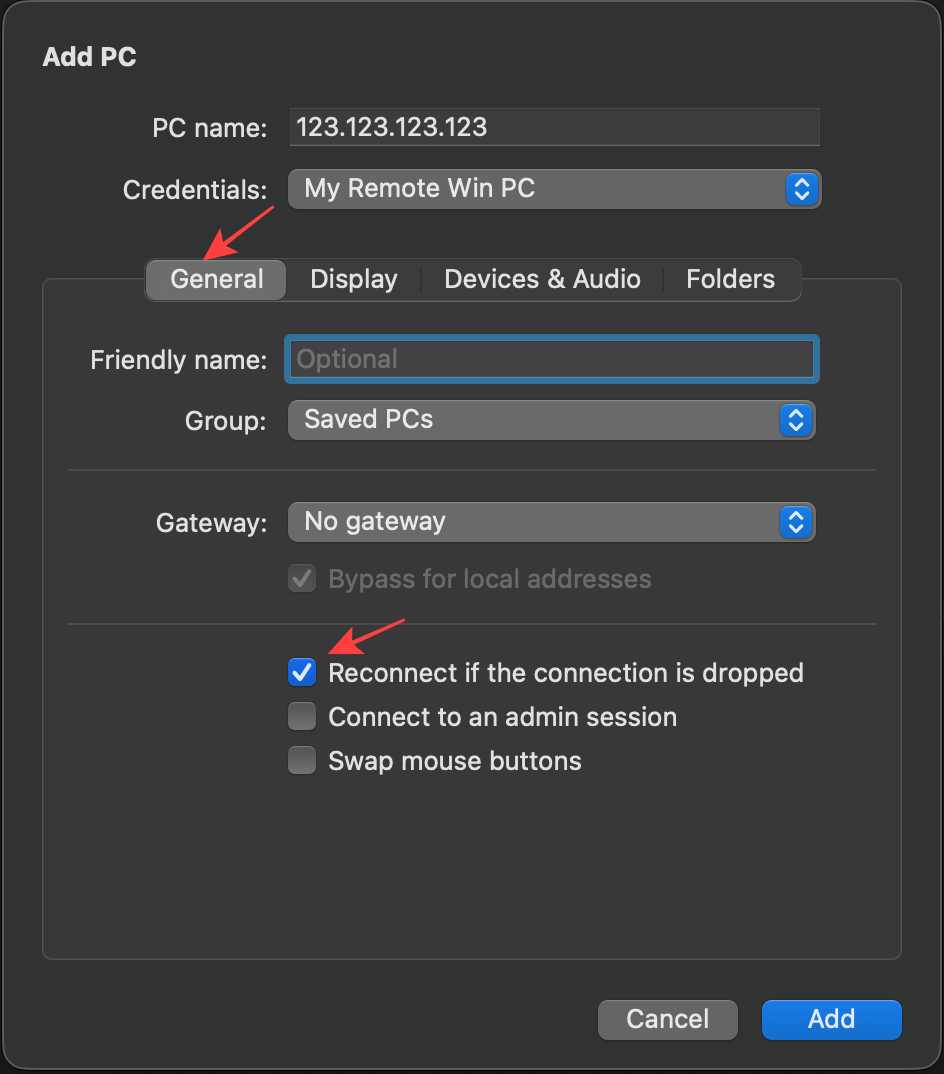
Go to the section “General”.
In the field "Friendly Name" you can enter the same name as in the form “Add Credentials”. This will be an easy-to-remember name for the PC you are connecting to.
“Group” - specify a group to make it easier to find your connections later. You can add a new group by clicking +, or select one from the list.
“Gateway” - this is a gateway for remote PCs, RemoteApp programs, and PCs with sessions on a corporate network. This field can be skipped.
“Reconnect if the connection is dropped” - the connection will be automatically restored if it is lost.
“Connect to admin session” - use this option to connect to the Windows server console session.
“Swap mouse buttons” - use this option to exchange the functions of the left and right mouse buttons. This is necessary if you are using a PC configured for left-handers, and your mouse is right-handed.
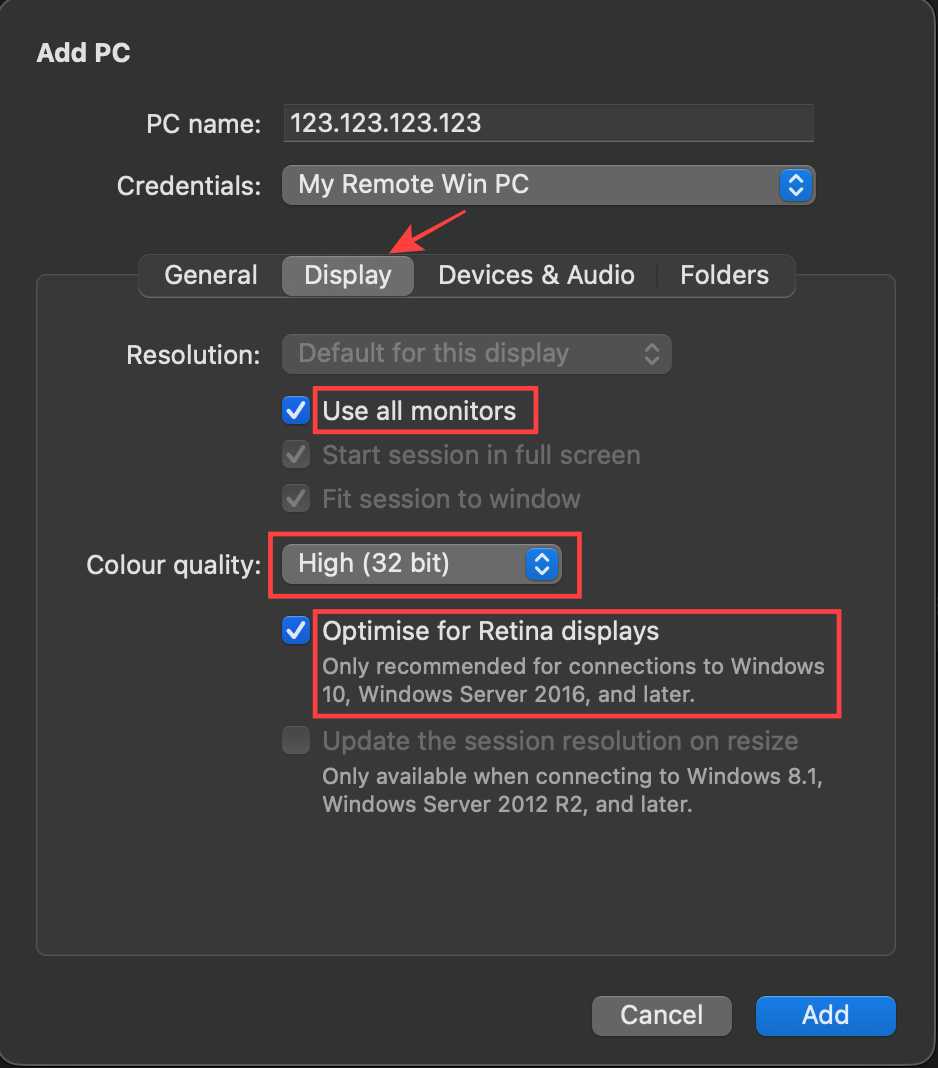
“Display” section:
“Resolution” - select the resolution you want to use in the session. “Default for this display” will set the resolution based on the screen size.
“Use all monitors” - if you have multiple monitors, use this feature. All monitors will be activated after connecting to the remote desktop.
“Start session in full screen” - the device will be displayed in full screen. If not selected, the device will be displayed in a window.
“Fit session to window” - when enabled, the device will be displayed in full screen. When not enabled, the device will be displayed in a window.
“Colour quality” - select “High (32 bit)”. You will get the best image quality.
“Optimise for Retina displays” - scale the device according to the scaling used on the Mac client. This uses four times more bandwidth.
“Update the session resolution on resize” - when the window size is changed, the device resolution automatically changes to match the new size.
“Devices & Audio” section. Select the devices you want to use in the remote session and configure the remote audio settings:
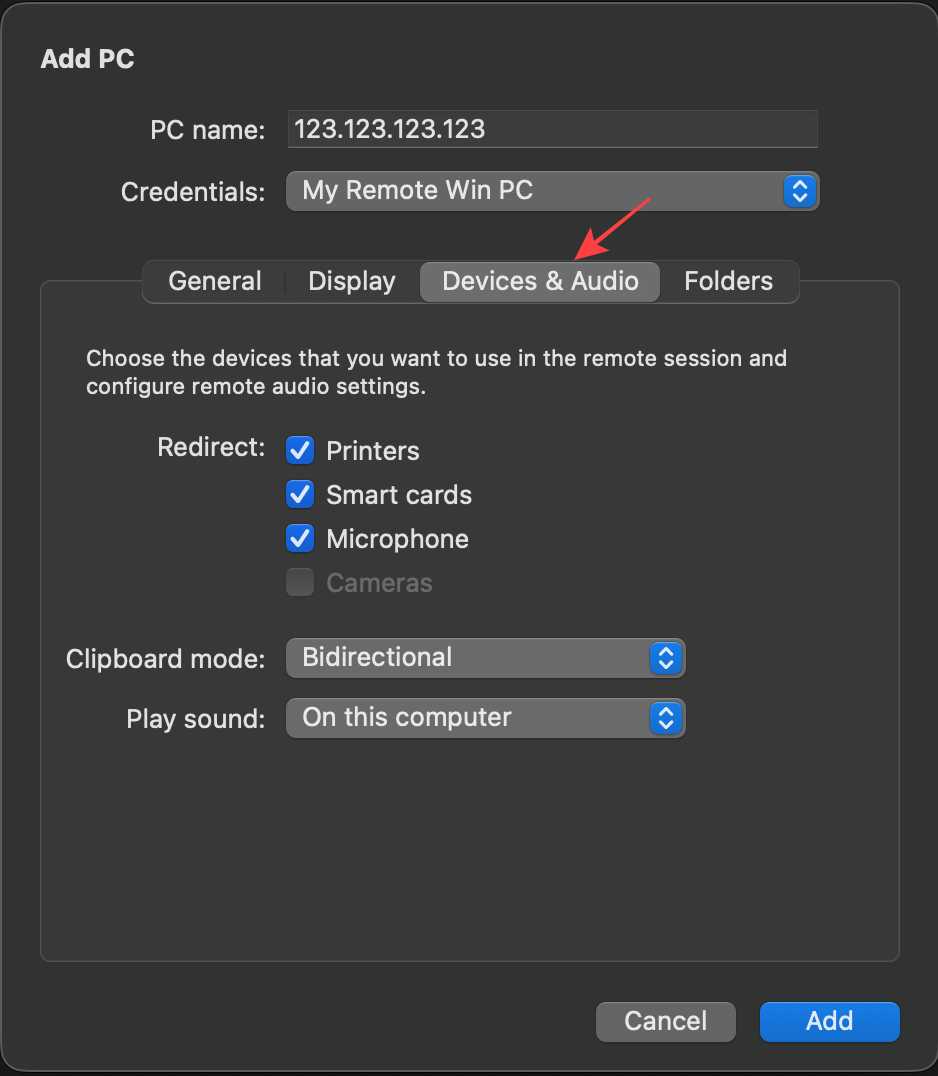
“Redirect” - select the local devices you want to use on the remote desktop.
List of redirectable devices:
Audio output
Cameras
Clipboard
Microphones
Printers
Smart cards
USB devices
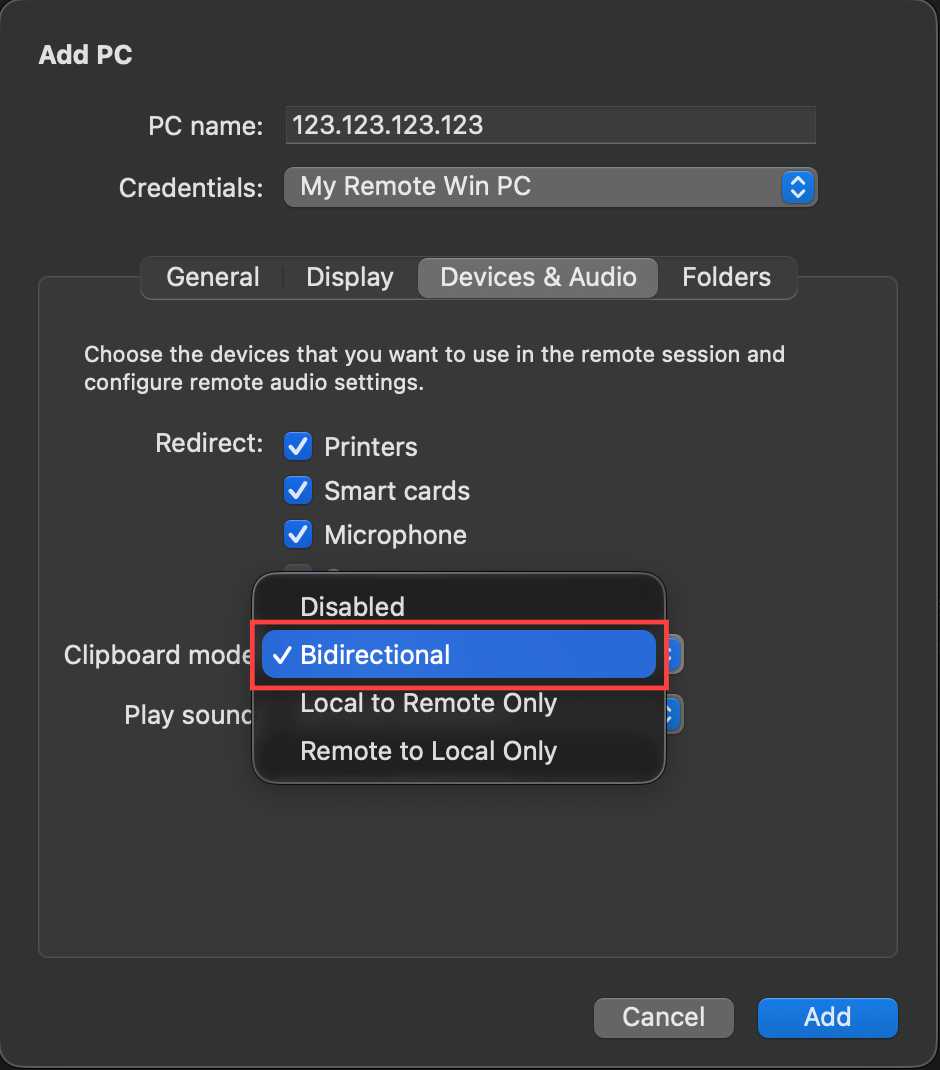
“Clipboard mode” - select whether you want to use the local clipboard in the remote session and the direction in which you can copy and paste (Bidirectional, Local to Remote Only, Remote to Local Only, Disabled). I chose Bidirectional because I want to copy both from the local Mac to the remote desktop and vice versa.
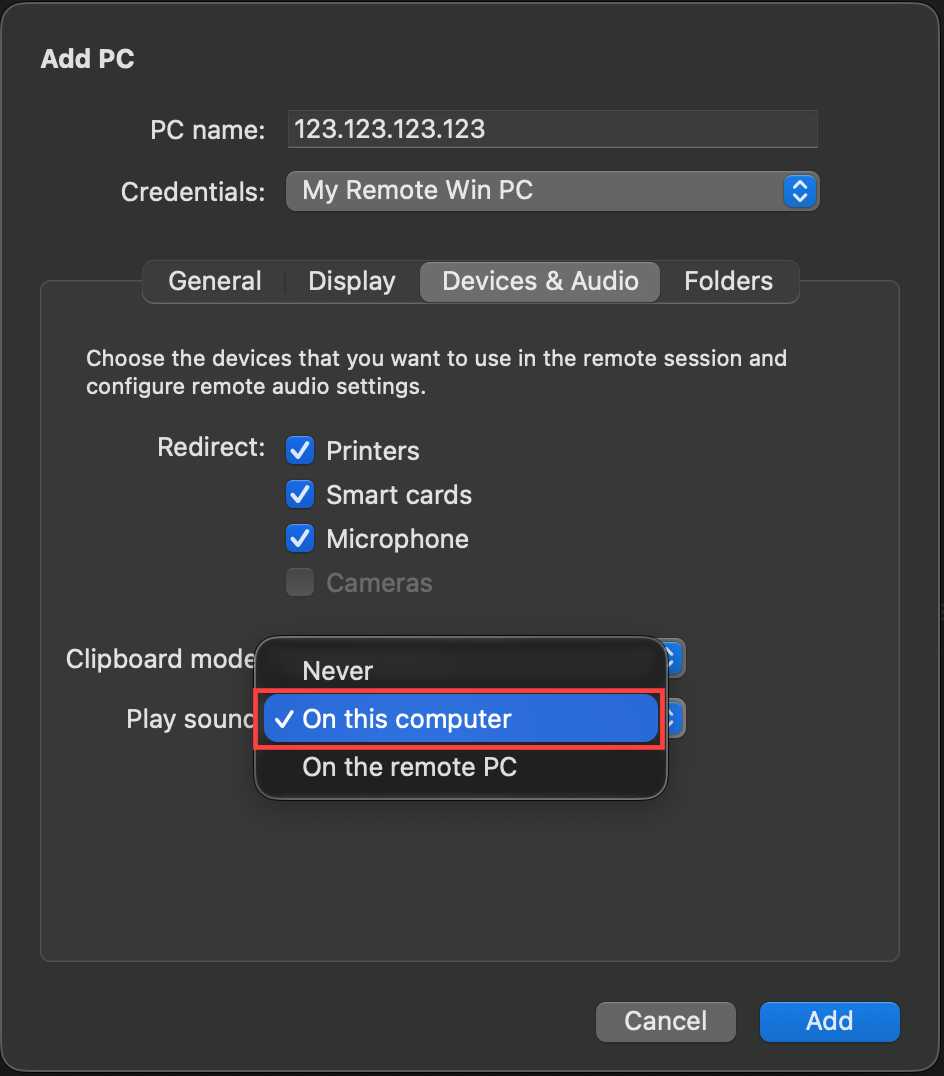
“Play sound” - select whether you want to play sound on this computer, on the remote PC, or never.
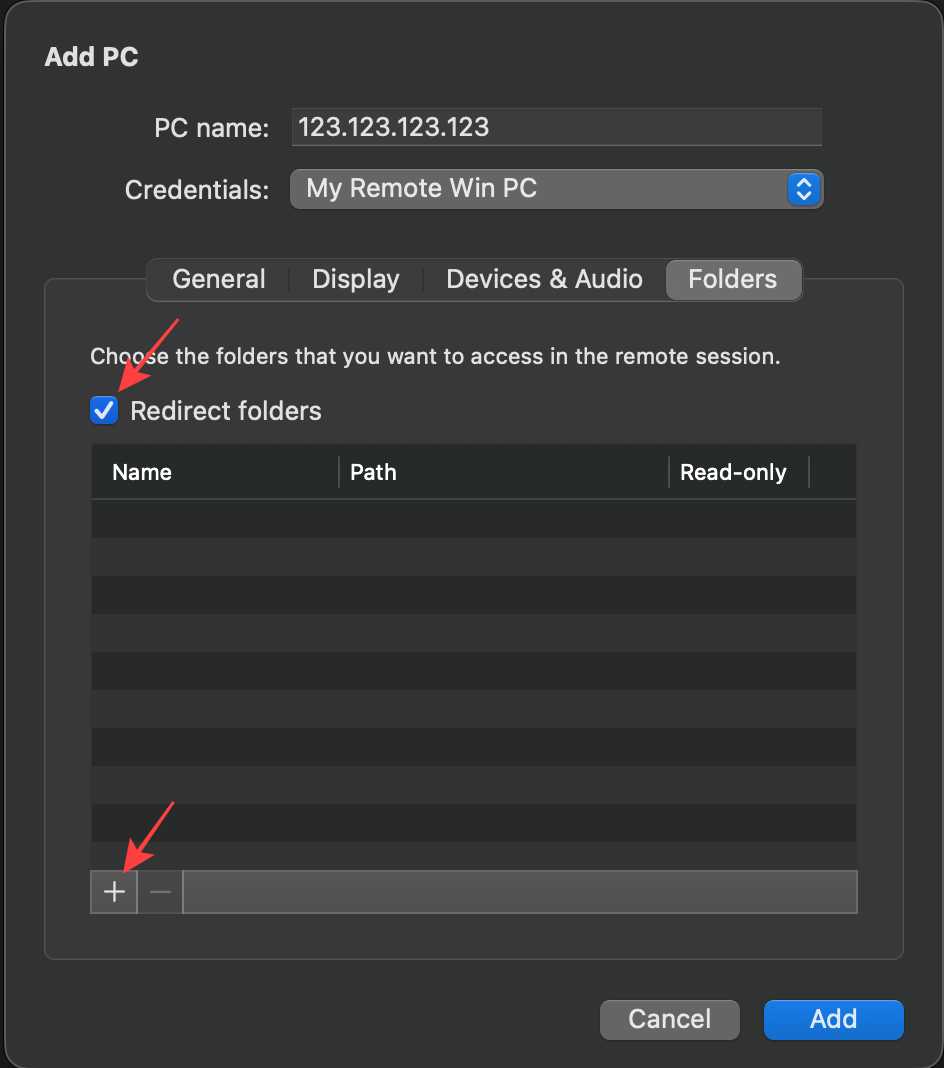
“Folders” section. Disk redirection is supported for remote resources so you can save files created using the remote application locally on your Mac. The redirected folder will always be your home directory, displayed as a network drive in the remote session.
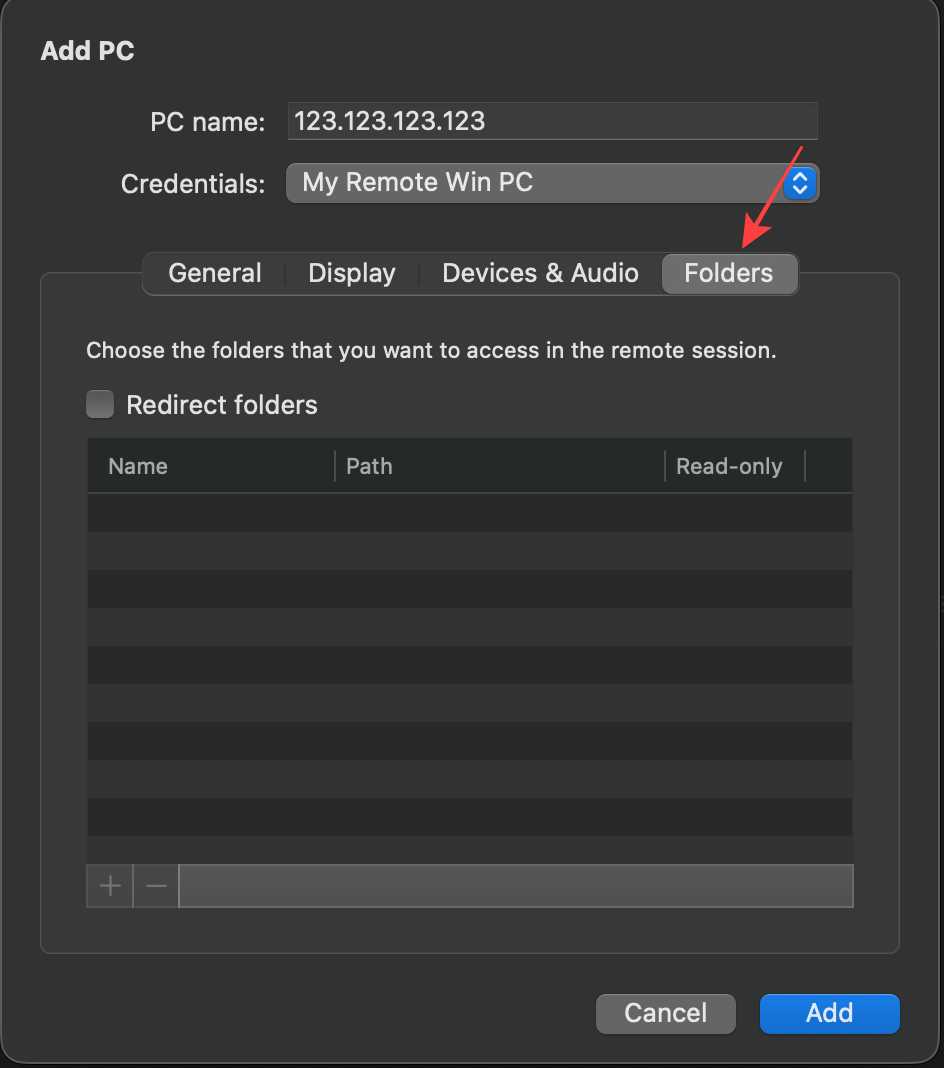
If you want to redirect folders, check “Redirect folders” and click “+”.
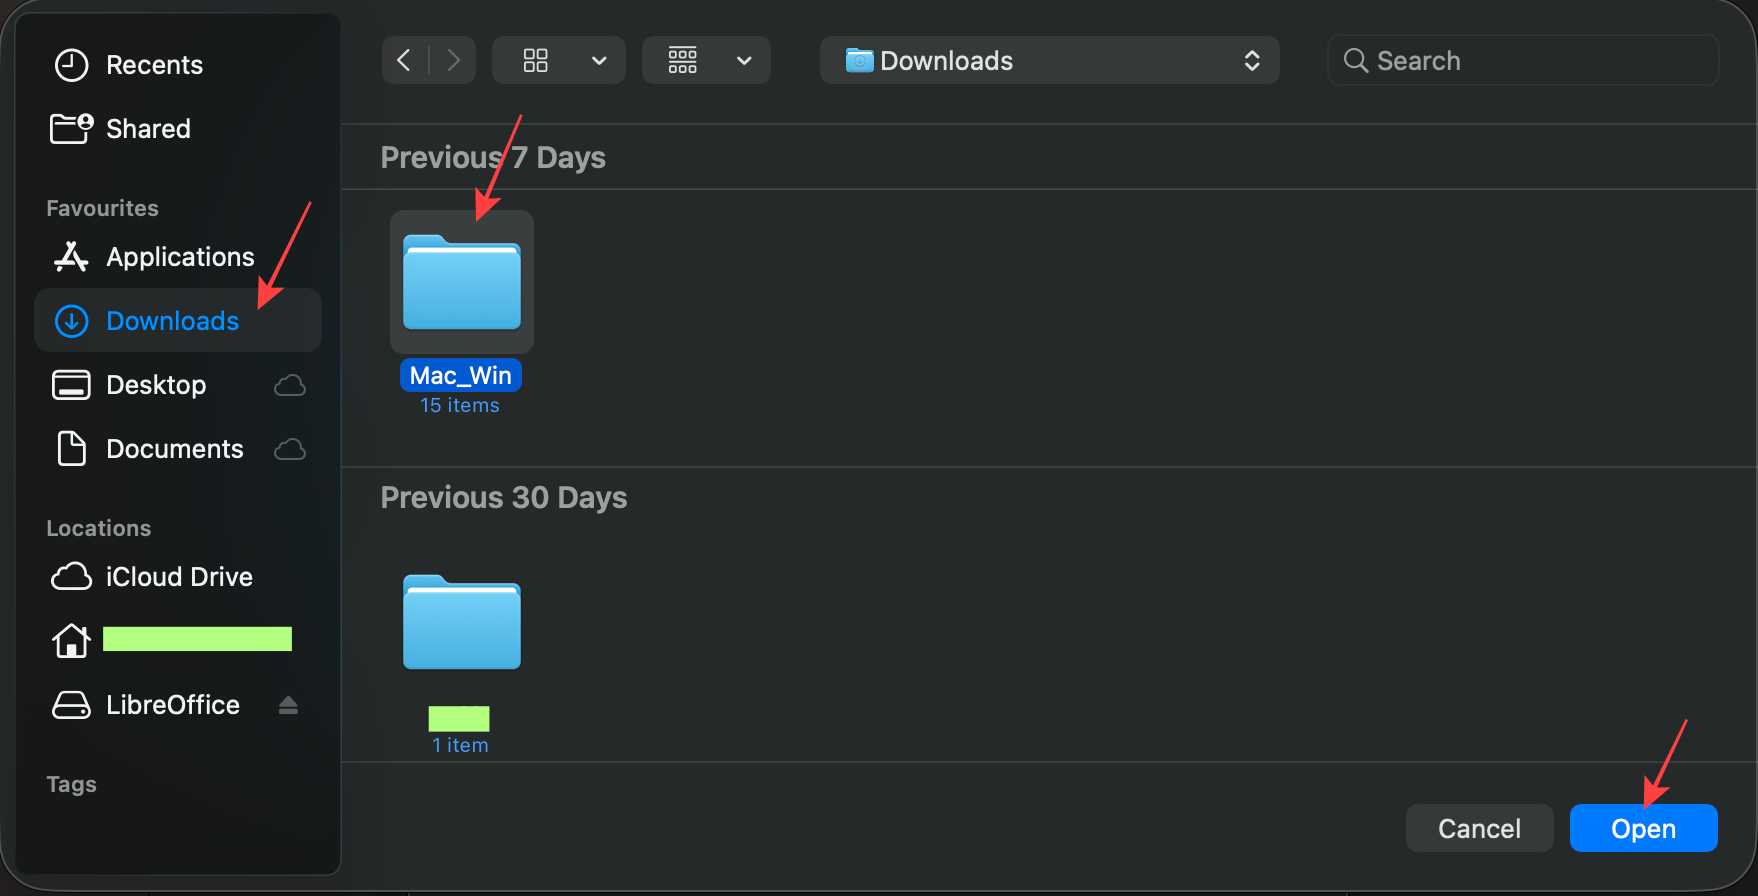
Select a folder in the opened window and click “Open”.
The selected folder will be added to the list.
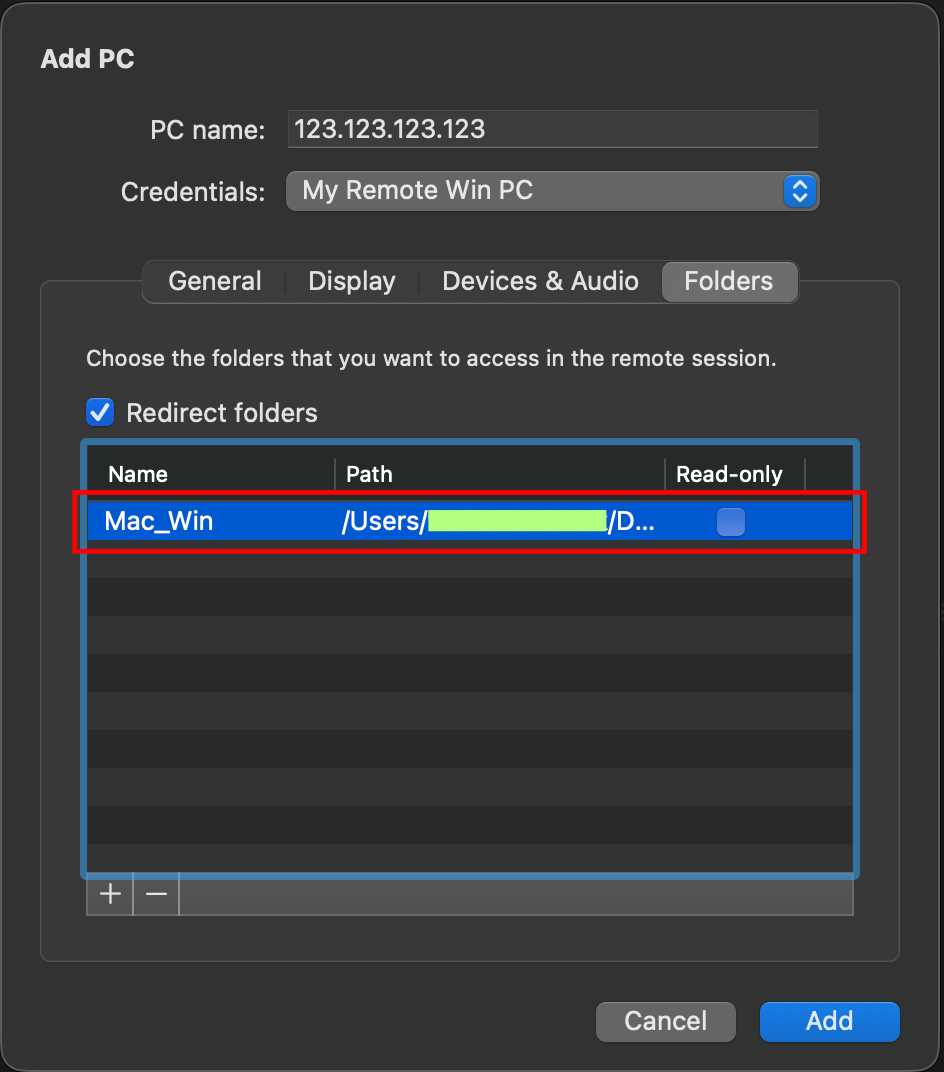
If you need to add more folders, click “+” and repeat the procedure. If you want to allow read-only access to the folder, check the box next to the desired folder.
Completing the addition of a new connection. Click “Add” to add the new PC.
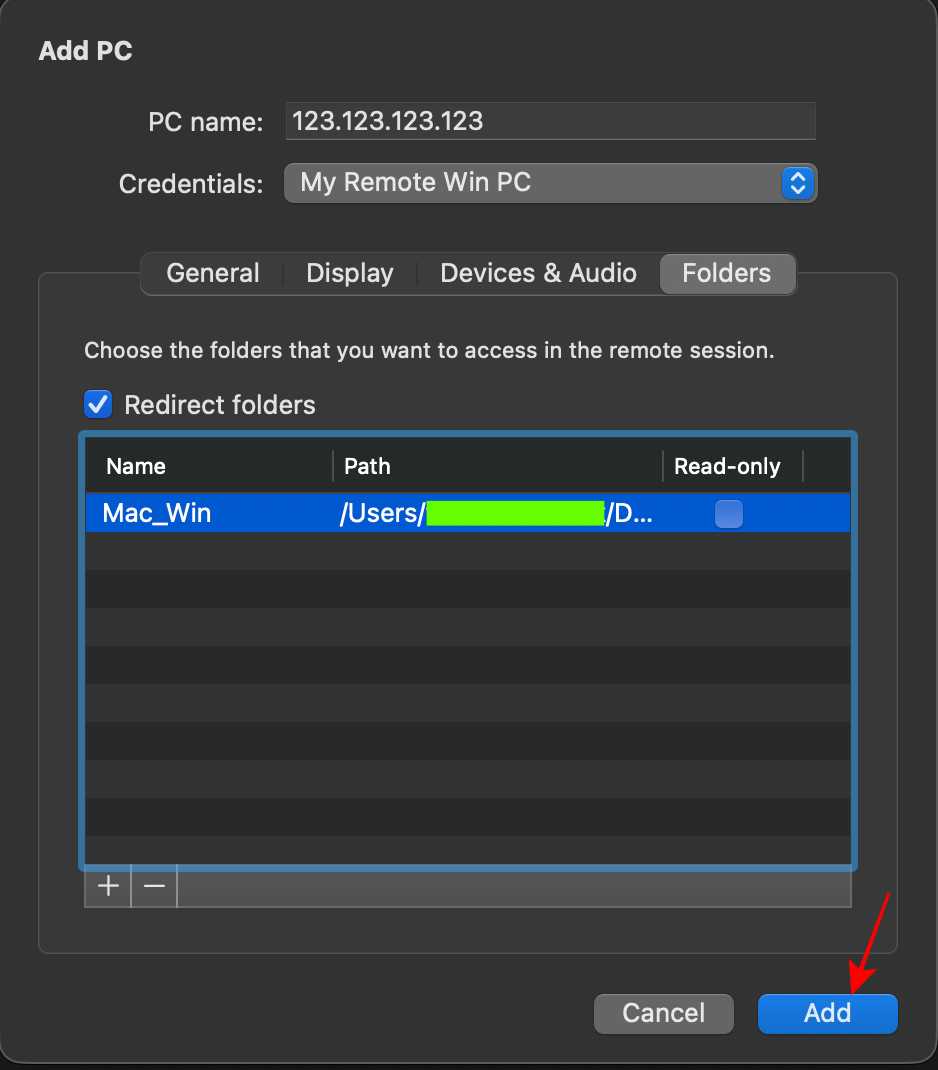
The connection to the PC has been added.
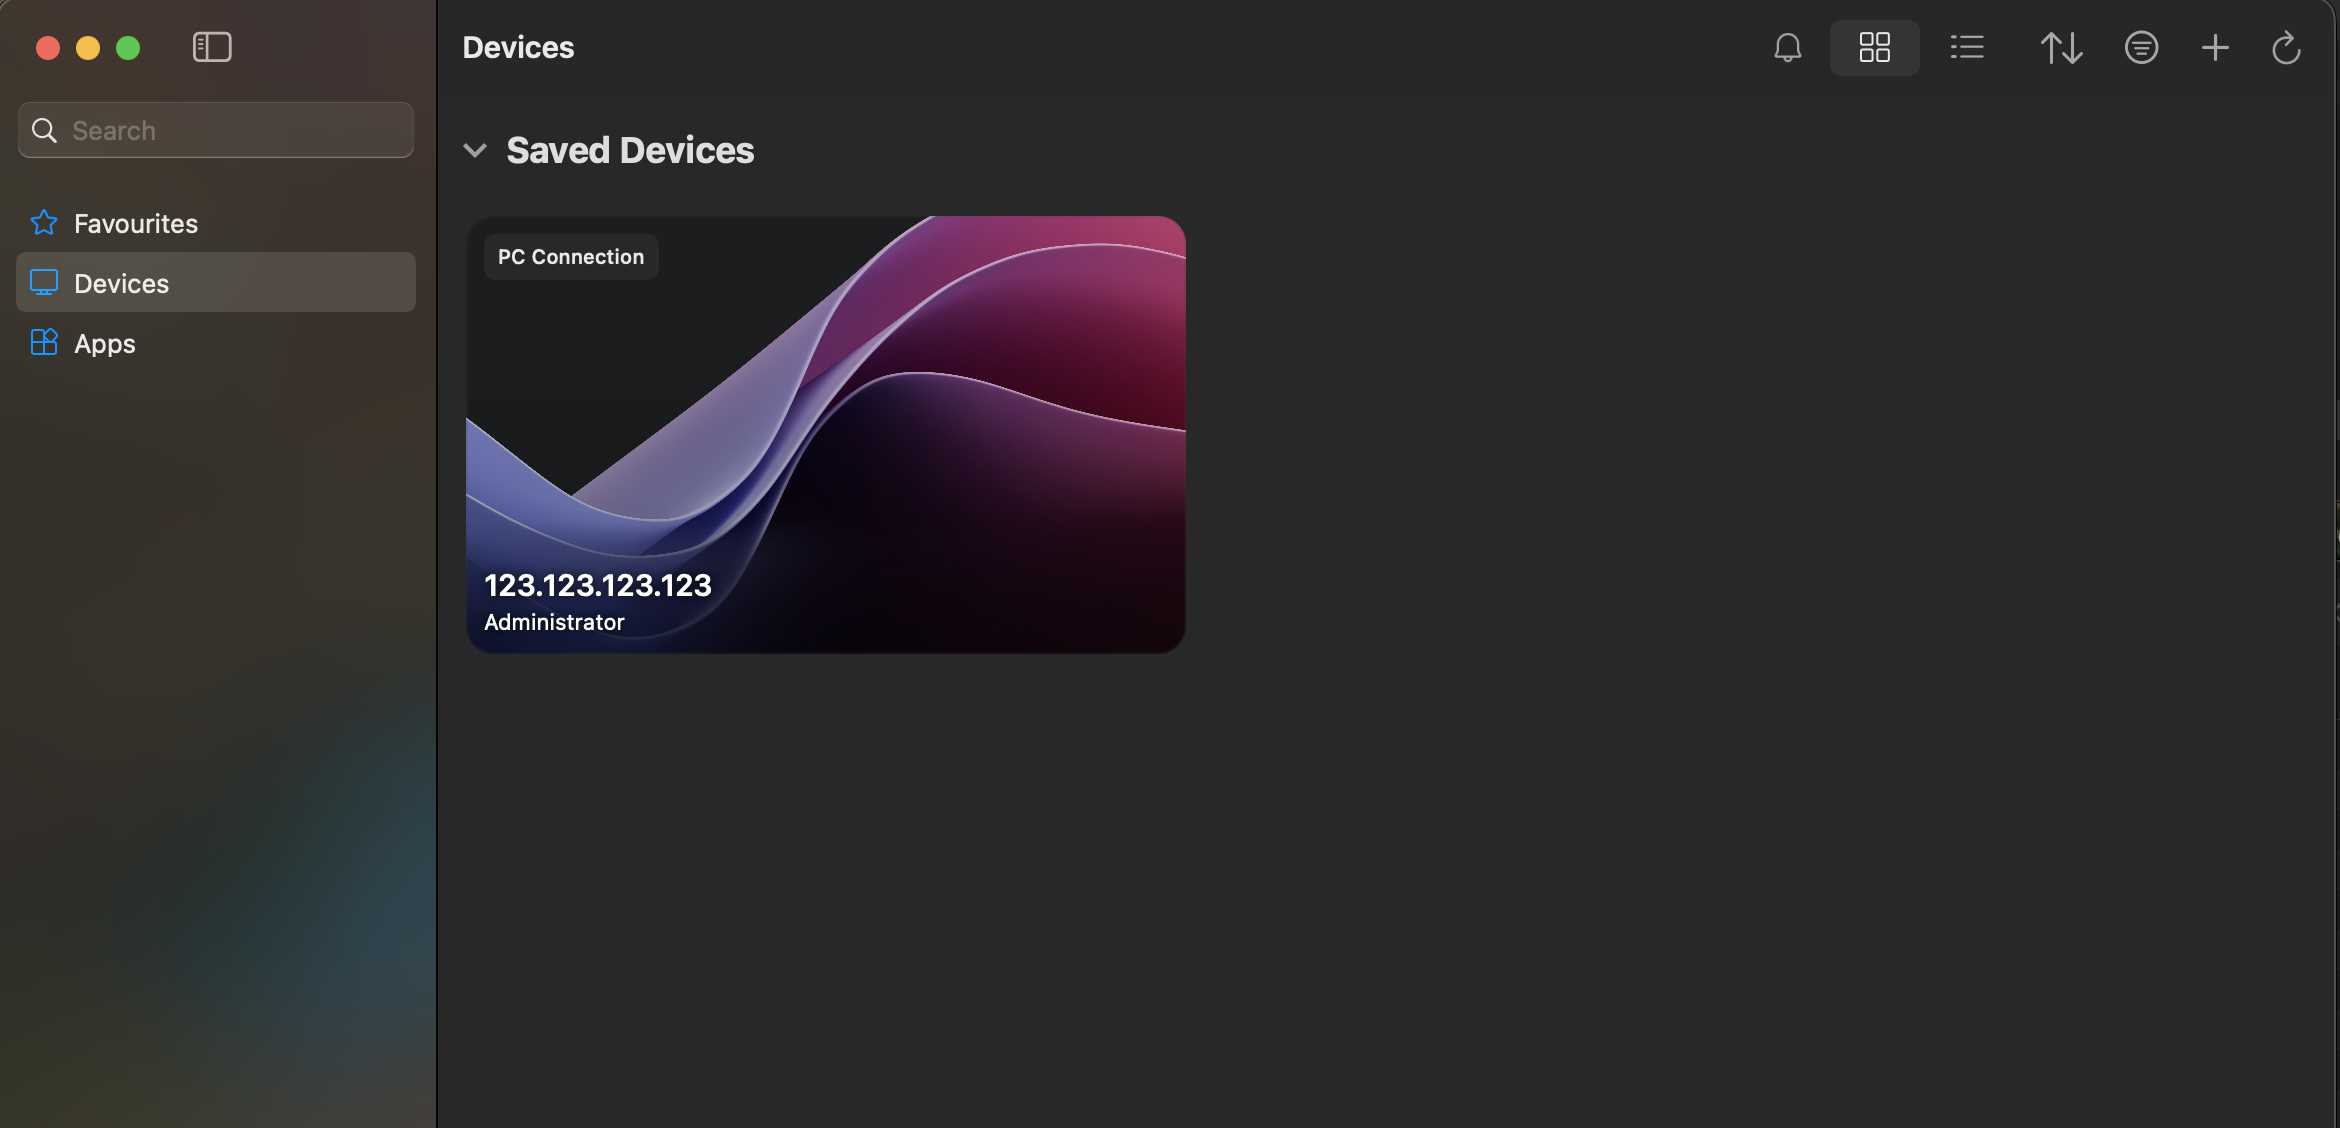
Connecting to the server
If you hover the cursor over the image of the newly added PC, you will see floating control icons.
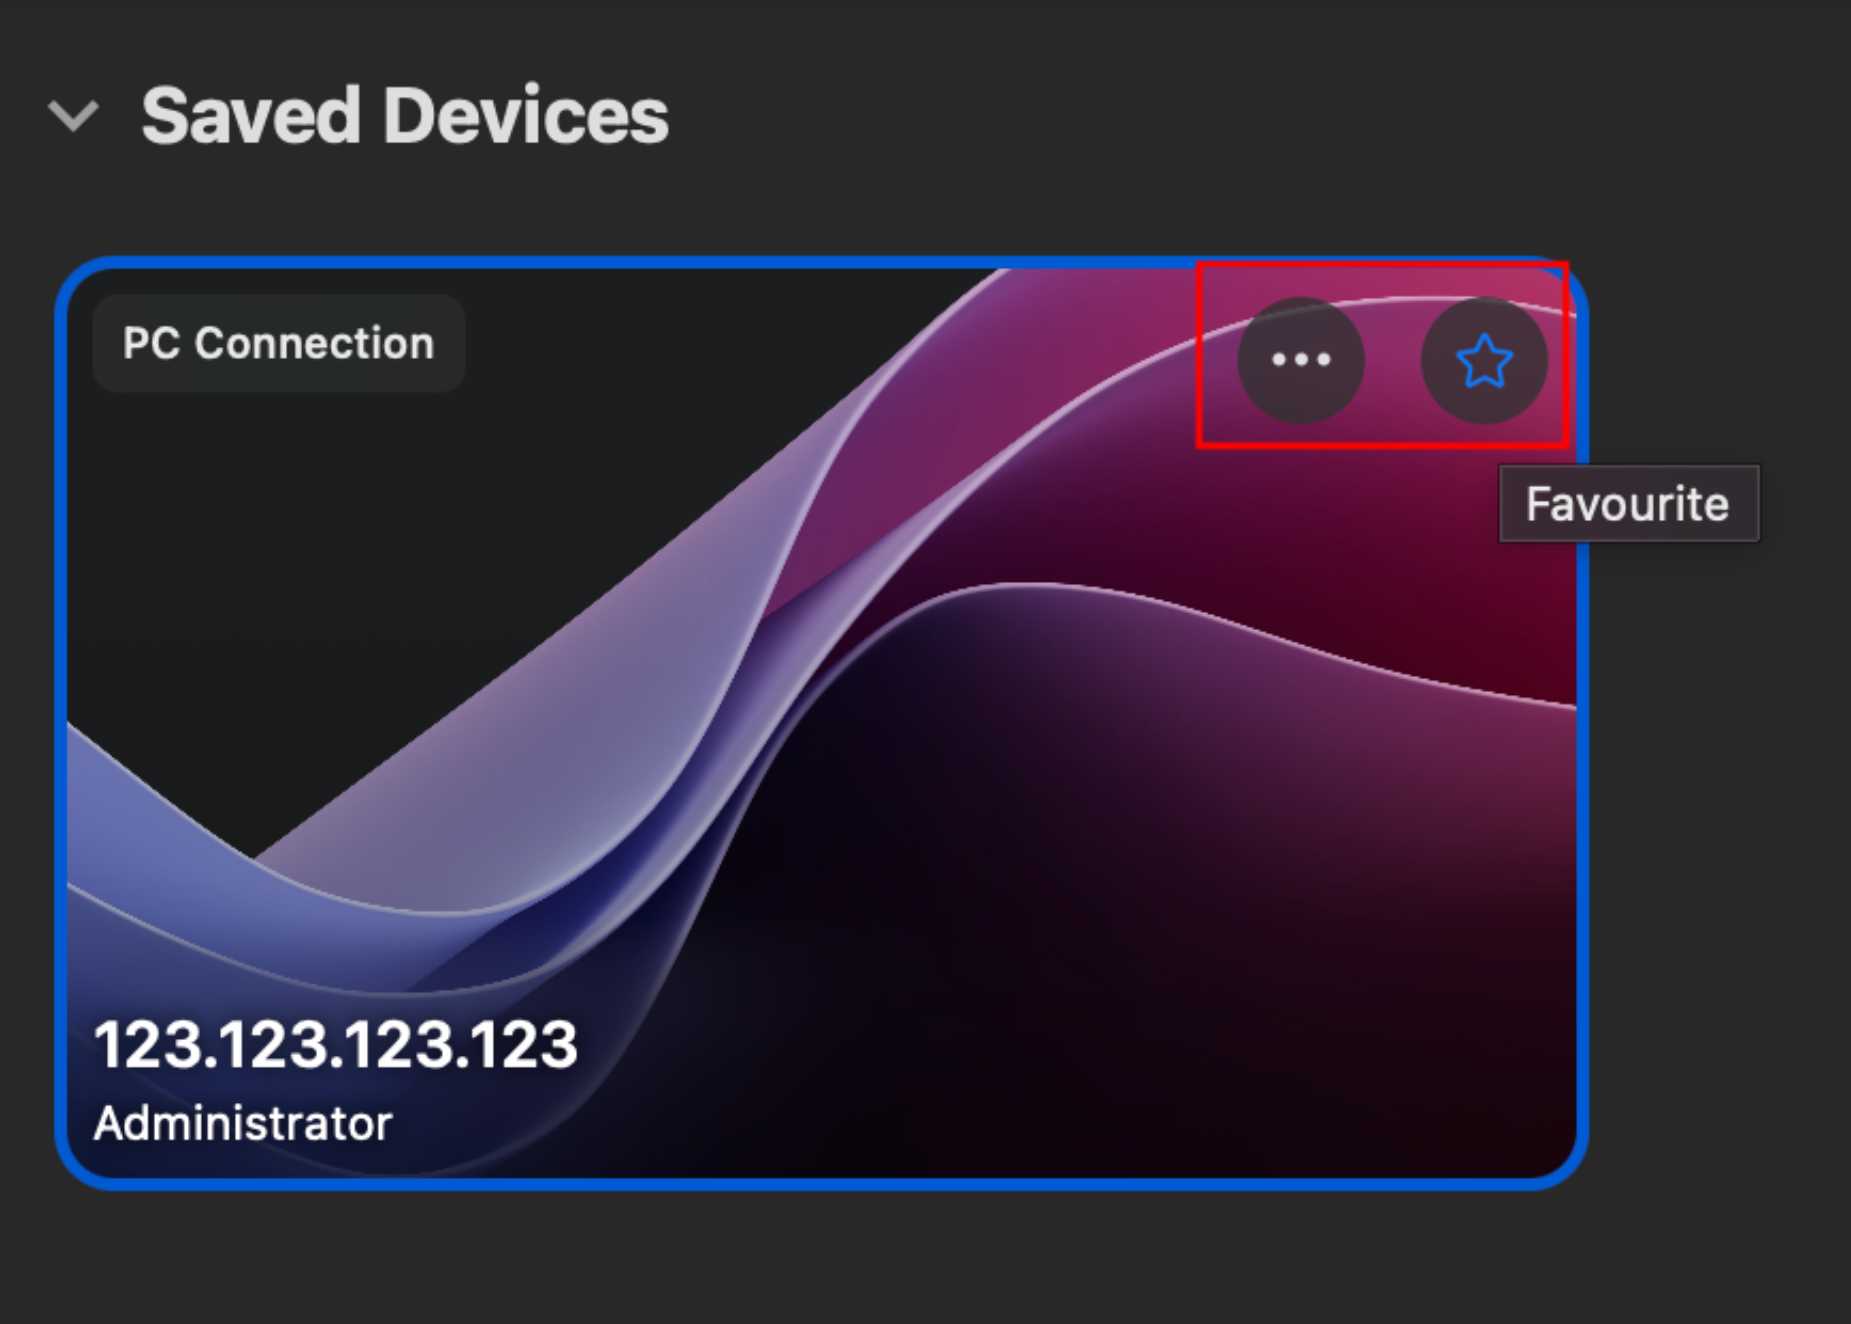
Click on the three dots (menu) that appear.
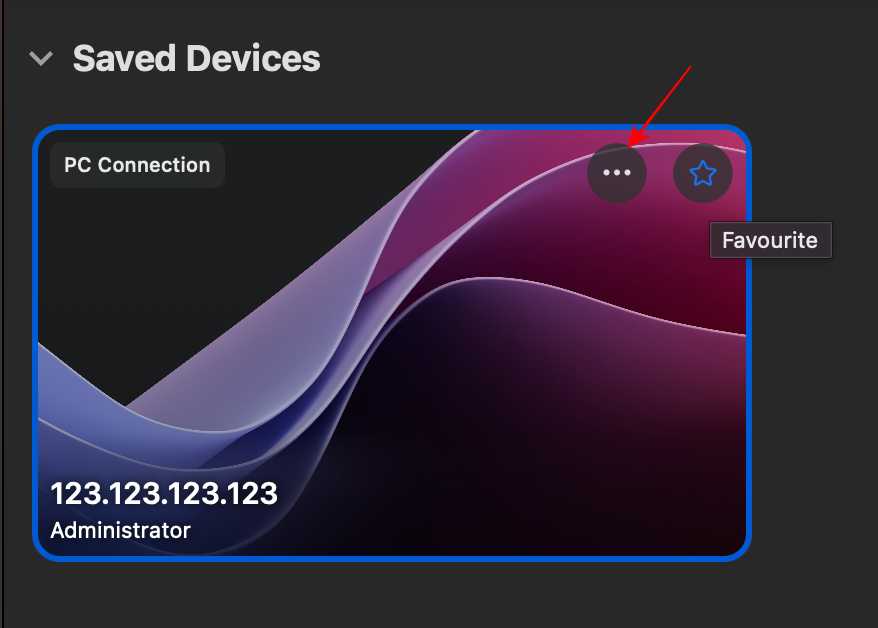
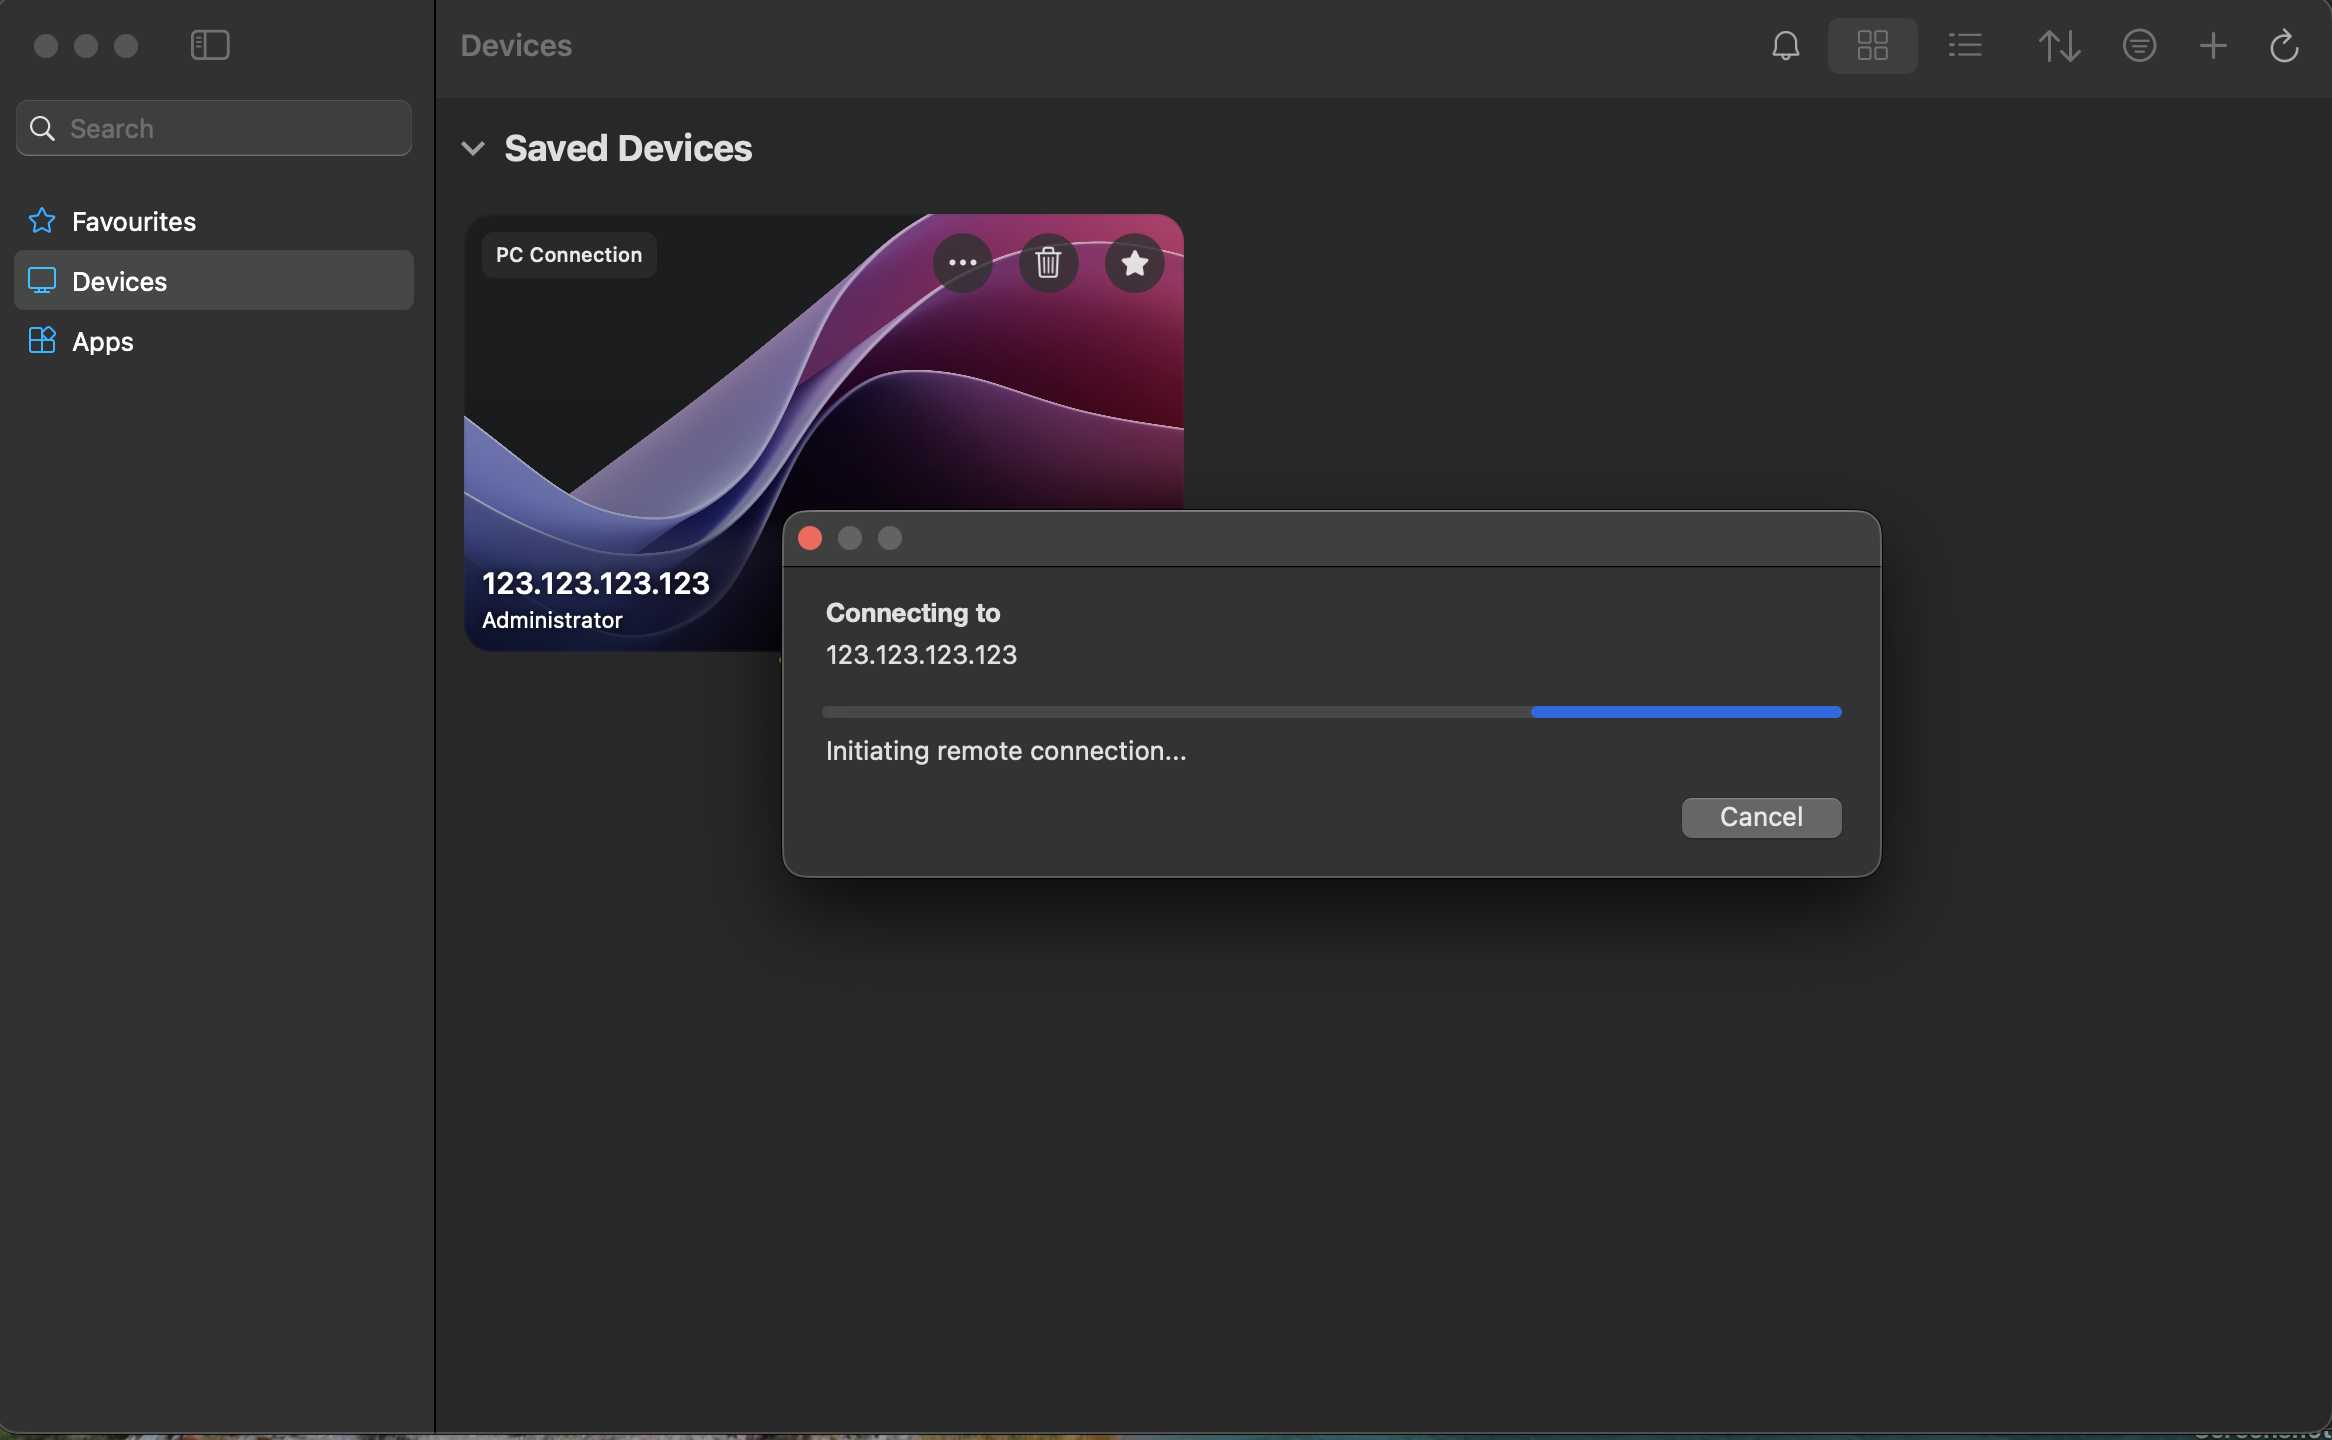
In the menu, select “Connect” to connect to the server. Or you can simply double-click on the saved PC.
The connection process will begin.
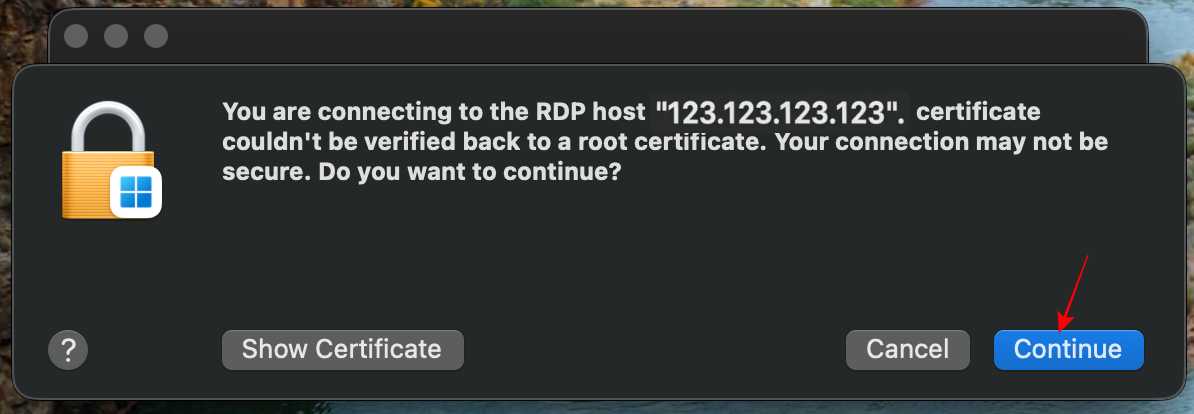
Click “Continue” on the pop-up warning.
Connection completed.
How to use the remote desktop
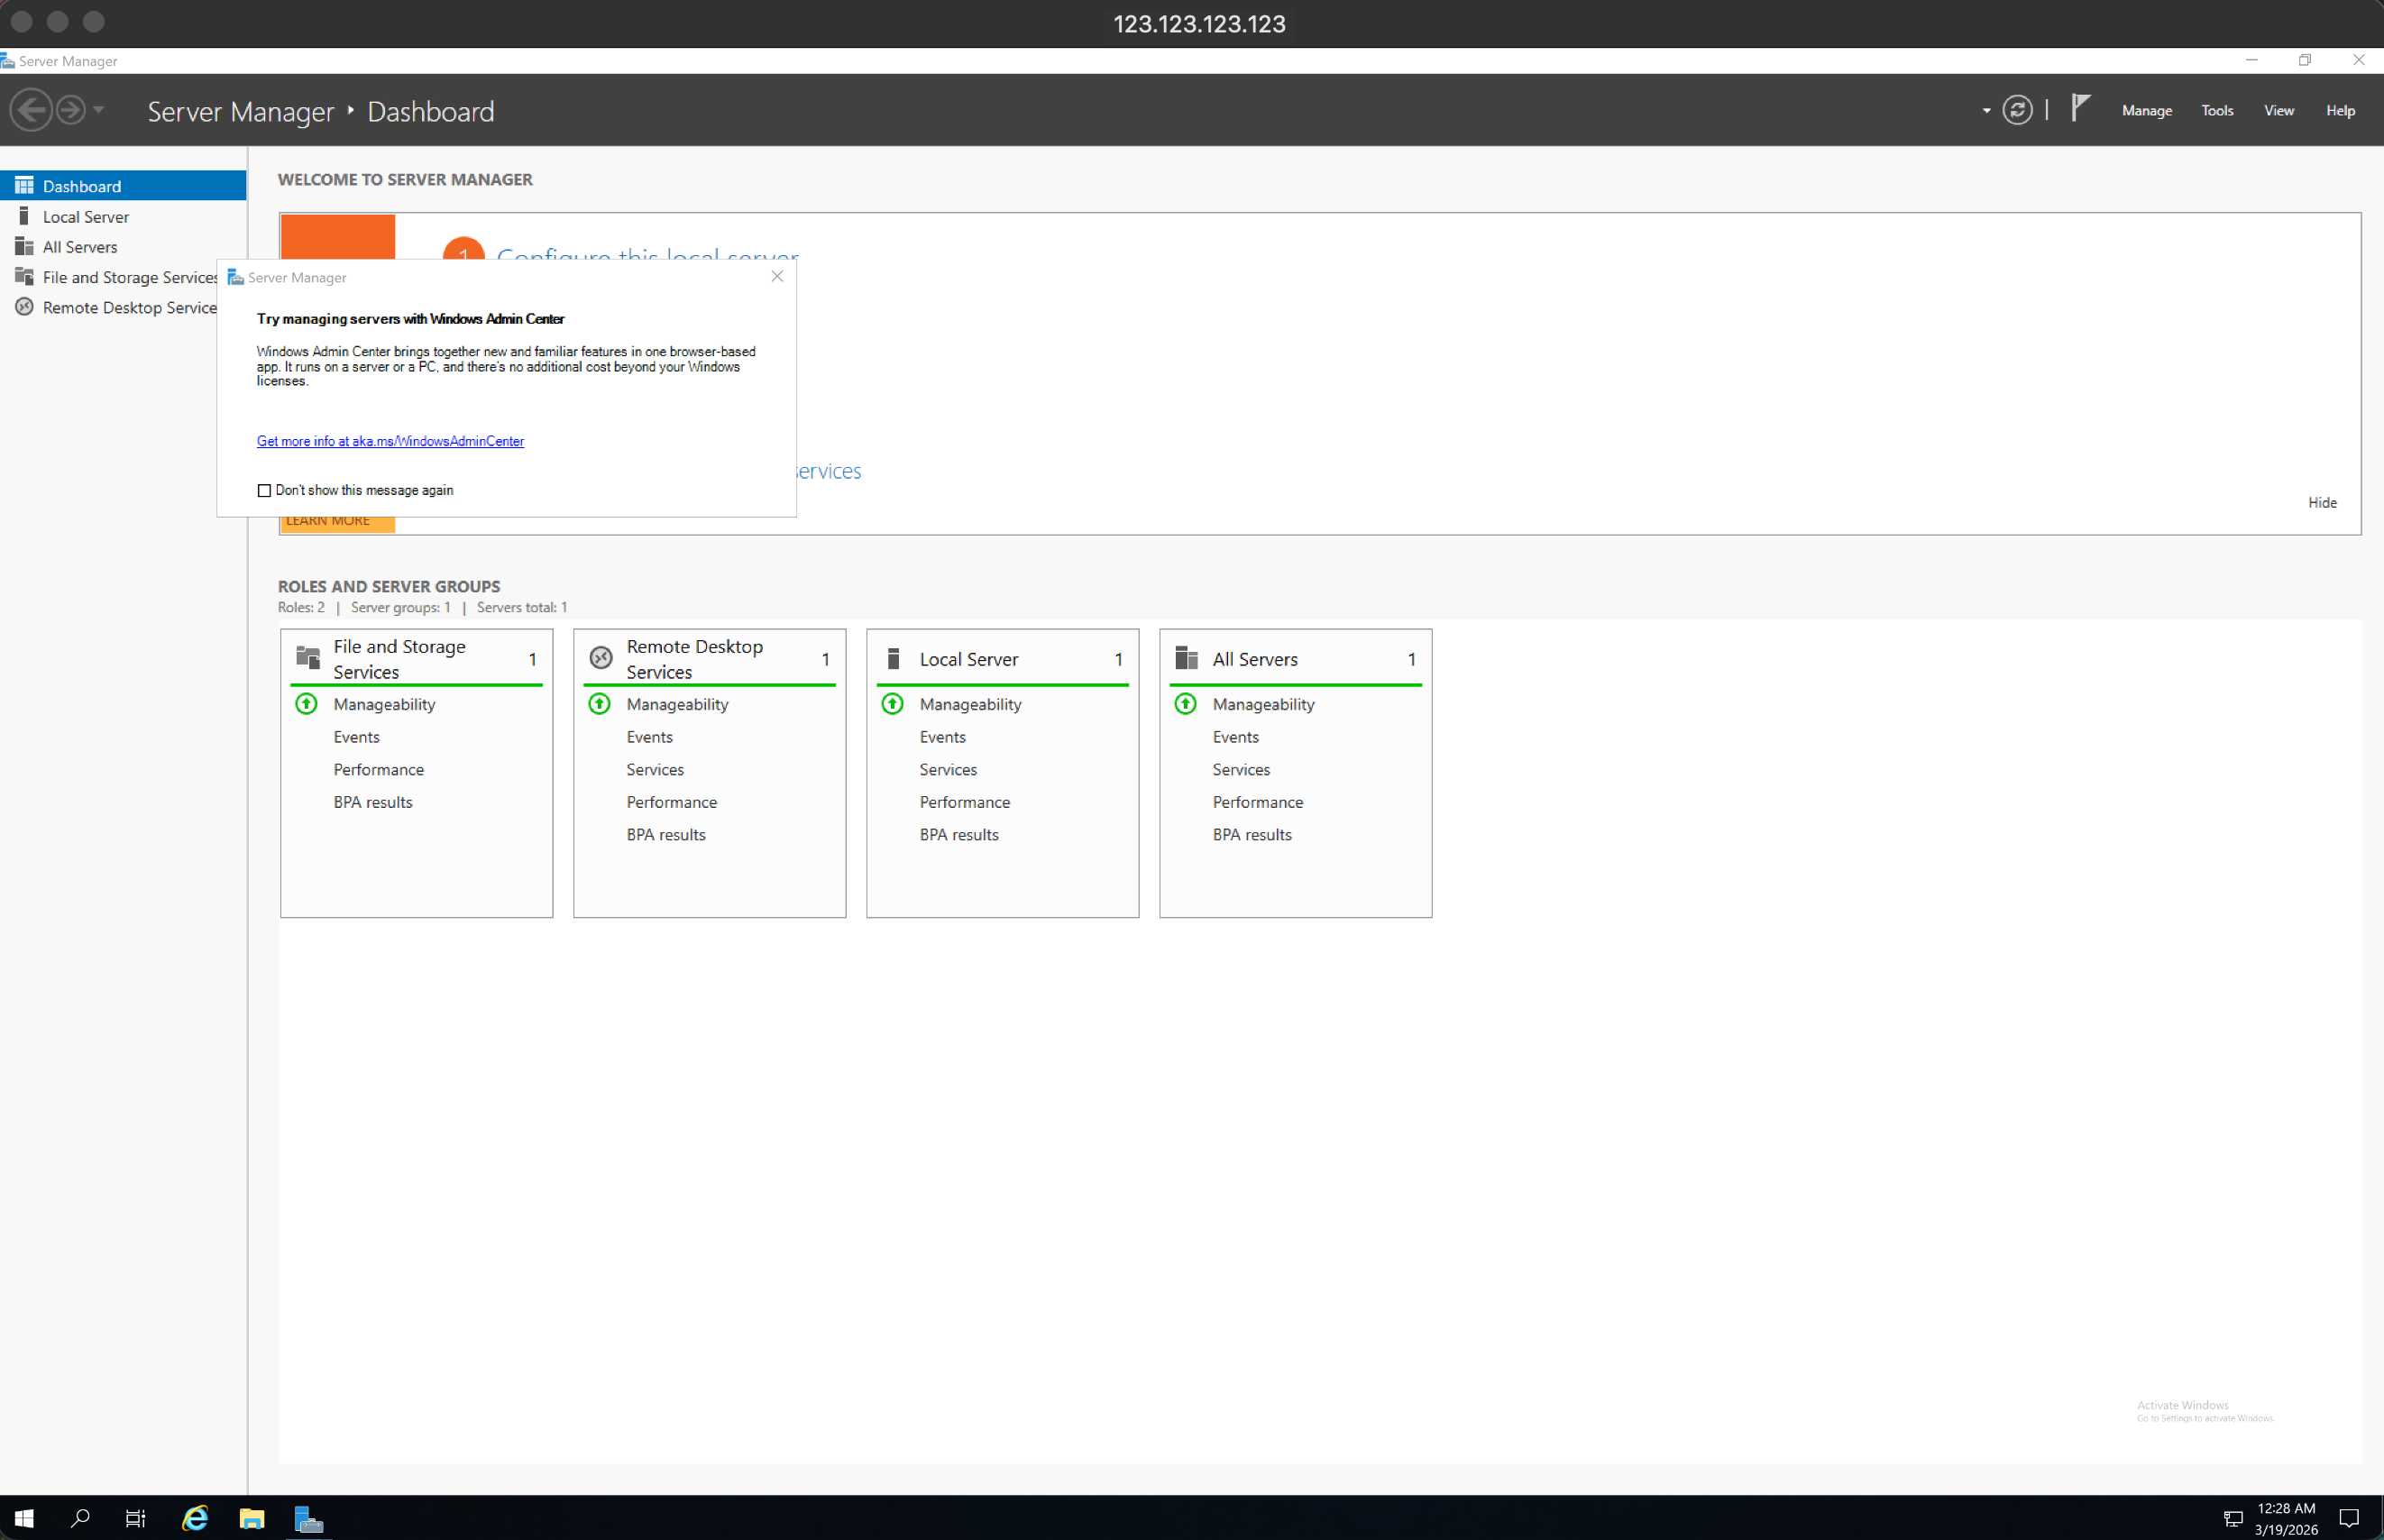
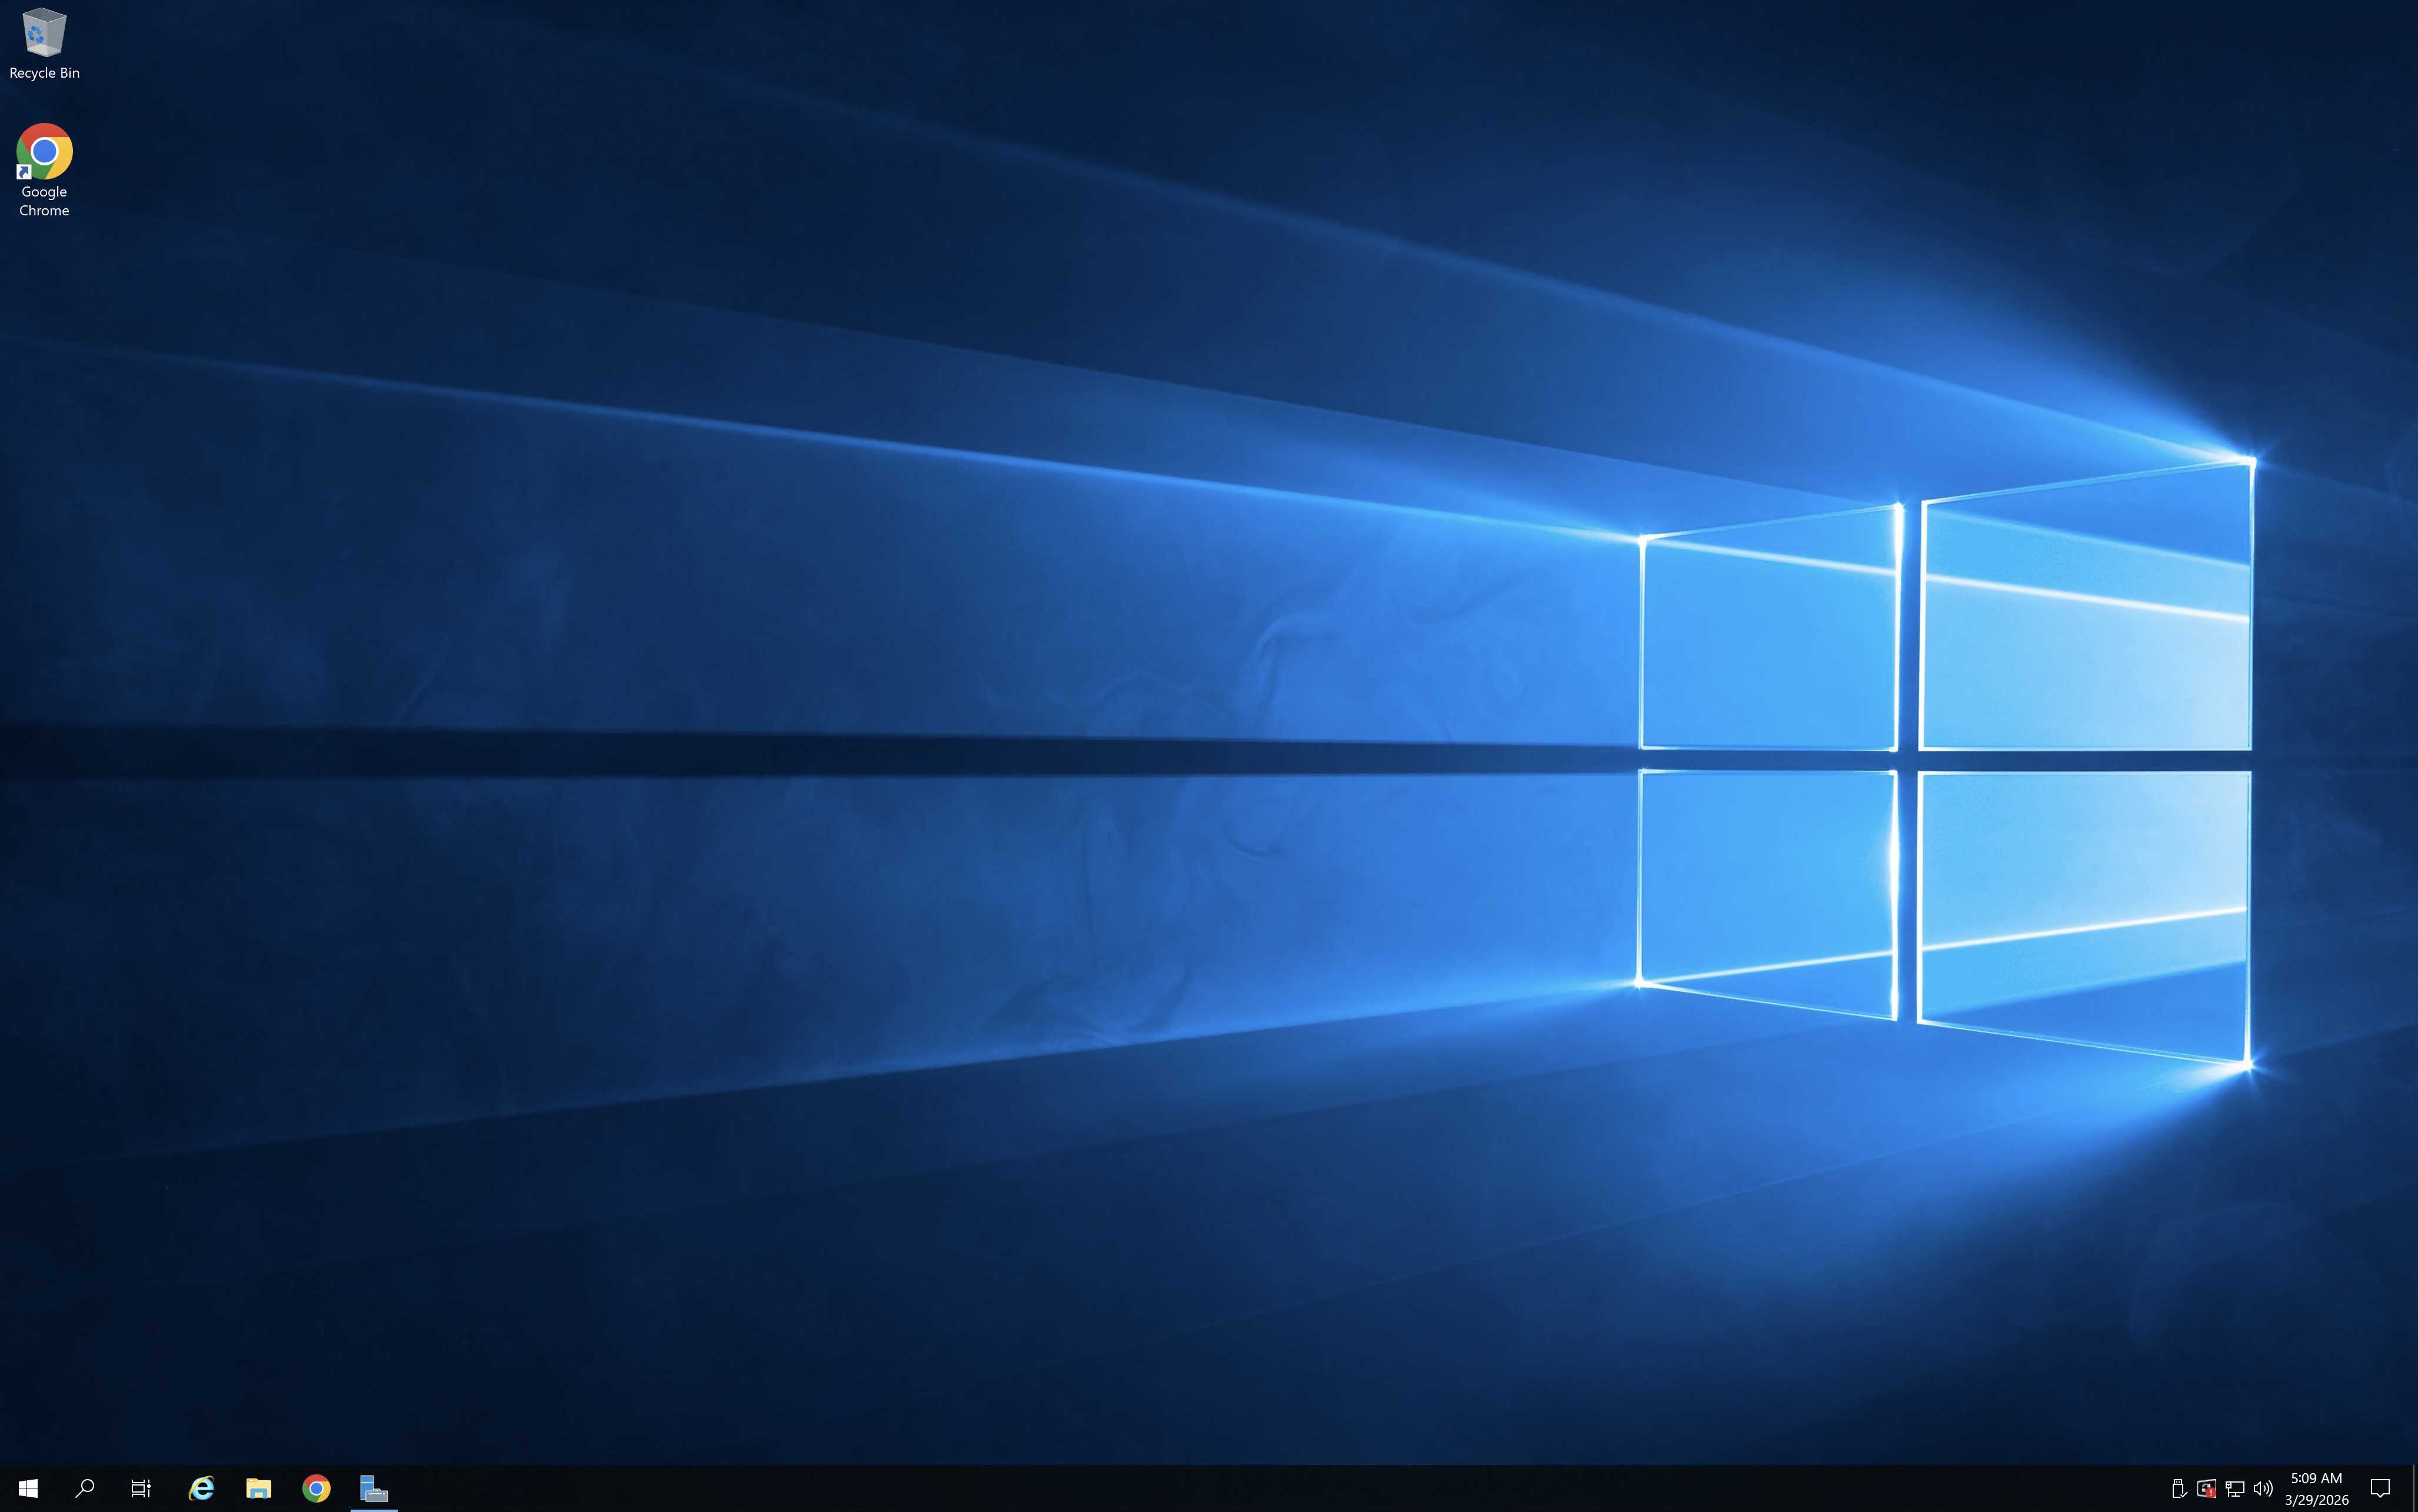
Close the “Server Manager” window. Welcome to your remote Windows desktop!
The Mac keyboard is different from the Windows keyboard, so here are a few helpful notes:
The Command key on a Mac keyboard is equivalent to the Windows key on a PC keyboard.
To perform actions that use the Command key on a Mac, you need to use the Control key in Windows (for example, for “Copy” = Ctrl+C).
Function keys can be activated in the session by additionally pressing the FN key (for example, FN+F1).
The Alt key, located to the right of the spacebar on the Mac keyboard, is equivalent to the Alt Gr (right Alt) key on the Windows keyboard.
By default, the remote session will use the same keyboard locale as the OS running the client. (If your Mac is running an en-us OS, it will be used for remote sessions). If the keyboard locale is not used, check the keyboard settings on the remote PC and change it manually.
 CLOUD VPS
  DEDICATED SERVERS
  HOSTING
  3 months