Installing Pterodactyl on CentOS 7
To install the Pterodactyl game servers control panel, we can use two methods:
- Manual installation.
- Automatic installation of the panel with editing of two parameters.
First, let's look at manual panel installation. If you need to quickly install the panel, you can scroll to the end of the article, there will be a link to the panel installation script.
Now let's look at what needs to be installed point by point and what needs to be done to install such a control panel. Most commands will use the -y switch so that you do not need to confirm the installation of programs.
1. You need to update the system repositories so that there are no installation errors later:
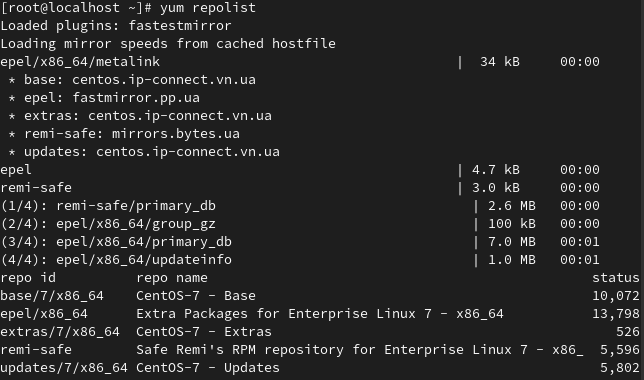
yum -y update2. Let's install the remi repositories, they are necessary to install php:
yum -y install https://dl.fedoraproject.org/pub/epel/epel-release-latest-7.noarch.rpm

yum -y install https://rpms.remirepo.net/enterprise/remi-release-7.rpm
Using the yum repolist command we can see that both repositories are connected.
3. We will also install a repository management program that will allow us to control which php versions we will install on the server:
yum -y install yum-utils
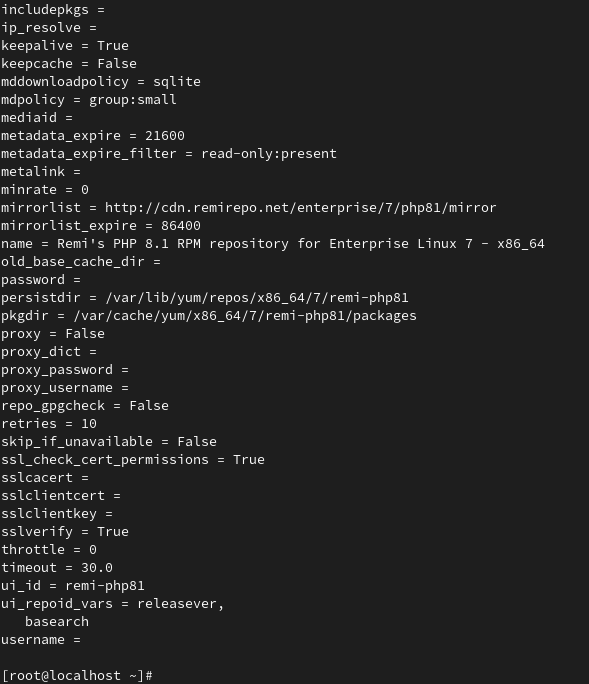
4. Now we will disable all old versions of php and enable php 8.1 because the panel currently requires it:
yum-config-manager --disable 'remi-php*'

yum-config-manager --enable draw-php81
In the screenshot, the command output will show both when disabling and enabling repositories using yum-config-manager.
5. Now we will install the dependencies necessary for the panel to work. Skipping one of them will result in the panel not working:
yum -y install httpd unzip openssl wget curl php php-sodium php-cli php-common php-gd php-mbstring php-mysqlnd php-pdo php-xml php-zip php-tokenizer php-json php-curl php-openssl php-zlib php-bcmath php-posix php-zip redisFirst, we set up a web server that will allow us to access the panel itself. We also installed openssl, which is responsible for generating the security keys, wget and curl needed to download resources from sources other than repositories.
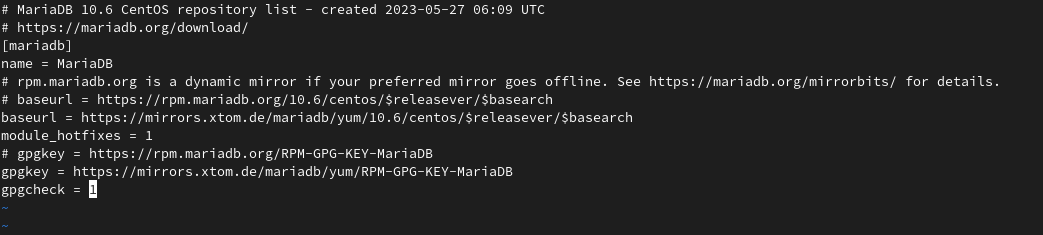
6. Now we need to add a MariaDB repository, which will be responsible for the databases of both the control panel itself and our game servers.
Create a file /etc/yum.repos.d/mariadb.repo with the following text:
# MariaDB 10.6 CentOS repository list - created 2023-05-27 06:09 UTC

# https://mariadb.org/download/

[mariadb]

name = MariaDB

# rpm.mariadb.org is a dynamic mirror if your preferred mirror goes offline. See https://mariadb.org/mirrorbits/ for details.

# baseurl = https://rpm.mariadb.org/10.6/centos/$releasever/$basearch

baseurl = https://mirrors.xtom.de/mariadb/yum/10.6/centos/$releasever/$basearch

module_hotfixes = 1

# gpgkey = https://rpm.mariadb.org/RPM-GPG-KEY-MariaDB

gpgkey = https://mirrors.xtom.de/mariadb/yum/RPM-GPG-KEY-MariaDB

gpgcheck = 1
7. Again we need to update the repositories so that the system can load MariaDB onto the server:
yum -y update
8. Install MariaDB itself:
yum install -y mariadb-server
9. Now let's create a directory in which the panel itself will be, and go to it. Here the -p switch is needed so that it creates directories that are inside the path. For example, there may not be a www directory:
mkdir -p /var/www/pterodactyl

cd /var/www/pterodactyl
10. We configure the firewall so that later we can access the panel:
firewall-cmd --add-service=http --permanent

firewall-cmd --add-service=https --permanent

firewall-cmd --reload
If an error occurs when executing a command, you may have one (-) instead of two before the permanent, reload and add-service parameters.
11. Launch MariaDB (mysql) and run it as a service so that when the system starts, it starts itself:
systemctl start mariadb

systemctl enable mariadb
12. Create a user and database:
mysql -u root -e "CREATE DATABASE panel;"

mysql -u root -e "CREATE USER 'pterodactyl'@'localhost' IDENTIFIED BY '121212121212';"

mysql -u root -e "GRANT ALL PRIVILEGES ON panel.* TO 'pterodactyl'@'localhost' WITH GRANT OPTION;"
There will be no output from these commands, but they are executed.
13. Here we need to install composer, then most of the work will be related to it:
curl -sS https://getcomposer.org/installer | php --install-dir=/usr/local/bin --filename=composer && ln /usr/local/bin/composer /usr/bin/composer

This command downloads the composer installer and then copies it to the /usr/local/bin directory, and creates a link to the /usr/bin directory, which is responsible for commands, so when you write a command, the system looks for the program file there.
14. At this point, use pwd to check if you are in the /var/www/pterodactyl directory, here we will load the panel itself using the command:
curl -Lo panel.tar.gz https://github.com/pterodactyl/panel/releases/latest/download/panel.tar.gz
15. Unpack it:
tar -xzvf Panel.tar.gz
16. We will issue the correct rights so that there are no errors during installation later:
chmod -R 755 store/* bootstrap/cache
17. Copy the .env file, without it the panel will not install correctly:
cp .env.example .env
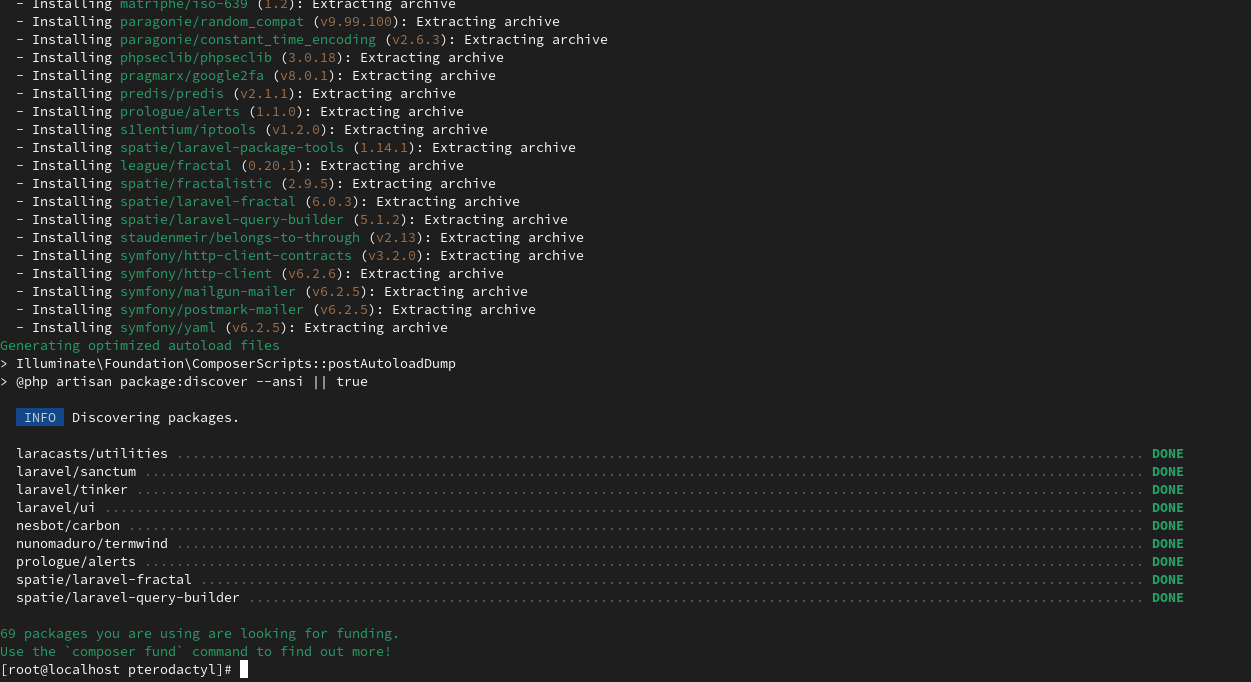
18. Install composer in a local directory. It will ask whether to run the command as the root user, we agree:
composer install --no-dev --optimize-autoloader
19. Let's create a key for composer:
php artisan key:generate --force

20. Let's start connecting the control panel to the database and setting parameters:
php artisan p:environment:setup --author=EMAIL --url=http://DOMAIN --timezone=UTC --cache=file --session=database --queue=database --settings-ui=yes --telemetry=no --no-interaction

The screenshot also shows what settings you need to enter when working in interactive configuration mode. (php artisan p:environment:setup)
Firstly, instead of EMAIL you need to specify any email. For the DOMAIN parameter, you must specify the real domain directed to the server, or the IP address of the server, or the domain specified in the hosts file on the device. These settings are needed for the panel itself to work. It is better not to change all other parameters for stability.
php artisan p:environment:database --host=localhost --port=3306 --database=panel --username=pterodactyl --password=PASS --no-interaction

Here we change the PASS parameter to the password of the database created earlier.
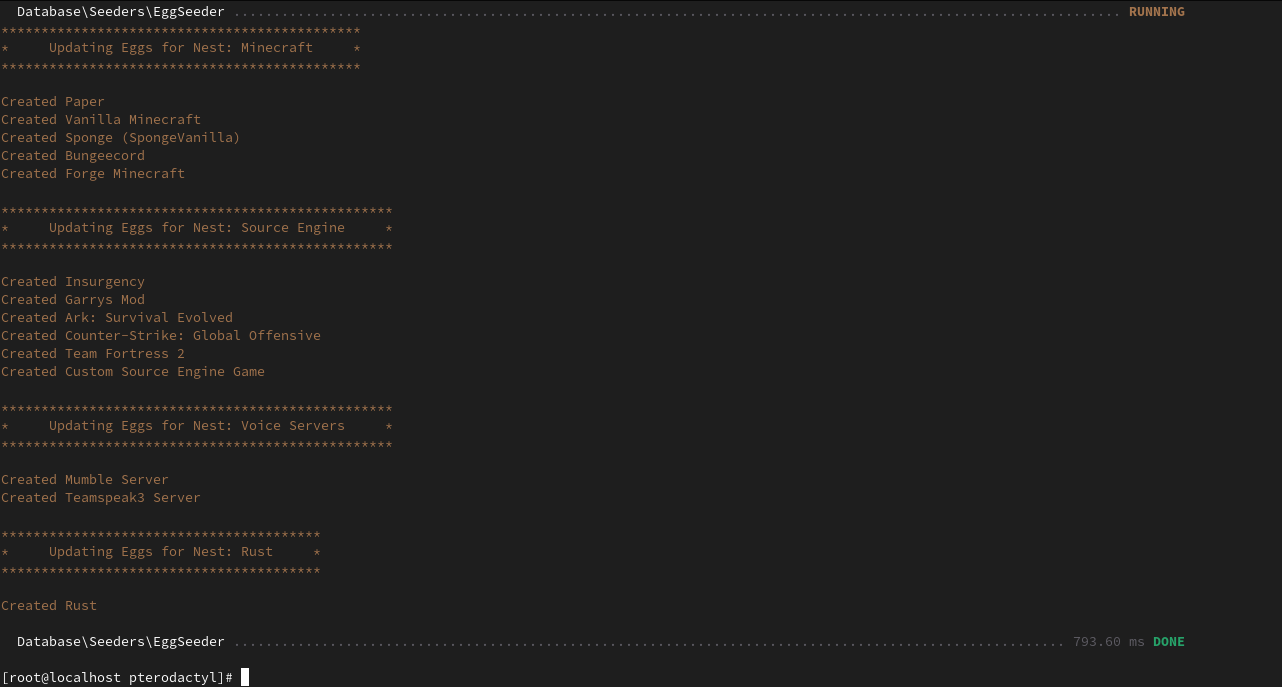
php artisan migrate --seed --force --no-interaction
Command to create a user on the panel. If the user should not be an administrator, then set the --admin parameter to 0. Users can also be created within the panel.
php artisan p:user:make --email=EMAIL --username=USER1 --name-first=USER2 --name-last=USER3 --password=PASS2 --admin=1 --no-interaction

Here in EMAIL you indicate the email with which you will log into the control panel. The USER1 parameter is the user's nickname. The parameters USER2 and USER3 are the first and last name, they are also displayed on the panel. The PASS2 parameter is the password with which the user will log into the control panel. These are all the parameters that need to be edited here. The --no-interaction option is needed to avoid configuring the user through Composer's built-in tools, since you can't change anything in them.
Now we are at the finish line. All we have left is to configure Apache2 (httpd) and configure the control panel service so that it can be restarted when necessary.
21. Set the user for the panel directory:
chown -R apache:apache /var/www/pterodactyl/*
The asterisk means that the command will be used for all files within the given directory.
22. Launch Apache and make it a service as before with MariaDB:
systemctl start httpd

systemctl enable httpd
23. Create an Apache configuration with the following parameters in /etc/httpd/conf.d/pterodactyl.conf:
<VirtualHost *:80>

ServerName DOMAIN

DocumentRoot /var/www/pterodactyl/public

AllowEncodedSlashes On

php_value upload_max_filesize 100M

php_value post_max_size 100M

<Directory "/var/www/pterodactyl/public">

AllowOverride all

Require all granted

</Directory>

</VirtualHost>
Instead of DOMAIN, specify the domain specified earlier when setting up the panel.
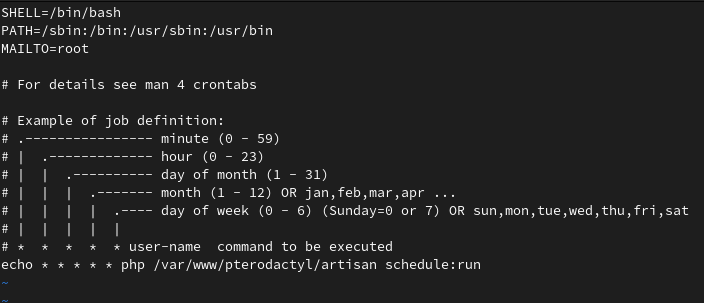
24. Set up a cron job, insert the following tape into the /etc/crontab file:
echo "* * * * * php /var/www/pterodactyl/artisan schedule:run" >> /etc/crontab
25. Now let’s create a service for the control panel itself at /etc/systemd/system/pteroq.service with the following content:
# Pterodactyl Queue Worker File

# ----------------------------------

[Unit]

Description=Pterodactyl Queue Worker

#After=redis.service

[Service]

# On some systems the user and group might be different.

# Some systems use `apache` or `nginx` as the user and group.

User=apache

Group=apache

Restart=always

ExecStart=/usr/bin/php /var/www/pterodactyl/artisan queue:work --queue=high,standard,low --sleep=3 --tries=3

StartLimitInterval=180

StartLimitBurst=30

RestartSec=5s

[Install]

WantedBy=multi-user.target
After which we need to start the service and restart Apache:
systemctl enable --now pteroq.service

systemctl start pteroq.service

systemctl restart httpd
Done, the control panel should be available when navigating to a domain or IP.
When you navigate, you may see this login field.

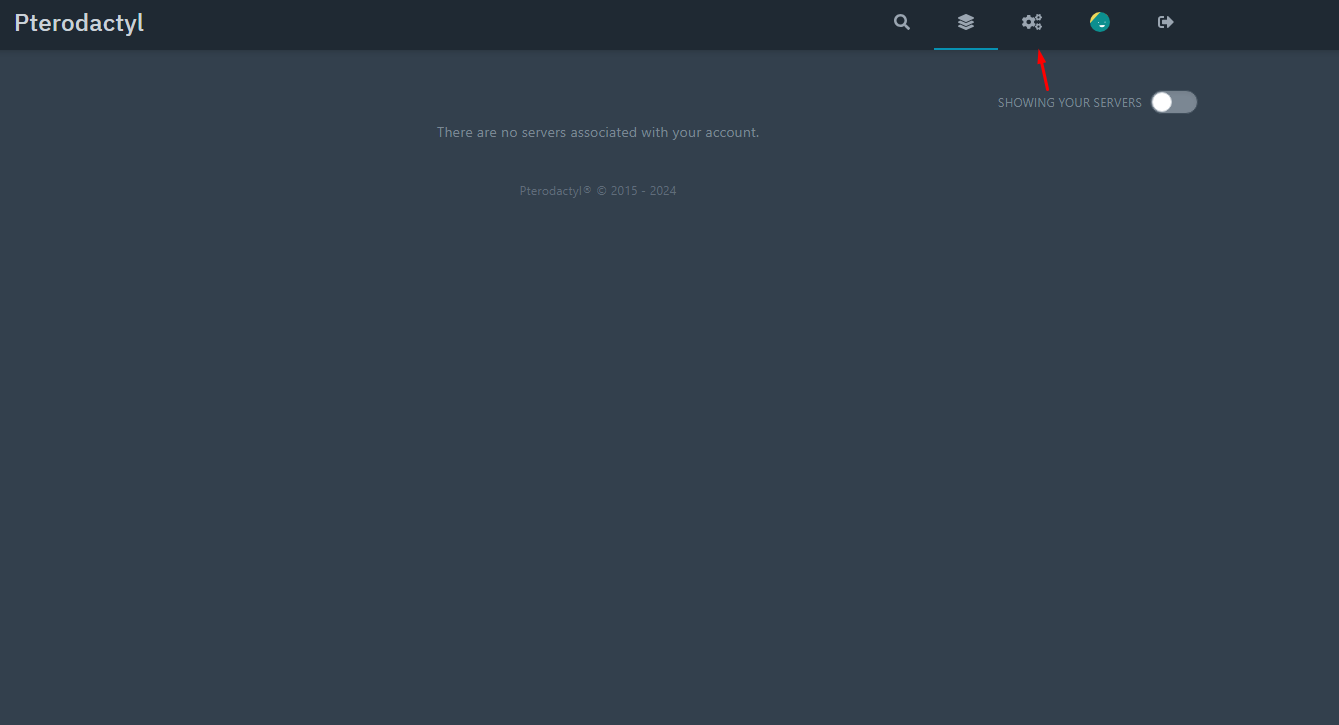
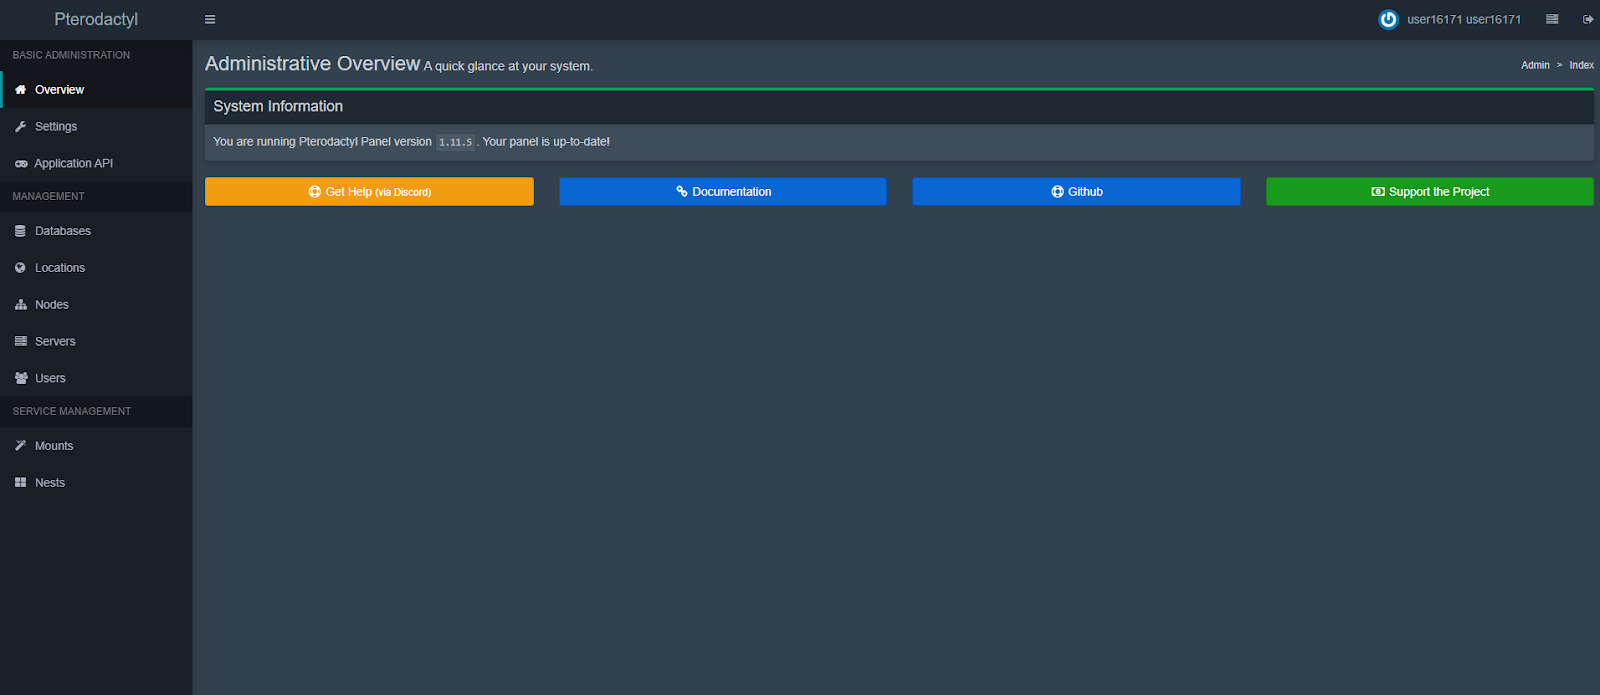
The internal interface of the control panel looks like this:
Now installation using a ready-made script.
Loading the script:
curl -O https://raw.githubusercontent.com/FartGarfild/Pterodactyl.sh/main/CentOS_7_Install.sh
Before running, you need to edit it (vi or nano will do):
vi CentOS_7_Install.sh
In the variables you need to specify EMAIL, which will be used in the control panel, and DOMAIN, which will be used by the panel to access it.
After that, use the command to install the control panel. Installation takes approximately 15-30 minutes.
chmod +x CentOS_7_Install.sh && bash CentOS_7_Install.sh
After which you can find access to the panel in the file /var/www/pterodactyl/access.txt.
This is how to install the Pterodactyl control panel on CentOS 7.
P.S. You may get a 500 error both during manual installation and when installing from a script, this is normal for this panel, it all depends on the system image that I use hosting.