---
title: 'How to install the FileGator file manager on Centos (Apache-Nginx) | Zomro'
description: 'Filegator is an open source file manager that provides a simple and efficient way to manage files and directories on your server.'
image: 'https://dx86q6oq7ry0e.cloudfront.net/uploads/media/blog/a48%40server-panel.net/2023/08/31/01_pUVvdh4.png'
---
![opened image]()
* [Zomro](https://zomro.com/)
* [FAQ](https://zomro.com/blog/faq/)
* How to install the FileGator file manager on Centos 7. (Apache-Nginx)
# How to install the FileGator file manager on Centos 7. (Apache-Nginx)
31-08-2023
Filegator is an open source file manager that provides a simple and efficient way to manage files and directories on your server. If you already have Apache-Nginx and VestaCP installed on CentOS 7, this detailed guide will help you install Filegator without any problems.
###
**Software Update** : First of all, update your system software to make sure all packages are up to date.
sudo yum update -y
### **Step 1: Downloading and unzipping Filegator**
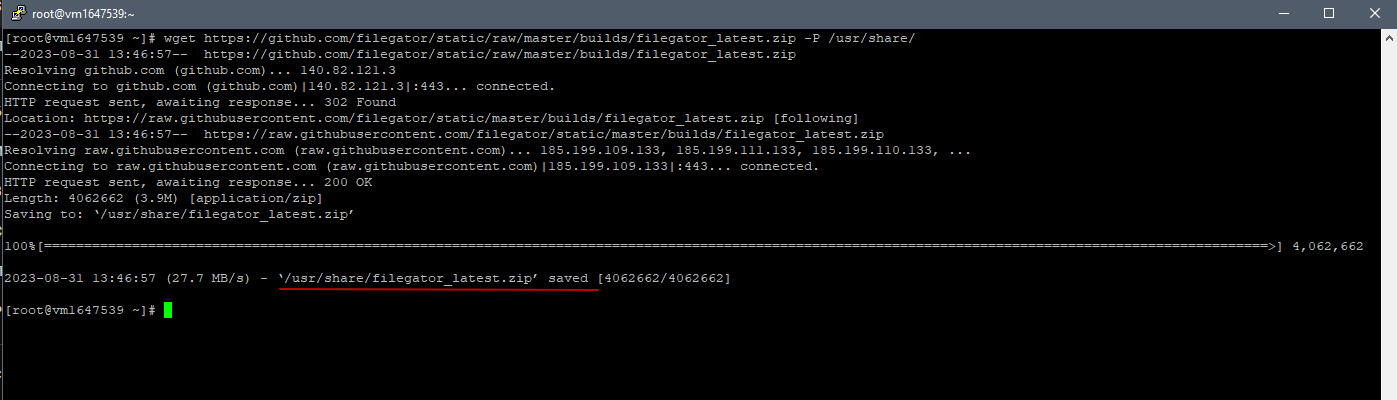
**Downloading the file** : Download the latest version of Filegator directly from the GitHub repository to the `/usr/share/` directory.
wget https://github.com/filegator/static/raw/master/builds/filegator_latest.zip -P /usr/share/
.
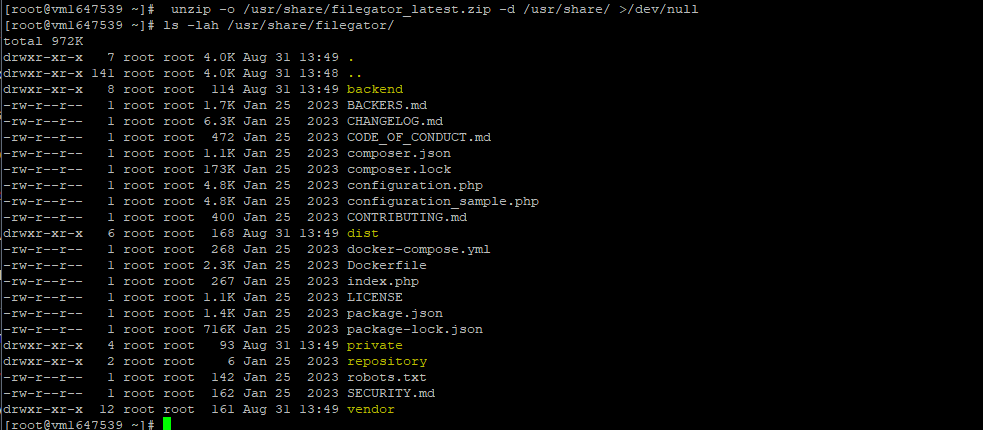
**Extract archive** : The command extracts the downloaded archive to the same directory.
unzip -o /usr/share/filegator_latest.zip -d /usr/share/ >/dev/null
### **Step 2: Set permissions**
**Change the owner** : This is necessary to ensure proper security and functionality of the directory.

As we can see the permissions are **root:root** So from under the **admin** user we can't work.
chown -R admin:admin:admin /usr/share/filegator
**Customize permissions** : Provide appropriate read, write, and execute permissions.
chmod -R 775 /usr/share/filegator

**Additional configuration** : In this example, the permissions are also set for the `**/home/backup** ` directory so that you can download backups that the VestaCP panel has created.
chmod +rx /home/backup

###
### **Step 3: Apache Configuration**
**Delete an existing configuration file** : If the file already exists, it should be deleted to avoid conflicts.
sudo rm /etc/httpd/conf.d/filegator.conf
**Creating a new configuration file** : A new configuration file is then created and populated with the appropriate settings.
vim /etc/httpd/conf.d/filegator.conf
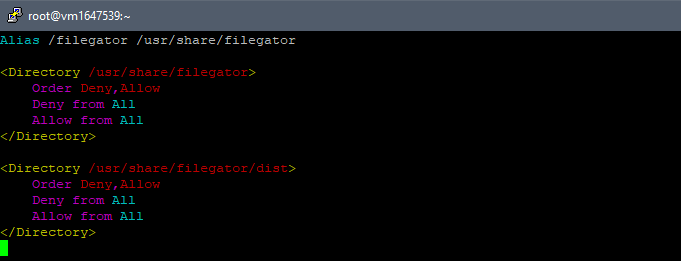
Paste the following code:
Alias /filegator /usr/share/filegator
Order Deny,Allow
Deny from All
Allow from All
Order Deny,Allow
Deny from All
Allow from All
Should look like this:
### Step 4: Modify the Filegator configuration
**Change Root Directory** : The following command changes the default storage root directory in Filegator.
sed -i "s#__DIR__\.'/repository'#'/home'#g" /usr/share/filegator/configuration.php

### Step 5: Activate Changes
**Restart Apache** : After all of the previous steps, Apache must be restarted to apply the changes.
systemctl restart httpd
## Completion
From this point Filegator should be fully installed and configured on your CentOS 7 server with Apache-Nginx and VestaCP. The Filegator interface can be accessed through a browser at **`http://your_domain_or_ip/filegator`**.
Similar articles:
[Enabling HTTP2 in ISPmanager](https://zomro.com/blog/faq/202-vkljuchenie-http2-v-ispmanager) [VestaCP: Database without user prefix.](https://zomro.com/blog/faq/214-vestacp-baza-dannyh-bez-prefiksa-polzovatelja) [Access via FTP to the site folder on the server with the Hestia panel](https://zomro.com/blog/faq/224-dostup-po-ftp-k-papke-sajta-na-servere-s-panelju-hestia) [Installing MetaTrader 4/5 on a Zomro server](https://zomro.com/blog/faq/648-installing-metatrader-45-on-the-zomro-server) [How to check for viruses Linux server](https://zomro.com/blog/faq/339-kak-proverit-na-virusy-linux-server)
[ Virtual hosting from €3.98/mon ](/virtual)