---
title: 'How to install HestiaCP | Zomro'
description: 'HestiaCP is a free web server control panel. It is a fork panel of VestaCP. In the same simple and clear web interface. The command line interface is the same as VestaCP.'
image: 'https://dx86q6oq7ry0e.cloudfront.net/uploads/media/blog/a48@server-panel.net/2022/08/01/1660478062_1.png'
---
![opened image]()
* [Zomro](https://zomro.com/)
* [FAQ](https://zomro.com/blog/faq/)
* How to install HestiaCP
# How to install HestiaCP
12-08-2022
**HestiaCP** is a free web server control panel. It is a fork panel of VestaCP.
In the same simple and clear web interface. The command line interface is the same as VestaCP.
In this article, we are installing **HestiaCP** on a server running Ubuntu 20.04. This panel also supports other operating systems. Such as:
* Debian 10
* Debian 11
* Ubuntu 18.04 LTS
* Ubuntu 20.04 LTS
* Ubuntu 22.04 LTS
So, for starters, let's update the packages on the server.
apt-get update && apt-get update -y
Now we need to add the repository key for HestiaCP in order to be able to order the necessary packages.
##
## **How to add a repository key for HestiaCP?**
wget -qO - https://gpg.hestiacp.com/deb_signing.key | sudo apt-key add -
Paste the latest version of the ca-certificates package
apt-get install ca-certificates
Now we can use the install script download:
wget https://raw.githubusercontent.com/hestiacp/hestiacp/release/install/hst-install.sh
And enable the panel setting interactively in the console. But in such cases, packages and services are installed by default.
## **What to do after downloading the file?**
-a, --apache Install Apache [yes|no] default: yes
-w, --phpfpm Install PHP-FPM [yes|no] by default: yes
-o, --multiphp Set Multi-PHP [yes|no] default: no
-v, --vsftpd Install Vsftpd [yes|no] by default: yes
-j, --proftpd Install ProFTPD [yes|no] default: no
-k, --named Set binding [yes|no] default: yes
-m, --mysql Install MariaDB [yes|no] default: yes
-g, --postgresql Install PostgreSQL [yes|no] default: no
-x, --exim Install Exim [yes|no] by default: yes
-z, --dovecot Set Dovecot [yes|no] default: yes
-Z, --sieve Set sieve [yes|no] default: no
-c, --clamav Set ClamAV [yes|no] default: yes
-t, --spamassassin Set SpamAssassin [yes|no] by default: yes
-i, --iptables Set Iptables [yes|no] to default: yes
-b, --fail2ban Set Fail2ban [yes|no] to default: yes
-q, --quota Filesystem quota [yes|no] default: no
-d, --api Enable API [yes|no] default: yes
-r, --port Change default internal port: 8083
-l, --lang Default language: en
-y, --interactive Install interactively [yes|no] default: yes
-s, --hostname Set hostname
-e, --email Set administrator email address
-p, --password Set administrator password
-f, --force Force installation
-h, --help Print this help
Therefore, we love fruits where you can generate a string with the desired parameters.
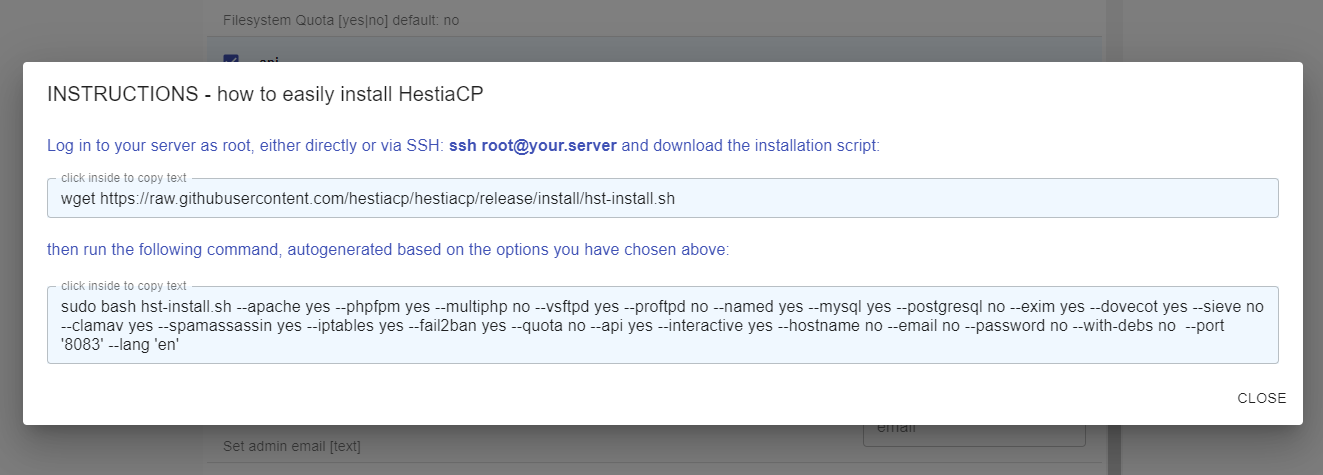
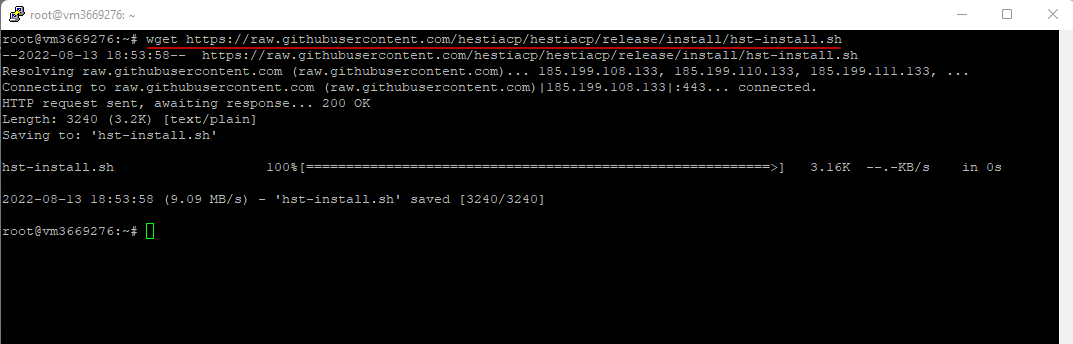
Copy the money supply to download the installation files. Paste into the console.
wget https://raw.githubusercontent.com/hestiacp/hestiacp/release/install/hst-install.sh
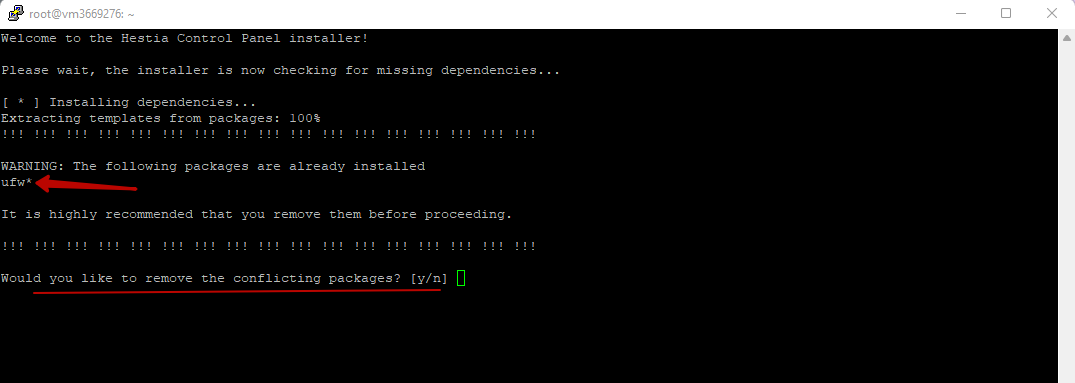
After downloading the file, copy the second package with all the keys that are needed for installation and paste it into the console. If necessary, I install PHP-FPM and Multi PHP. The domain, mail and password are also known. If you do not use it, if we talk about security, then after the installation is completed, it will be generated automatically.

During the installation process, the removal of **ufw** will be requested, we agree, since we will use **iptables**.
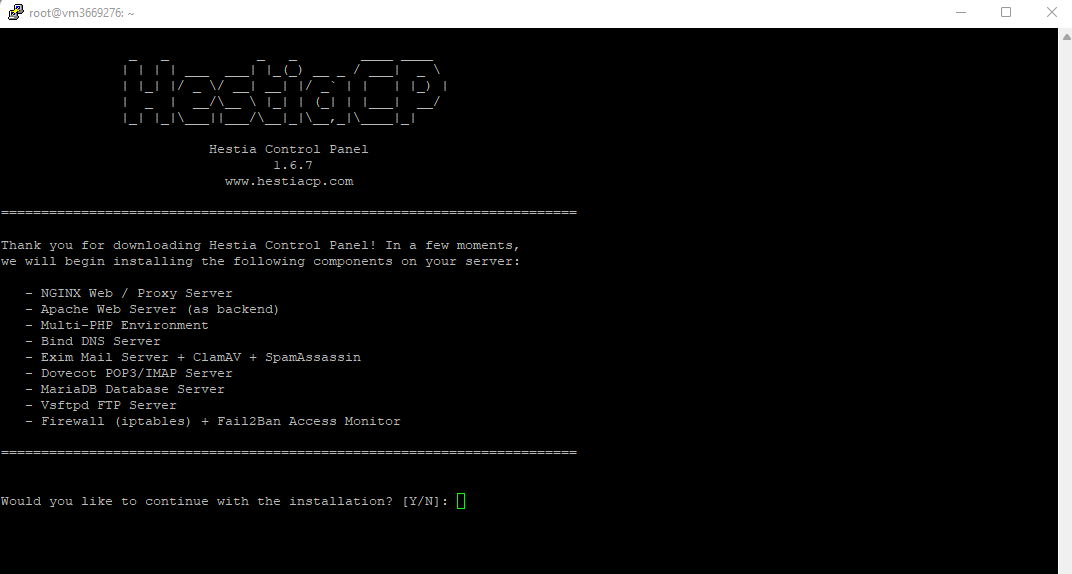
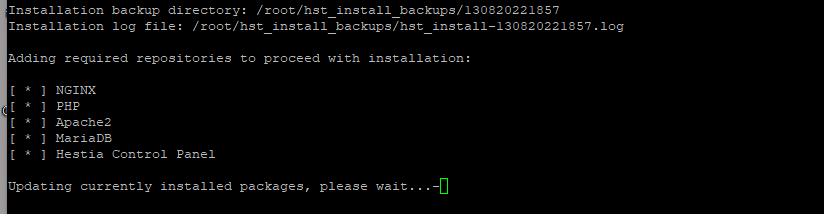
We are waiting for the installation of the HestiaCP panel to finish. This may take 15 to 25 minutes.
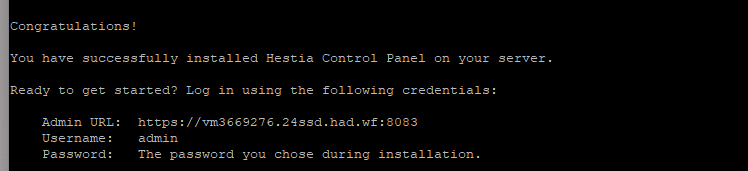
After the installation is complete, the server will need to be rebooted, so copy the panel access data for the admin user if you did not specify a password at the beginning.

If you still didn’t find it or forgot it, you can reset it using the command:
/usr/local/vesta/bin/v-change-user-password admin PASSWORD
where: **admin** is the network user, the password will be set;
**PASSWORD** is your new password. (replace it with whatever you want)
After restarting, you can connect to the panel via the domain with the port that was specified during installation, or via IP.
https://your_IP:8083
**IMPORTANT!!!
Assigned by domain for security. Also, when going to the phpMyAdmin panel, having received a domain and not an IP.**
Now you can connect to the **HestiaCP** panel
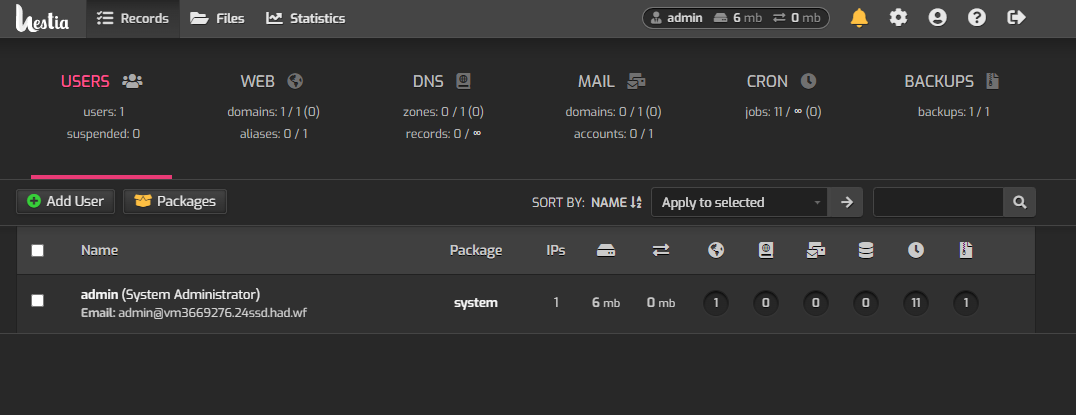
In the next article, we'll add a user and a domain that could be deployed to a site. You can read this article
We also suggest you other useful articles:
* [Domain transfer to another user on the same server with VestaCP/HestiaCP](https://zomro.com/blog/faq/386-domain-transfer-to-another-user-on-the-same-server-with-vestacphestiacp)
* [Installation of PostgreSQL and pgAdmin4 on HestiaCP panel](https://zomro.com/blog/faq/326-ustanovka-postgresql-i-pgadmin4-na-panel-hestiacp)
* [How to change PHP version in HestiaCP panel?](https://zomro.com/blog/faq/246-kak-smenit-versiju-php-v-paneli-hestiacp)
Similar articles:
[How to Install Docker on Ubuntu 20.04](https://zomro.com/blog/faq/286-kak-ustanovit-docker-na-ubuntu-2004) [How to install NextCloud on Docker](https://zomro.com/blog/faq/302-kak-ustanovit-nextcloud-v-docker) [How to connect to a server via FTP, SFTP, and SCP](https://zomro.com/blog/faq/144-kak-podkljuchitsja-k-serveru-po-ftp-sftp-i-scp) [MySQL basics](https://zomro.com/blog/faq/264-osnovy-raboty-v-mysql) [Site transfer on servers with VestaCP panel](https://zomro.com/blog/faq/384-site-transfer-on-servers-with-vestacp-panel)
[ Virtual hosting from €3.98/mon ](/virtual)