---
title: 'Installing Python on Linux. Several ways | Zomro'
description: 'In this article, we will explain how to install Python on your Linux distribution.'
image: 'https://dx86q6oq7ry0e.cloudfront.net/uploads/blog/seo%40server-panel.net/2024/09/16/1_q50.jpg'
---
![opened image]()
* [Zomro](https://zomro.com/)
* [Useful articles](https://zomro.com/blog/articles/)
* Installing Python on Linux. Several ways
# Installing Python on Linux. Several ways
16-09-2024
Python — is a multifunctional programming language suitable for solving a wide range of tasks, from creating websites to data analysis. It is popular among developers due to its simplicity and versatility.
In this article, we will explain how to install Python on your Linux distribution.
## **We will consider three options for installing Python:**
1. **Using a package manager** — the simplest and most common method of installing Python. Most Linux distributions already have Python packages in their repositories.
2. **From source code** — this method provides more flexibility but can be more complicated.
3. **Using a Python package manager (pyenv)** — the most convenient method, requiring additional setup.
###
### **Checking Python versions**
Usually, on most Linux distributions, Python 3 is already installed as a standard option. We can check its version using the following command by opening the terminal.
**python3 --version**
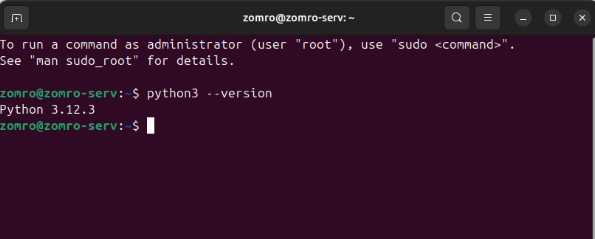
However, on outdated versions of distributions, Python 2 may be installed, for which we use the command
**python --version**
### **Installing Python via package manager**
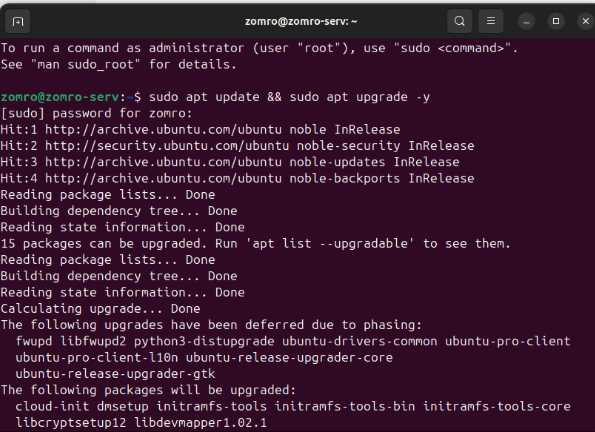
Before installation, it is necessary to update system packages and repositories, and here we will consider different methods for different versions
**_Debian / Ubuntu_**
**sudo apt update && sudo apt upgrade -y**
**_RHEL (Fedora / Almalinux / RockyOS / CentOS)_**
**sudo yum update -y**
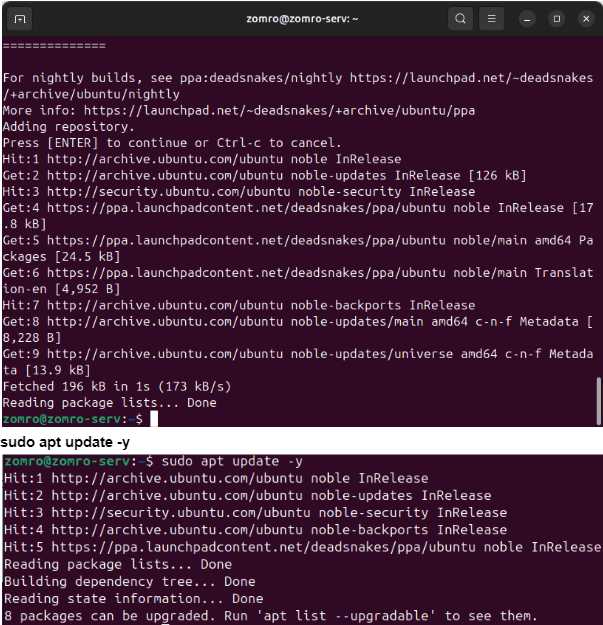
For Ubuntu distributions, it is easy to extend the list of available versions by adding the deadsnakes repository:
**sudo add-apt-repository ppa:deadsnakes/ppa**
For Red Hat-based distributions (Fedora / Almalinux / RockyOS / CentOS), it is easy to add the EPEL (Extra Packages for Enterprise Linux) repository:
**sudo yum install epel-release -y**
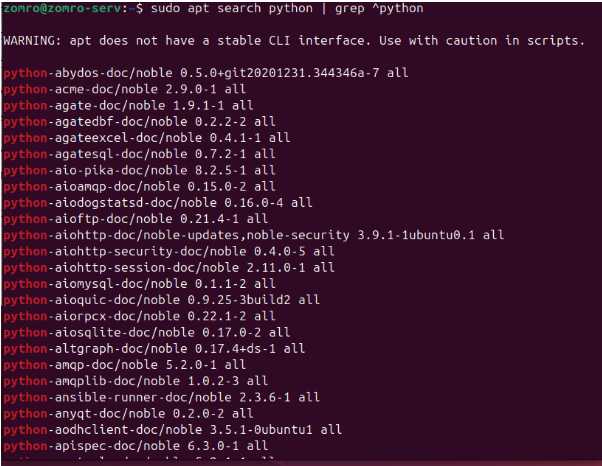
Next, we need to check which versions of Python are available for installation:
**_Debian / Ubuntu_**
**sudo apt search python | grep ^python**
**_RHEL (Fedora / Almalinux / RockyOS / CentOS)_**
**sudo yum list available | grep ^python**
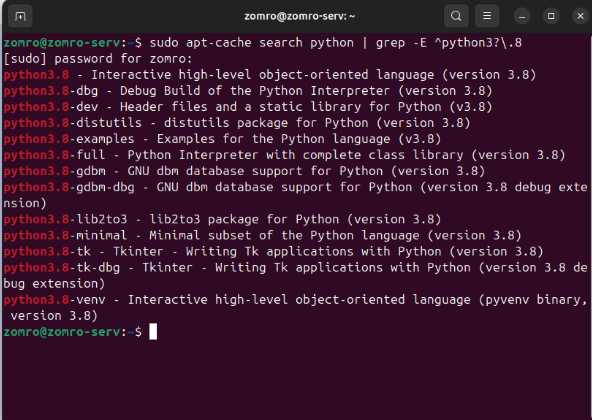
To limit ourselves to the required version, we need to enter a command like (we are looking for whether version python 3.8 is available, as version 12 is already installed)
**_Debian / Ubuntu_**
**sudo apt-cache search python | grep -E ^python3?\\.8**
**_RHEL (Fedora / Almalinux / RockyOS / CentOS)_**
**sudo yum list available | grep -E ^python3?\\.8**
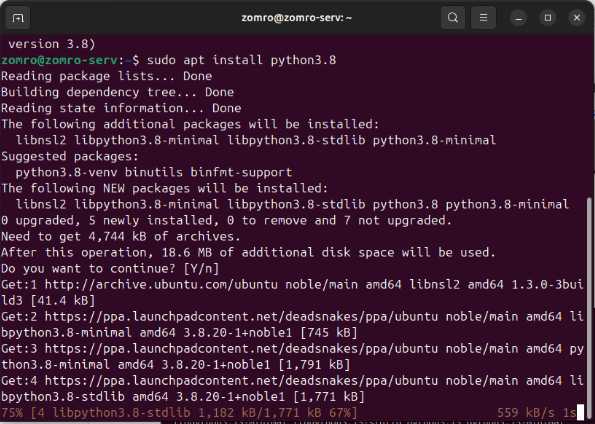
If the required version is in the list, it can be installed using the command
**_Debian / Ubuntu_**
**sudo apt install python3.8**
**_RHEL (Fedora / Almalinux / RockyOS / CentOS)_**
**sudo yum install python3.8 -y**
An important point here is whether to specify the minor version with a dot (python3.10) or without (python310), which depends on how the package version is named. This can be determined from the results of the previous commands we used to check available versions for installation.
To refer to the installed version of the interpreter, you need to specify its number and version in the command:
**python3.8 --version**

##
## **Compiling Python from source code**
Compiling a version of Python from source code requires the installation of additional dependencies. We perform the installation with the following commands:
**_Debian / Ubuntu_**
**sudo apt-get install -y make curl build-essential libssl-dev zlib1g-dev libbz2-dev libreadline-dev libsqlite3-dev wget llvm libncurses5-dev libncursesw5-dev xz-utils tk-dev libffi-dev liblzma-dev python-openssl**
****
**_RHEL (Fedora / Almalinux / RockyOS / CentOS)_**
**sudo yum -y install epel-release**
**sudo yum -y groupinstall «Development Tools»**
**sudo yum -y install curl gcc make zlib-devel bzip2 bzip2-devel readline-devel sqlite sqlite-devel openssl-devel xz xz-devel libffi-devel tk-devel**
For convenience in further work on installing Python in shell command variables, let's set the version number as a variable
You can check the list of available Python versions on the official website
You need to download and unpack the archive with the source code, and then navigate to the unpacked directory, and to simplify our task, we can use the Build, compile and install Python from source code service
**sudo apt-get update**
**sudo apt-get upgrade**
**sudo apt-get install -y make build-essential libssl-dev zlib1g-dev libbz2-dev libreadline-dev libsqlite3-dev wget curl llvm libncurses5-dev libncursesw5-dev xz-utils tk-dev liblzma-dev tk-dev**
**cd /tmp/**
**wget https://www.python.org/ftp/python/3.9.20/Python-3.9.20.tgz**
**tar xzf Python-3.9.20.tgz**
**cd Python-3.9.20**
Now we specify the configuration for building and start the compilation
**sudo ./configure --prefix=/opt/python/3.9.20/ --enable-optimizations --with-lto --with-computed-gotos --with-system-ffi --enable-shared**
**sudo make -j "$(nproc)"**
**sudo ./python3.9 -m test -j "$(nproc)"**
**sudo make altinstall**
**sudo rm /tmp/Python-3.9.20.tgz**
Depending on our needs for using Python, you can add the following options to the ./configure command we used above. Now we will provide examples of what we can add:
**\--prefix=/path/to/directory** \- Specifies the installation directory.
**\--enable-optimizations** \- Enables optimization for Python.
**\--enable-ipv6** \- Enables support for IPv6 networks.
**\--with-lto** \- Enables Link-Time Optimization (LTO), which will improve performance but may increase compilation time.
To learn more about all options and configuration, you need to execute the command
**./configure --help**
Next, we can add additional tools for work
**sudo /opt/python/3.9.20/bin/python3.9 -m pip install --upgrade pip setuptools wheel**
**sudo ln -s /opt/python/3.9.20/bin/python3.9 /opt/python/3.9.20/bin/python3**
**sudo ln -s /opt/python/3.9.20/bin/python3.9 /opt/python/3.9.20/bin/python**
**sudo ln -s /opt/python/3.9.20/bin/pip3.9 /opt/python/3.9.20/bin/pip3**
**sudo ln -s /opt/python/3.9.20/bin/pip3.9 /opt/python/3.9.20/bin/pip**
**sudo ln -s /opt/python/3.9.20/bin/pydoc3.9 /opt/python/3.9.20/bin/pydoc**
**sudo ln -s /opt/python/3.9.20/bin/idle3.9 /opt/python/3.9.20/bin/idle**
**sudo ln -s /opt/python/3.9.20/bin/python3.9-config /opt/python/3.9.20/bin/python-config**
**After running this code, we will have a compilation that will take some time, and as a result, we should end up in the directory of our installed version**

Now an important step is to check the correctness of the Python installation. For our installed version **3.9.20** \- we check with the following command:
**python3.9 --version**

If everything works correctly, then you need to delete the source code files from which we performed the compilation, as they are no longer needed:
**rm -rf /tmp/Python-3.9.20 /tmp/Python-3.9.20.tar.gz**
There are cases when compilation ends with errors. In this case, you need to reinstall, but this time without optimization. Before that, you need to clean up the temporary files that were created during our previous compilation:
**sudo make clean; ./configure; sudo make -j «$(nproc)»; sudo make install**
## **Installing Python via pyenv**
If the above methods do not suit us, we recommend trying pyenv, which is extremely convenient if you need to work on multiple projects that require different versions of the interpreter. This version manager allows you to easily switch between versions and isolate project dependencies.
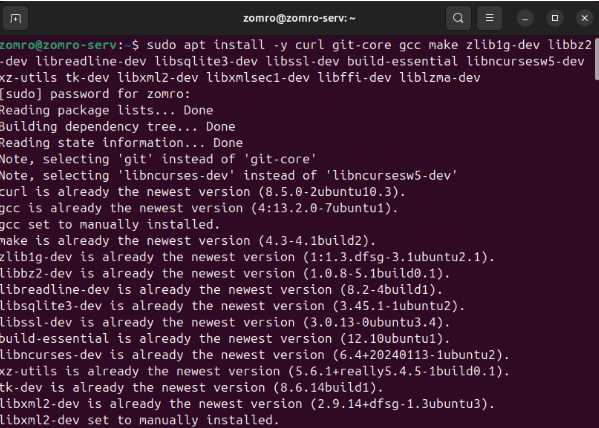
Before installing pyenv, you need to install the dependencies required for compiling Python; the commands for their installation are already known from this article above, but you will also need to add the git package since we will download pyenv from the git repository
**_Debian / Ubuntu_**
**sudo apt install -y curl git-core gcc make zlib1g-dev libbz2-dev libreadline-dev libsqlite3-dev libssl-dev build-essential libncursesw5-dev xz-utils tk-dev libxml2-dev libxmlsec1-dev libffi-dev liblzma-dev**
**_RHEL (Fedora / Almalinux / RockyOS / CentOS)_**
**sudo yum -y install epel-release**
**sudo yum -y groupinstall «Development Tools»**
**sudo yum -y install git curl gcc make zlib-devel bzip2 bzip2-devel readline-devel sqlite sqlite-devel openssl-devel xz xz-devel libffi-devel tk-devel**
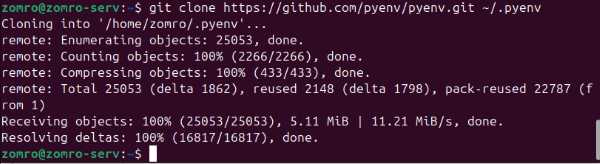
Next, we download the latest branch of the pyenv source code from the repository on Github and install it in the path ~/.pyenv :
**git clone https://github.com/pyenv/pyenv.git ~/.pyenv**
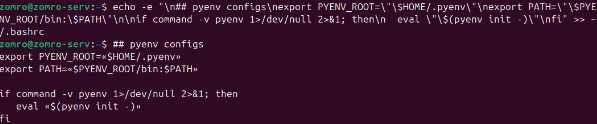
Now you need to set the PYENV_ROOT environment variable to point to the path where you installed pyenv and export it. Then add $PYENV_ROOT/bin to PATH to run the pyenv command-line utility like any other system command.
You also need to enable shims and autocompletion by adding pyenv init to the command line to be able to switch between Python versions "on the fly". You can add all configurations with the following command:
**echo -e "\n## pyenv configs\nexport PYENV_ROOT=\"\$HOME/.pyenv\"\nexport PATH=\"\$PYENV_ROOT/bin:\$PATH\"\n\nif command -v pyenv 1 >/dev/null 2>&1; then\n eval \"\$(pyenv init -)\"\nfi" >> ~/.bashrc**
**## pyenv configs**
**export PYENV_ROOT=«$HOME/.pyenv»**
**export PATH=«$PYENV_ROOT/bin:$PATH»**
**if command -v pyenv 1 >/dev/null 2>&1; then**
**eval «$(pyenv init -)»**
**fi**
After this, you need to apply the changes:
**source ~/.bashrc**
Now at the bash shell level of the user from which the installation was performed, you have the ability to use, install, and change Python versions.
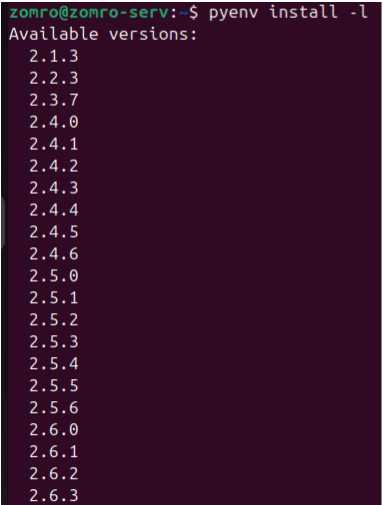
At this stage, you can proceed directly to installing the version of Python you need. You can check the list of available versions for installation by executing the following command:
**pyenv install -l**
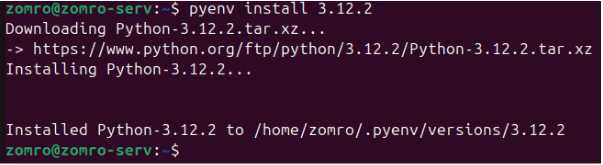
You can install Python versions as follows:
**pyenv install 3.12.2**
### **Then we check which versions are already installed:**
**pyenv versions**

Now we have the ability to install Python versions for each project separately. To do this, you need to navigate to the directory of our project:
**cd /path/to/project/**
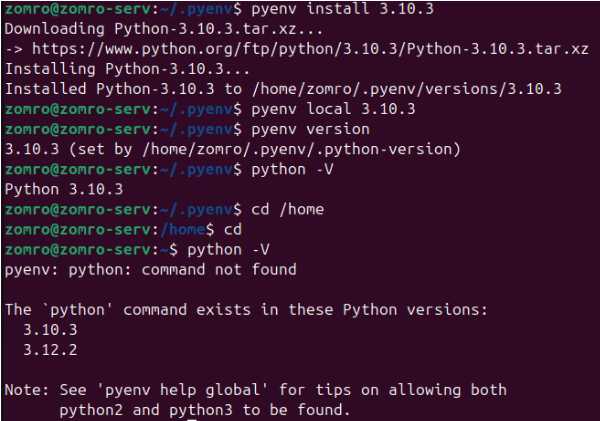
Now at the command shell level, you need to set the Python version that we previously installed using the command**pyenv install :**
**pyenv local 3.10.3**
Now you need to check, while in the directory, whether the version for our project was installed correctly or not, using the commands **pyenv version** or **python -V**.
**Conclusion**
We have considered 3 different ways to install Python versions on Linux. The most convenient method is installation via the system package manager, as the installation takes 2-3 commands, however, when various applications with different versions may be hosted on the server - it is better to choose installation via Pyenv. This method is also recommended by the Python community, as any version can be installed with a single command and immediately start using it.
At Zomro, you can choose a [server](https://zomro.com/dedicated) for any needs and any applications.
Similar articles:
[API - Operation Delete](https://zomro.com/blog/articles/467-api-operation-delete) [DDOS Attacks and How to Protect Your Site Against One](https://zomro.com/blog/articles/172-ddos-ataki-i-kak-zaschitit-svoj-sajt-ot-nih) [The 6 Different Types of Websites](https://zomro.com/blog/articles/186-6-razlichnyh-tipov-veb-sajtov) [Guide to Managing the cPanel Control Panel on VPS](https://zomro.com/blog/articles/539-guide-to-managing-the-cpanel-control-panel-on-vps) [Installing Python on Linux. Several ways](https://zomro.com/blog/articles/507-installing-python-on-linux-several-ways)
[ Premium Cloud VPS from €7.95/mon ](/vps)